
FAQ - Advanced Bathroom Queries
What to Do With Oil After Deep Frying
Fed up with the sense that our hard-earned cash is just going to waste each time we deep fry? Worry no more, as we have some fantastic suggestions for how to use oil post-frying.
From storing it for future use to making homemade soap, seasoning cast iron, and even using it to condition wooden cutting boards, we’ve got all the tips and tricks you need to make the most of every drop.
So let’s dive in and master the art of oil reuse!
Key Takeaways
- Recycling and repurposing used oil reduces reliance on fossil fuels and contributes to the production of renewable and environmentally-friendly fuel.
- Donating used oil to local farms for animal feed reduces waste, supports sustainable farming practices, and provides a valuable source of nutrition for animals.
- Recycling used oil prevents improper disposal and environmental harm, reduces pollution and contamination of soil and water, conserves natural resources, decreases energy consumption, and lowers greenhouse gas emissions.
- Utilizing used cooking oil to condition wooden cutting boards protects against drying and cracking, acts as a natural barrier against moisture and bacteria, maintains the board’s integrity and durability, and adds a subtle shine to the wood.
Store It for Future Use
We store the used oil from deep frying for future use. This is because used oil can still be valuable in other applications.
One way to repurpose it’s by storing it for biodiesel production. Biodiesel is a renewable and environmentally-friendly fuel that can be made from used cooking oil. By storing our used oil, we can contribute to the production of biodiesel and reduce our reliance on fossil fuels.

Another option is to use the used oil as a fire starter. Its high flammability makes it a convenient and efficient way to start fires, whether it’s for grilling, camping, or even in emergency situations.
Make Homemade Soap
One common way to repurpose used oil after deep frying is by making homemade soap. This is a great way to reduce waste and create a useful product at the same time. By combining the used oil with lye and other ingredients, you can create a natural and environmentally-friendly soap that can be used for personal hygiene or cleaning purposes.
Here is a simple recipe to make homemade soap using used oil:
| Ingredients | Instructions |
|---|---|
| Used oil | Collect the used oil and strain out any food particles. |
| Lye | Wear protective gloves and goggles. Slowly add lye to water, stirring constantly. Allow mixture to cool. |
| Other ingredients (optional) | You can add essential oils for fragrance or herbs for exfoliation. Mix them into the cooled lye-water mixture. |
| Mold | Pour the mixture into a mold and let it sit for several weeks to harden. |
In addition to making soap, used oil can also be used to make homemade candles or as a moisturizer for dry skin. These alternative uses allow you to maximize the benefits of your used oil and minimize its impact on the environment.
Now, let’s move on to the next section and explore another way to repurpose used oil: using it for seasoning cast iron.
Use It for Seasoning Cast Iron
So, how can we put that used oil to good use and season our cast iron cookware? Well, it turns out that the oil from deep frying can be a fantastic option for conditioning hair and preserving garden tools. Here are a couple of ways you can make the most out of your used oil:
- Conditioning Hair:
- Apply a small amount of the used oil to your hair, focusing on the ends.
- Leave it on for about 30 minutes before washing it out with shampoo. This will help moisturize and nourish your hair, leaving it soft and shiny.
- Preserving Garden Tools:
- Dip a cloth or sponge into the used oil and apply a thin layer to your garden tools.
- This will help prevent rust and keep your tools in good condition for longer periods of time.
By using your used oil for these purposes, you’ll be able to extend its usefulness and minimize waste.

Now, let’s move on to another creative way to repurpose your oil: mixing it with birdseed to create a homemade bird feeder.
Mix It With Birdseed for a Homemade Bird Feeder
To create a homemade bird feeder, mix the used oil from deep frying with birdseed. This sustainable gardening method not only helps to reduce waste but also provides a valuable food source for birds, enhancing your bird watching experience.
By mixing the oil with birdseed, you create a sticky and nutritious mixture that can be easily molded into shapes or spread onto surfaces. Birds will be attracted to this birdseed blend, and you can hang it in your garden or near a window to enjoy the sight of different bird species visiting your feeder.
Not only will you be helping the birds, but you’ll also be contributing to a healthier ecosystem by encouraging biodiversity in your backyard.

Now, let’s explore another practical use for your used oil – using it as a lubricant for squeaky hinges.
Use It as a Lubricant for Squeaky Hinges
After mixing the used oil with birdseed to create a homemade bird feeder, we can now explore another practical use for the oil – using it as a lubricant for squeaky hinges. When it comes to lubricating tools and preventing rust, using oil on squeaky hinges is a simple and effective solution.
Here are a few reasons why using oil as a lubricant for squeaky hinges is a smart choice:
- It reduces friction: Oil is a great lubricant because it helps reduce friction between moving parts. When applied to squeaky hinges, it allows them to move smoothly and silently.
- It prevents rust: Oil creates a protective barrier that helps prevent rust from forming on metal hinges. By regularly applying oil to your hinges, you can keep them in good condition and extend their lifespan.
Donate It to a Local Farm for Animal Feed
Donating used cooking oil to a local farm for animal feed has several environmental benefits. By recycling the oil, we can prevent it from being improperly disposed of and causing harm to the environment.

Additionally, donating the oil to a farm supports local agriculture and helps farmers provide a nutritious and sustainable feed source for their animals.
Lastly, this alternative use for oil ensures that it’s put to good use instead of being wasted or ending up in landfills.
Environmental Benefits of Recycling
At a local farm, we can donate the used oil from deep frying for animal feed, providing environmental benefits through recycling. Recycling used oil has numerous benefits and helps mitigate the negative impact of oil disposal on the environment.
Here are some key advantages of oil recycling:
- Reduces pollution: Instead of being disposed of improperly, which can lead to soil and water contamination, recycling used oil ensures it’s repurposed for a useful cause.
- Conservation of resources: By recycling oil, we reduce the need for new oil extraction, preserving natural resources like petroleum.
- Decreases energy consumption: The recycling process requires less energy compared to refining new oil.
- Minimizes greenhouse gas emissions: Recycling oil results in lower carbon emissions compared to producing new oil.
Supporting Local Agriculture
Regularly, we donate the used oil from deep frying to a local farm for animal feed, supporting local agriculture and promoting sustainability. By doing so, we not only reduce waste but also contribute to the well-being of our local farmers and the environment. Supporting local farmers is essential for sustainable agriculture, as it helps to maintain the economic viability of small-scale farms and preserves the diversity of our local food systems. Through our donations, we provide a valuable source of nutrients for animals, reducing the need for conventional feed alternatives that may have a larger environmental impact. This practice aligns with our commitment to promoting responsible and ethical food production, while also fostering a stronger sense of community and connection to the land.
| Benefits of Donating Used Oil to Local Farms |
|---|
| Supports local farmers |
| Promotes sustainable agriculture |
| Reduces waste |
| Contributes to a stronger community |
Alternative Uses for Oil
We continue to support local agriculture by finding alternative uses for our oil after deep frying, such as donating it to a local farm for animal feed. This practice not only reduces the environmental impact of disposing oil improperly but also provides health benefits to the animals consuming it.
Donating used oil to local farms for animal feed offers an environmentally friendly solution, as it prevents the oil from being dumped into the sewage system or ending up in landfills, where it can contaminate water sources and harm wildlife.
By repurposing the oil as animal feed, we help reduce the demand for other feed ingredients, such as soybeans, which may have a larger environmental footprint due to their production and transportation.
Additionally, feeding animals with oil-rich feed can improve their health and well-being, as certain fats are essential for proper growth, energy, and nutrient absorption.
By donating our used oil to local farms, we not only support sustainable agriculture but also contribute to the overall health and vitality of the animals.
Now, let’s explore another alternative use for oil: using it as a moisturizer for dry skin.
Use It as a Moisturizer for Dry Skin
After deep frying, one option for repurposing the oil is to use it as a moisturizer for dry skin. This DIY skincare hack can provide moisturizing benefits and help restore hydration to your skin. Oil acts as a natural emollient, creating a protective barrier on the skin’s surface. It helps to lock in moisture and prevent water loss, leaving your skin feeling soft and supple.
To use oil as a moisturizer, simply apply a small amount to your skin and gently massage it in. Focus on dry areas such as elbows, knees, and heels. However, keep in mind that not all oils are suitable for all skin types. It’s important to choose oils that are non-comedogenic and won’t clog your pores.
Now, let’s move on to the next topic: creating homemade candles.
Create Homemade Candles
Continuing with our exploration of repurposing oil after deep frying, let’s now delve into the creative process of making homemade candles.
Crafting homemade candles not only allows you to express your creativity but also provides a sustainable way to recycle used oil. Here are two reasons why making homemade candles is beneficial for both you and the environment:
- Recycling benefits:
- By reusing oil that would otherwise be wasted, you contribute to reducing environmental impact.
- Homemade candles help minimize waste and promote sustainability by repurposing materials that might’ve otherwise been discarded.
- Cost-effective solution:
- Making your own candles is an affordable alternative to buying expensive store-bought ones.
- You can create unique scents and designs tailored to your preferences, all while saving money.
With these recycling benefits and cost-effective advantages, making homemade candles is a rewarding and eco-friendly activity that adds a touch of warmth and ambiance to any space.
Use It to Condition Wooden Cutting Boards
When it comes to maintaining wooden cutting boards, using oil to condition them is a smart choice. By regularly applying a thin layer of oil, you can revitalize the board, preventing it from becoming dry and cracked.
This simple step not only extends the lifespan of your cutting board but also provides an eco-friendly solution for disposing of used cooking oil.
Revitalize Cutting Board
We use the oil from deep frying to revitalize and condition our wooden cutting boards. Not only does this help extend the life of our cutting boards, but it also keeps them looking beautiful and well-maintained. Here’s how we do it:
- Apply a thin layer of the used oil on the surface of the cutting board.
- Let the oil sit on the board for about 10-15 minutes to allow it to penetrate the wood. This process helps to revitalize the wood, restoring its natural moisture and preventing it from drying out and cracking.
- The oil also acts as a protective barrier, preventing bacteria from seeping into the wood.
- After the oil has had time to soak in, wipe off any excess oil with a clean cloth. This step ensures that the cutting board isn’t overly greasy and ready for use.
- Repeat this process every few months or as needed to maintain the condition of your wooden cutting board.
Extend Board’s Lifespan
To extend the lifespan of our wooden cutting boards, we regularly condition them using the oil from deep frying. This simple and eco-friendly disposal method not only helps to keep our boards in good condition but also reduces waste.
Conditioning the cutting boards with oil helps to prevent the wood from drying out and cracking, as well as protects them from absorbing moisture and odors from food. The oil acts as a natural sealant, creating a barrier that helps to maintain the board’s integrity and durability.
Additionally, the oil adds a subtle shine to the wood, giving it a refreshed and polished appearance.
Eco-Friendly Oil Disposal
One effective method of eco-friendly oil disposal is utilizing it to condition wooden cutting boards. Instead of throwing away used cooking oil, you can repurpose it to nourish and protect your wooden cutting boards. This not only helps reduce the environmental impact of oil disposal but also extends the lifespan of your cutting boards, making it a sustainable disposal option.
By applying a thin layer of oil to the surface of the cutting board and allowing it to soak in, you can prevent the wood from drying out and cracking. Additionally, the oil acts as a natural barrier, helping to repel moisture and bacteria.
This simple practice not only keeps your cutting boards in top condition but also contributes to a more sustainable kitchen.
- Benefits of using oil to condition wooden cutting boards:
- Protects against drying and cracking
- Acts as a natural barrier against moisture and bacteria.
Make Homemade Dog Treats
Let’s repurpose the leftover oil from deep frying by making homemade dog treats. Not only is it an eco-friendly way to dispose of the oil, but it also allows us to provide our furry friends with delicious and healthy treats. By using dog-friendly recipes, we can ensure that the treats are safe and beneficial for our dogs. Homemade dog treats have several health benefits, including better digestion, improved dental health, and a boost to their immune system. To give you some inspiration, here are a few simple and nutritious recipes you can try:
| Recipe | Ingredients |
|---|---|
| Peanut Butter Biscuits | 1 cup whole wheat flour, 1/4 cup peanut butter, 1/4 cup water |
| Pumpkin Dog Bites | 1 cup canned pumpkin, 1/2 cup oats, 1/4 cup peanut butter |
| Apple Carrot Treats | 1 cup grated apple, 1/2 cup grated carrot, 1 cup oats |
These homemade dog treats are not only a great way to use up leftover oil, but they also provide a healthy and tasty snack for our furry friends.
Use It to Remove Sticky Residue
When it comes to removing sticky residue, don’t overlook the power of used cooking oil. Grease can be an effective cleaning agent, especially for stubborn grime that won’t budge with regular cleaners.
Simply apply a small amount of oil to the sticky residue, let it sit for a few minutes, and then wipe it away with a cloth or sponge.
It’s a simple and eco-friendly solution that can make cleaning up sticky messes a breeze.
Grease as Cleaning Agent
We can effectively use a small amount of leftover grease as a cleaning agent to remove sticky residue. Not only can it be a sustainable way to repurpose grease, but it can also save us money on store-bought cleaners.
Here are two ways we can use grease as a cleaning agent:
- Grease as Fuel
- Use grease in oil lamps or lanterns to provide light during power outages.
- Convert grease into biodiesel to fuel vehicles or machinery.
- Grease as Fertilizer
- Mix small amounts of grease with compost to provide nutrients for plants.
- Apply grease directly to the soil to increase its fertility.
Oil for Stubborn Grime
To tackle stubborn grime and remove sticky residue, we can harness the power of oil left over from deep frying. Grease for cleaning purposes is a highly effective and natural solution. When confronted with stubborn grime, such as adhesive residue or sticky substances, applying a small amount of oil can work wonders.
The oil helps to loosen the grime, making it easier to wipe away. To use the oil, simply apply it to the affected area, let it sit for a few minutes, and then gently scrub with a cloth or sponge. The greasy residue will dissolve, leaving behind a clean surface.
Recycle It at a Local Recycling Center
One option for disposing of used cooking oil after deep frying is to recycle it at a local recycling center.

Recycling used cooking oil has significant environmental impact and economic benefits. Here are two reasons why recycling used cooking oil is a great option:
- Environmental Impact:
- Recycling used cooking oil reduces the amount of waste that ends up in landfills, preventing potential pollution of soil and groundwater.
- It also helps to prevent clogs and blockages in the sewage system, reducing the risk of sewage backups and overflows.
- Economic Benefits:
- Recycled cooking oil can be converted into biofuel, which can be used as an alternative to fossil fuels, reducing our dependence on non-renewable resources.
- Some recycling centers may even offer incentives or compensation for dropping off used cooking oil, providing an additional economic benefit.
Conclusion
In conclusion, there are many ways to repurpose used oil after deep frying.
Not only can it be stored for future use or recycled at a local recycling center, but it can also be used for seasoning cast iron, making homemade soap, and even as a lubricant for squeaky hinges.
Here’s an interesting statistic: Did you know that recycling just one gallon of used oil can generate enough electricity to power an average household for 24 hours?

So let’s do our part and find creative ways to reuse and recycle our cooking oil.

With an impeccable eye for detail and a passion for bathroom-related, Ava leads our editorial team gracefully and precisely.
Under her guidance, Best Modern Toilet has flourished as the go-to resource for modern bathroom enthusiasts. In her free time, you might find Ava exploring antique shops and looking for vintage bathroom fixtures to add to her collection.


We’ve all experienced it – facing a toilet, pondering whether we should flush that bundle of toilet paper or not.
Well, here’s a surprising fact: in some places, you can’t flush it at all! From public restrooms to older plumbing systems, there are several situations where tossing that tissue down the drain is a big no-no.
In this article, we’ll explore where you can and can’t flush toilet paper, so you never find yourself in a messy situation again.
Key Takeaways
- Flushing toilet paper in public restrooms can have severe environmental impacts, clog pipes, and strain wastewater treatment facilities.
- Older plumbing systems may not be able to handle flushing toilet paper, leading to clogging and backups in the pipes.
- Many countries with inadequate sewage infrastructure cannot handle flushing toilet paper, leading to clogged pipes, sewage backups, and contaminated water sources.
- Flushing non-biodegradable items can cause blockages in septic systems and disrupt the natural balance of the tank, so it is important to use waste bins and properly dispose of hazardous materials.
Public Restrooms
In public restrooms, it’s important to remember that toilet paper shouldn’t be flushed in certain situations. Proper hygiene practices in public restrooms require us to dispose of toilet paper appropriately. Flushing toilet paper may seem convenient, but it can have severe environmental impacts.

When flushed, toilet paper can clog pipes and sewage systems, causing costly repairs and potential health hazards. Additionally, flushing toilet paper contributes to water pollution and strain on wastewater treatment facilities. By not flushing toilet paper in public restrooms, we can help conserve water, reduce maintenance costs, and protect the environment.
Instead, it’s recommended to use the provided waste bins for proper disposal. Let’s all be mindful of our actions and practice responsible hygiene practices in public restrooms for the benefit of ourselves and the environment.
Older Plumbing Systems
Our older plumbing systems may not be able to handle the flushing of toilet paper. This is due to their historical significance and the environmental impact it can have.
Many older buildings still have outdated plumbing systems that weren’t designed to handle the modern use of toilet paper. These systems were built at a time when people used alternative methods such as bidets or reusable cloths.

Flushing toilet paper in these older systems can lead to clogging and backups in the pipes, causing costly repairs and potential damage to the environment. It’s important to be aware of the limitations of these older plumbing systems and to dispose of toilet paper in the appropriate waste receptacles to prevent any issues.
Countries With Inadequate Sewage Infrastructure
Many countries around the world have inadequate sewage infrastructure that cannot handle the flushing of toilet paper. This poses significant challenges for hygiene practices and has a severe environmental impact. In countries where the sewage infrastructure is inadequate, flushing toilet paper can lead to clogged pipes, sewage backups, and contaminated water sources.
To illustrate the severity of the issue, let’s take a look at the table below, which highlights a few countries facing this problem:
| Country | Hygiene Practices Affected | Environmental Impact |
|---|---|---|
| Haiti | Limited access to clean water and sanitation facilities | Contamination of water sources and increased risk of diseases |
| India | Lack of proper sanitation facilities in rural areas | Pollution of rivers and groundwater |
| Cambodia | Insufficient sewage treatment plants | Water pollution and degradation of ecosystems |
It’s clear that the inadequate sewage infrastructure in these countries not only poses challenges to hygiene practices but also has a detrimental impact on the environment. Efforts should be made to improve and upgrade the sewage systems to ensure proper waste management and protect public health.
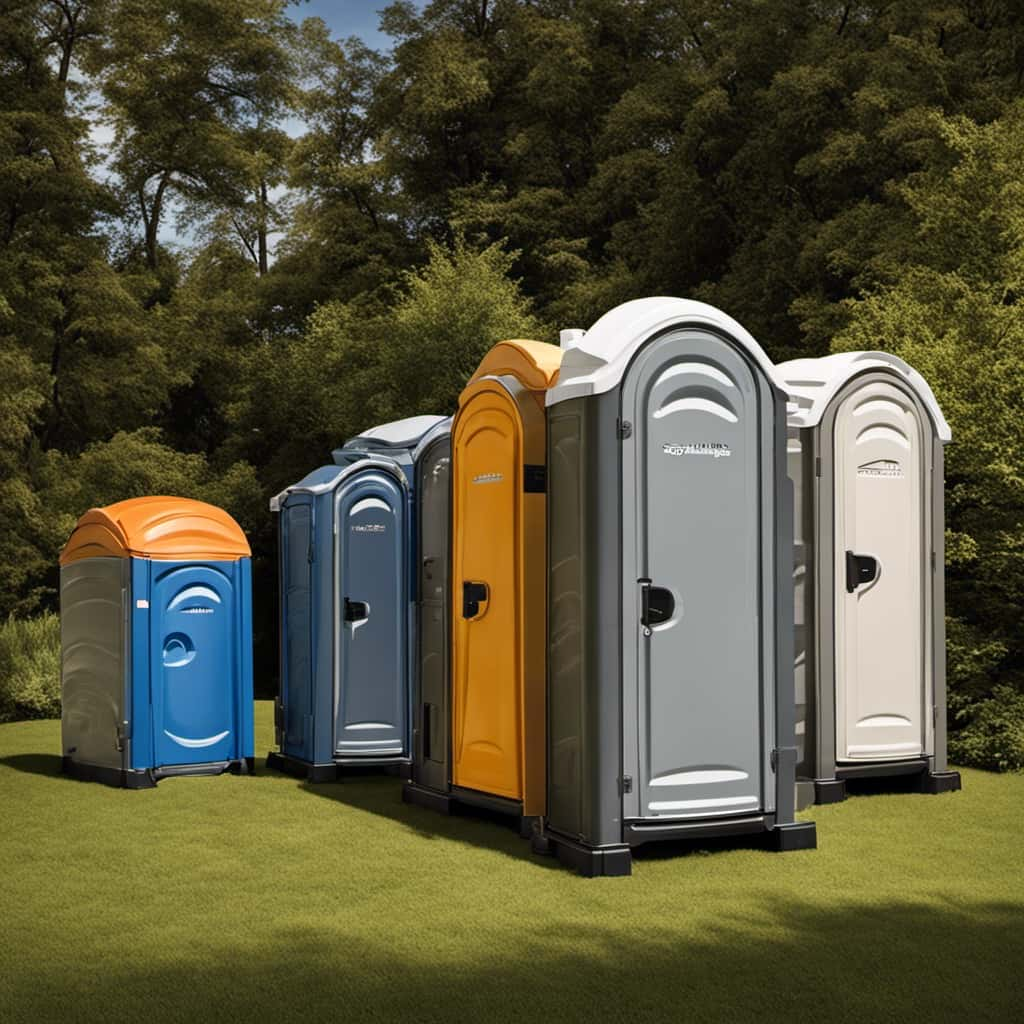
Portable Toilets
Moving forward from the discussion on countries with inadequate sewage infrastructure, let’s now explore the topic of portable toilets and their role in addressing the challenges related to proper waste management and hygiene practices.
Portable toilets play a crucial role in providing sanitation solutions in various situations. Here are four key points to consider:
- Temporary Events: Portable toilet rental is essential for outdoor events like concerts, festivals, and sports matches. They ensure that attendees have access to clean and convenient restroom facilities.
- Construction Sites: Portable toilets are commonly used on construction sites where permanent facilities are unavailable. They help maintain proper hygiene practices and ensure the well-being of workers.
- Disaster Relief: During natural disasters or emergencies, portable toilets are vital in providing immediate sanitation solutions in affected areas, preventing the spread of diseases.
- Outdoor Activities: Whether it’s camping, hiking, or boating, portable toilets are essential for maintaining cleanliness and hygiene in remote outdoor locations.
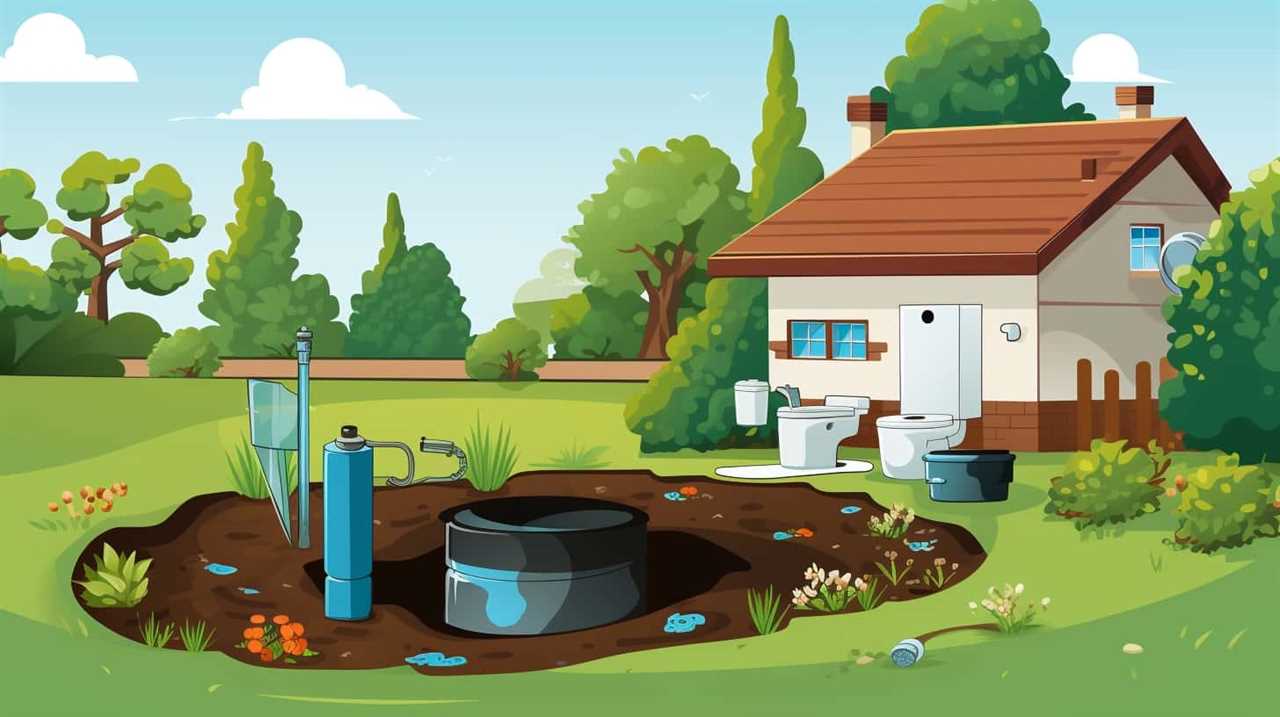
Septic Tanks
Let’s now delve into the topic of septic tanks and their role in addressing waste management and hygiene practices, particularly in relation to portable toilets.
Septic tanks play a crucial role in waste disposal and treatment, providing an efficient and eco-friendly solution for waste management. When it comes to portable toilets, septic tanks are often used to collect and store waste until it can be properly disposed of or treated.

One of the key considerations with septic tanks is their environmental impact. Properly maintained septic tanks can minimize the release of harmful substances into the environment, protecting both human health and ecosystems.
Maintenance requirements for septic tanks include regular pumping, inspection, and proper use of additives to promote the breakdown of organic waste. By adhering to these maintenance practices, septic tanks can effectively manage waste and maintain a healthy environment.
Frequently Asked Questions
How Often Should Public Restrooms Be Cleaned to Ensure Proper Hygiene and Prevent the Spread of Diseases?
We clean public restrooms frequently to maintain proper hygiene and prevent the spread of diseases. Our disease prevention measures include regular cleaning, disinfecting surfaces, and ensuring adequate supply of soap and hand sanitizers.
What Are Some Alternative Options for Disposing of Toilet Paper in Areas With Older Plumbing Systems?
In areas with older plumbing systems, waste disposal can be a challenge. However, there are environmentally friendly alternatives to flushing toilet paper. Let’s explore some options for proper disposal that won’t harm the plumbing.
Can You Provide a List of Countries With the Most Advanced Sewage Infrastructure?
A list of countries with the most advanced sewage infrastructure includes Japan, Germany, and Singapore. These countries have invested in modern technology to efficiently manage wastewater. Bidets are another alternative to toilet paper, with benefits like improved hygiene and reduced environmental waste.
How Are Portable Toilets Emptied and Maintained to Ensure Proper Sanitation?
When it comes to portable toilet maintenance, ensuring proper disposal of waste is crucial. We take the responsibility seriously, employing strict protocols to empty and maintain portable toilets, guaranteeing optimal sanitation for everyone.
What Are the Common Problems That Can Occur With Septic Tanks and How Can They Be Prevented or Resolved?
Common septic tank problems include blockages, leaks, and overflows. Regular septic tank maintenance, such as pumping and inspecting, can help prevent these issues. It’s important to follow proper waste disposal guidelines to avoid further complications.
Conclusion
In conclusion, while it may seem strange to some, there are various places where flushing toilet paper isn’t advisable. Public restrooms, older plumbing systems, countries with inadequate sewage infrastructure, portable toilets, and septic tanks all fall into this category.
It’s crucial to be mindful of these restrictions to prevent clogging and damage to the plumbing systems. So next time you find yourself in one of these situations, remember to dispose of your toilet paper properly and help keep the pipes flowing smoothly.
With an impeccable eye for detail and a passion for bathroom-related, Ava leads our editorial team gracefully and precisely.
Under her guidance, Best Modern Toilet has flourished as the go-to resource for modern bathroom enthusiasts. In her free time, you might find Ava exploring antique shops and looking for vintage bathroom fixtures to add to her collection.
If you have ever been in Italy and faced with a confusing toilet, not sure how to flush it, do not worry! We are here to help you navigate the complexities of Italian toilet flushing systems.
In this article, we will provide a step-by-step guide on how to properly flush a toilet in Italy, highlighting common mistakes to avoid and offering tips for using public restrooms.
Prepare to master the art of toilet flushing in Italy with our informative and precise instructions.
Key Takeaways
- In Italy, there are different types of toilets, including traditional flush toilets, dual-flush toilets for water conservation, bidets, squat toilets in public restrooms, and high-tech toilets with advanced features.
- The flushing mechanisms vary, with traditional flush toilets having a handle or button, dual-flush toilets having separate buttons for full and half flush, bidets having a separate faucet or lever for water control, squat toilets being flushed manually by pouring water, and high-tech toilets having electronic buttons or sensors.
- Water conservation is a priority, with dual-flush toilets offering different flushing options, some toilets having water-saving modes for liquid waste, bidets using less water compared to toilet paper, squat toilets requiring less water for flushing, and high-tech toilets having water-saving features like low-flow flushes.
- Toilet etiquette in Italy includes throwing toilet paper in the bin, using bidets for personal hygiene, maintaining proper squatting posture for effective use of squat toilets, high-tech toilets having additional features like heated seats or air dryers, and leaving the toilet clean and tidy being considered polite.
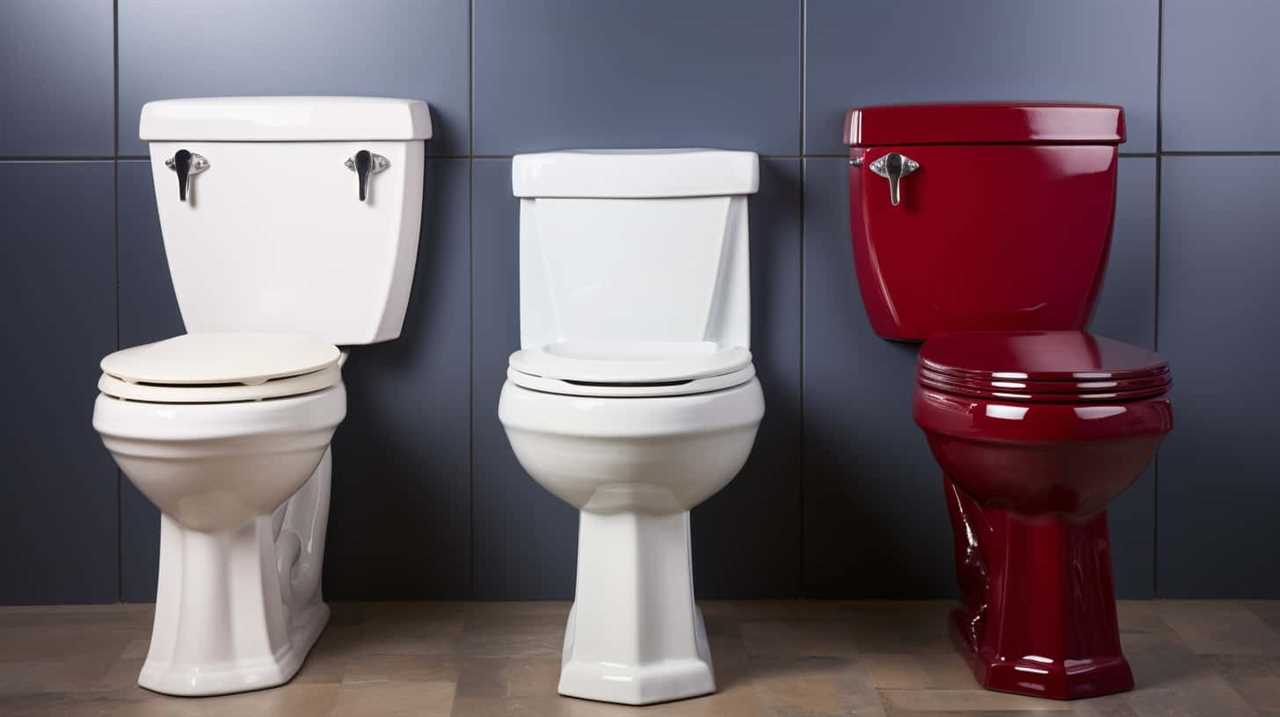
Types of Toilets in Italy
In Italy, we commonly encounter both manual and automatic toilets, with manual flushes being more prevalent. Historical toilets in Italy have played a significant role in shaping the country’s bathroom culture.

One unique feature found in many Italian bathrooms is the bidet, which is often located next to the toilet. The bidet is used for personal hygiene purposes and is a traditional fixture in Italian households. It provides a convenient way to clean oneself after using the toilet. The bidet’s popularity in Italy can be traced back to its introduction in the 18th century and its association with hygiene and cleanliness.
Today, bidet use is still common in Italy, although modern toilets with bidet functions integrated into the seat are becoming increasingly popular.
Understanding the Flushing Mechanisms
To understand the flushing mechanisms in Italian toilets, let’s explore the different types of flushes commonly found:
- Dual Flush: Many modern Italian toilets are equipped with a dual flush system, allowing users to choose between a partial flush for liquid waste and a full flush for solid waste. This not only promotes water conservation but also helps prevent toilet clogging.
- Push Button: Another common flushing mechanism in Italian toilets is the push button. This type of flush is often found in public restrooms and offers different buttons for different water volumes, ensuring efficient flushing.
- Lever Flush: Traditional Italian toilets may still use the lever flush mechanism, where a lever on the side of the toilet tank is pressed to initiate the flush. This mechanism is straightforward and reliable, but it’s important to be mindful of the amount of force applied to avoid excessive water consumption.
Understanding the different flushing mechanisms in Italian toilets can help prevent toilet flushing problems and promote proper toilet flushing etiquette.
Step-By-Step Guide to Flushing a Toilet
We start by pressing the appropriate button or lever to initiate the flushing process in an Italian toilet. The location of the flush button or lever may vary depending on the design of the toilet. Once pressed, the flushing mechanism activates, releasing a powerful stream of water into the bowl. This water flow helps to remove waste and cleanse the toilet bowl. To ensure effective toilet cleaning and water conservation, it is important to use the appropriate amount of water for each flush. Some toilets may have dual-flush systems, offering a choice between a partial flush for liquid waste and a full flush for solid waste. This option allows for greater water conservation by using less water for liquid waste disposal. Here is a step-by-step guide to flushing a toilet in Italy:
| Step | Action |
|---|---|
| 1 | Locate the flush button or lever |
| 2 | Press the button or push the lever |
| 3 | Allow the flushing mechanism to activate |
| 4 | Ensure effective toilet cleaning and water conservation by using the appropriate amount of water for each flush |
| 5 | Consider using the dual-flush option, if available, for greater water conservation |
Common Mistakes to Avoid When Flushing
One mistake to avoid when flushing a toilet in Italy is failing to ensure proper water conservation by using excessive amounts of water. It’s important to follow toilet flushing etiquette to prevent unnecessary wastage.
Here are three common flushing mistakes to avoid:
- Flushing unnecessary items: Don’t flush items such as sanitary napkins, wipes, or cigarette butts, as they can clog the toilet and cause plumbing issues.
- Overloading the toilet: Avoid flushing large amounts of toilet paper or excessive waste at once, as it may lead to clogging and require professional assistance to fix.
- Ignoring flushing problems: If you notice a weak flush, slow drainage, or frequent clogs, don’t ignore these signs. Troubleshoot common flushing problems promptly to prevent further issues and costly repairs.
Tips for Using Public Restrooms in Italy
When using public restrooms in Italy, it’s important to consider the cleanliness and availability of necessary amenities. Italy has its own cultural differences in bathroom etiquette that visitors should be aware of.
To ensure a pleasant and hygienic experience, here are some tips for finding clean public restrooms in Italy:
- Look for establishments like cafes, restaurants, or hotels, as they usually have better-maintained facilities.
- Carry tissues or toilet paper with you, as some public restrooms may not provide them.
- Be prepared to pay a small fee to use certain public restrooms, especially in busy tourist areas.
- Avoid using public restrooms in train stations or other high-traffic areas, as they tend to be less clean.
Frequently Asked Questions
Are Bidets Commonly Found in Italian Toilets?
Bidets are commonly found in Italian households. They are used for personal hygiene after using the toilet. Bidet usage varies in different regions of Italy, but it is a common fixture in most homes.
What Do the Different Symbols on the Flushing Buttons or Levers Mean?
Different symbols on flushing buttons or levers in Italian toilets indicate various types of flushing mechanisms. Common misconceptions about these symbols can lead to confusion. It is important to understand their meanings for proper operation.
Is It Necessary to Hold Down the Flushing Mechanism for a Longer Time in Italy?
We found that in Italy, it is not necessary to hold down the flushing mechanism for a longer time. However, it’s important to note that certain toilets may have different flushing durations to conserve water.

Are There Any Specific Times When Flushing the Toilet Should Be Avoided in Italy?
There are specific times in Italy when flushing the toilet should be avoided to conserve water. It is important to be mindful of water usage and only flush when necessary, especially during periods of drought or water scarcity.
What Are Some Cultural Etiquettes to Keep in Mind When Using Public Restrooms in Italy?
What cultural etiquettes should we keep in mind when using public restrooms in Italy? In Italian culture, bathroom cleanliness is highly valued. It’s important to properly dispose of toilet paper in the designated bins provided.
Conclusion
In conclusion, mastering the art of flushing a toilet in Italy is like unlocking a hidden treasure. With various types of toilets and unique flushing mechanisms, it’s essential to understand the intricacies involved.
By following our step-by-step guide and avoiding common mistakes, you’ll navigate the waters smoothly. Whether you’re in a public restroom or your own private oasis, these tips will ensure a seamless experience.

Embrace the challenge and conquer the flushing game with finesse.
With an impeccable eye for detail and a passion for bathroom-related, Ava leads our editorial team gracefully and precisely.
Under her guidance, Best Modern Toilet has flourished as the go-to resource for modern bathroom enthusiasts. In her free time, you might find Ava exploring antique shops and looking for vintage bathroom fixtures to add to her collection.

We have thoroughly searched the market to discover the top toilet brands for you. Whether it’s American Standard, Kohler, Toto, Delta, or Gerber, we have all the insider details you require.
Picture this: a bathroom oasis, where every flush is powerful, every seat is comfortable, and every fixture is reliable. Our expertise and unbiased research have led us to these top contenders.
Get ready to elevate your bathroom experience with the best toilet brand on the market.
Key Takeaways
- American Standard offers a wide range of options for residential and commercial use, while Gerber offers a wide range of models to cater to different needs and preferences.
- Gerber toilets are known for their reliability and durability, with minimal maintenance and repairs needed, while American Standard focuses on advanced flushing technology for efficient water usage.
- Gerber toilets are praised for their water efficiency and are certified by WaterSense for their water-saving capabilities, while American Standard is known for its innovative technologies like EverClean and WaterSense certification.
- Gerber toilets are generally more affordable compared to American Standard, and customers have praised Gerber toilets for their excellent performance and value for money.
American Standard
In our opinion, American Standard is the top choice for a reliable and high-quality toilet brand. When comparing American Standard’s toilet models for residential and commercial use, it’s clear that they offer a wide range of options to suit different needs.

For residential use, American Standard provides toilets with advanced flushing technology that ensures efficient water usage without compromising on performance. These models also come in various designs and sizes to fit any bathroom aesthetic.
On the other hand, American Standard’s commercial toilet models are specifically engineered to withstand heavy usage and have features like powerful flushes and easy maintenance. This demonstrates the brand’s commitment to providing durable and efficient solutions for both residential and commercial settings.
With a history spanning over 140 years, American Standard has continuously innovated in the toilet industry. They’ve introduced groundbreaking technologies such as EverClean, a surface that inhibits the growth of bacteria, mold, and mildew. This not only ensures a cleaner and more hygienic toilet but also reduces the need for frequent cleaning.
American Standard has also been at the forefront of water conservation efforts by developing toilets with WaterSense certification, which means they meet strict efficiency standards. This dedication to sustainability and innovation has solidified American Standard’s position as a leader in the toilet industry.

Kohler
When it comes to a reliable and high-quality toilet brand, Kohler stands out with its impressive range of models for residential and commercial use. Kohler toilets are known for their innovative features and superior performance.
Here are some key features that make Kohler toilets a popular choice among consumers:
- Efficient flushing system: Kohler toilets are equipped with powerful flushing mechanisms that ensure effective waste removal, preventing clogs and reducing water usage.
- Comfort height: Many Kohler models feature a comfort height design, which offers a chair-like seating position for added comfort and ease of use.
- Dual-flush technology: Some Kohler toilets come with dual-flush options, allowing users to choose between a full flush for solid waste and a partial flush for liquid waste, resulting in water savings.
- Easy installation: Kohler toilets are designed for easy installation, with clear instructions and user-friendly features that simplify the process.
- Wide range of pricing options: Kohler offers a variety of toilet models at different price points, making it possible to find a suitable option for every budget.
Whether you’re looking for efficiency, comfort, or affordability, Kohler toilets have a model to meet your needs.
Toto
Let’s now shift our focus to Toto, another leading toilet brand that offers exceptional features and performance. When comparing Toto to American Standard, Toto often comes out on top in terms of innovative technology and water efficiency.
Toto toilets incorporate advanced flushing systems like the Tornado Flush, which uses centrifugal force to create a powerful and efficient flush. In terms of design, Toto offers a wide range of styles and finishes to suit any bathroom decor.
When comparing Toto to Kohler, both brands are known for their quality and reliability. However, Toto is often praised for its superior flushing performance and water-saving features. With Toto, you can expect a toilet that not only looks great but also delivers exceptional performance.
Now, let’s move on to the next section and discuss the brand Delta.
Delta
We’ve found three major factors that make Delta a top toilet brand.
- Delta toilets are known for their exceptional durability and reliability. The materials used in their construction are of high quality, ensuring a long-lasting product.
- Delta toilets offer innovative features that enhance the user experience. From efficient flushing systems to easy-to-clean designs, Delta toilets are designed with the user in mind.
- Delta toilets are backed by a strong warranty and excellent customer support. This ensures that any issues or concerns are addressed promptly and efficiently.
When comparing Delta to other brands, it’s clear that Delta stands out in terms of quality, innovation, and customer satisfaction. Their toilets consistently outperform competitors in terms of durability and functionality.
With its superior features and outstanding performance, Delta proves to be a top choice for those seeking a reliable and high-quality toilet.
Now, let’s move on to discuss another top toilet brand: Gerber.
Gerber
Moving on to Gerber, another top toilet brand, we find that they offer their own unique set of features and qualities. Gerber toilets are known for their reliability, durability, and water efficiency. They have a wide range of models that cater to different needs and preferences. To provide a comprehensive understanding of Gerber toilets, let’s compare them to American Standard, one of their main competitors.

Below is a table that highlights the key differences between Gerber and American Standard toilets:
| Gerber | American Standard |
|---|---|
| Strong flush power | Powerful flush system |
| Water-saving technology | Efficient water usage |
| Affordable pricing | Higher price range |
Based on gerber toilet reviews, customers have praised Gerber toilets for their excellent performance and value for money. However, when comparing Gerber vs American Standard, it ultimately comes down to personal preference and specific requirements. Both brands have their own strengths and can be trusted for their quality craftsmanship.
Frequently Asked Questions
What Is the Average Lifespan of a Toilet Manufactured by American Standard?
On average, the lifespan of an American Standard toilet is around 15 to 20 years. To maximize its longevity, regular maintenance is crucial. Here are some tips: keep it clean, avoid using harsh chemicals, and promptly fix any leaks.
Does Kohler Offer Any Eco-Friendly or Water-Saving Toilet Models?
Yes, Kohler offers a range of eco-friendly and water-saving toilet models. They have innovative options that help conserve water while still providing efficient flushing capabilities. These toilets are a great choice for those looking to reduce their environmental impact.
Are Toto Toilets Suitable for Small Bathrooms With Limited Space?
Toto toilets are suitable for small bathrooms with limited space due to their compact dimensions and space-saving options. They offer a range of toilet models designed specifically for maximizing space while maintaining functionality and comfort.
Can Delta Toilets Be Easily Installed by Homeowners Without Professional Assistance?
Delta toilets can be easily installed by homeowners without professional assistance. However, it is important to follow the Delta toilet installation guide and consider the pros and cons of DIY toilet installation.
What Is the Warranty Period Offered by Gerber for Their Toilet Products?
The warranty period offered by Gerber for their toilet products and customer reviews are important factors to consider when determining the quality and reliability of their toilets.
Conclusion
In conclusion, when it comes to choosing the best toilet brand, American Standard, Kohler, Toto, Delta, and Gerber stand out as top contenders.

Like a symphony of efficiency, these brands harmonize quality, durability, and innovation, ensuring a seamless bathroom experience.
Whether you seek sleek aesthetics, water-saving features, or reliable flushing power, these brands have got you covered.
So, go ahead, take the plunge and elevate your bathroom to new heights with a toilet from one of these trusted manufacturers.
With an impeccable eye for detail and a passion for bathroom-related, Ava leads our editorial team gracefully and precisely.
Under her guidance, Best Modern Toilet has flourished as the go-to resource for modern bathroom enthusiasts. In her free time, you might find Ava exploring antique shops and looking for vintage bathroom fixtures to add to her collection.


Which Is More Hygienic Toilet Paper or Water

Where Can You Not Flush Toilet Paper
How Do You Flush the Toilet in Italy

Best Toilet Brand

Flush Toilet Price

Loupusuo Luxury Smart Toilet Review [2024]

Simple Project Modern Smart Toilet Review [2024]

LDian Smart Toilet Review: Luxury and Hygiene Combined [2024]

American Standard Town Square S Toilet Review [2024]

American Standard Studio S Toilet Review [2024]


-

 Bathroom Enhancements2 months ago
Will Hot Bath Lower Blood Pressure
-

 FAQ - Advanced Bathroom Queries3 months ago
Which Countries Use Bidets the Most
-
 Reviews1 month ago
LDian Smart Toilet Review [2024]
-
 Reviews2 months ago
Kohler Innate Smart Toilet Review [2024]
-
 Reviews2 months ago
Kohler NUMI 2.0 Smart Toilet Review [2024]
-
 Reviews2 months ago
CANEST Smart Toilet Review: The Ultimate Bathroom Upgrade [2024]
-

 Toilet Types3 months ago
Are Bleach Tablets Bad for Your Toilet
-
 Reviews2 months ago
Woodbridge B0970S Smart Bidet Toilet Review [2024]