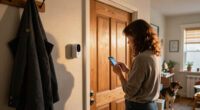
Set up a smart home security system by choosing compatible devices, installing them in useful locations, and testing alerts and coverage. This guide is for homeowners and renters who can use a smartphone and follow basic installation instructions. Allow 1–3 hours, depending on the number of devices and whether you need to mount cameras or sensors.

Get home appliances delivered free with Prime
- Fast, free delivery on millions of items
- Prime Video, Amazon Music and more included
- Member-only deals all year

Ring Alarm 14-Piece Home Security Kit
- ✔ Included components: Base station, 2 keypads, 8 contact sensors, 2 motion detectors, range extender
- ✔ Recommended home size: 2–4 bedrooms
- ✔ Connectivity: Ethernet, WiFi, Z-Wave, Bluetooth for setup; cellular backup with compatible subscription

Ring Alarm 8-Piece Home Security System Kit
- ✔ Included components: Base station, keypad, 4 contact sensors, motion detector, range extender
- ✔ Recommended home size: 1–2 bedrooms
- ✔ Connectivity: Ethernet, WiFi, Z-Wave, Bluetooth for setup; cellular backup with compatible subscription

DEEPVIGLX 22-Piece Wireless Home Security Alarm System with WiFi and GSM
- ✔ Kit size: 22 pieces
- ✔ Included components: Control panel, 3 motion sensors, 10 contact sensors, 2 remotes, doorbell button, 3 RFID tags, siren, SOS button
- ✔ Connectivity: 2.4 GHz WiFi and stated 2G cellular
Difficulty: Beginner | Time: 1–3 hours
What You’ll Need
Tools & Materials:
- Smartphone or tablet
- Home Wi-Fi network and its password
- Security devices, such as a hub, entry sensors, motion sensors, cameras, or a video doorbell
- Screwdriver or drill if the device instructions call for one
- Ladder for high mounting locations, if needed
Knowledge:
- Basic smartphone app use
- How to connect a device to Wi-Fi
- Where household doors, windows, and likely camera views are located
Check each product’s Wi-Fi, hub, power, and subscription requirements before buying or installing it. Ask your landlord before drilling or changing a doorbell. Keep device manuals and account recovery details available during setup.
Ring Alarm 14-Piece Home Security Kit
For households that need to cover several doors and rooms, the Ring Alarm 14-Piece Kit is the most balanced choice in this lineup. Eight contact sensors and two motion detectors give us more flexibility to place protection around a multi-room home than the 8-piece kit, and the second keypad can make everyday arming more convenient when people use different entrances. Ring identifies the kit for 2–4 bedroom homes, giving buyers a useful starting point for comparing the included coverage with their floor plan.Connected control is a core part of its appeal: we can use the keypads or Ring app, and the system supports Ethernet, WiFi, Z-Wave, and Bluetooth for setup. The base station’s rechargeable 24-hour backup adds resilience during a power interruption. Yet the larger kit does not mean every smart security service is included. Professional monitoring and cellular backup require a compatible subscription, and expanding beyond the supplied sensors means buying accessories separately. Compared with DEEPVIGLX, Ring offers a more familiar app-led approach and a clearer stated backup arrangement; DEEPVIGLX includes more varied alert types and a larger stated expansion ceiling. Choose Ring when dependable household coverage and keypad access matter more than maximizing sensor count or alert variety.
Pros:
- Includes eight contact sensors, two motion detectors, and two keypads for broader coverage and access.
- Controls are available through both keypads and the Ring app, with mobile alerts when triggered.
- Base station has a rechargeable 24-hour battery backup.
- Supports Ethernet, WiFi, Z-Wave, and Bluetooth for setup.
Cons:
- Professional monitoring and cellular backup require a compatible subscription.
- Additional sensors and accessories are sold separately.
Best for: Households in a 2–4 bedroom home that want multiple keypads and broad entry-point coverage in one kit.
Not ideal for: Buyers who want professional monitoring or cellular backup without a compatible subscription, or those with a small layout that needs fewer sensors.
Bottom line: We recommend this as the strongest all-round fit for a multi-room home that needs substantial included coverage and keypad flexibility.
“We recommend this as the strongest all-round fit for a multi-room home that needs substantial included coverage and keypad flexibility.”
Ring Alarm 8-Piece Home Security System Kit
The Ring Alarm 8-Piece Kit gives smaller households a straightforward way into the same app-and-keypad style of security control as the larger Ring system. With four contact sensors and one motion detector, it is intended for 1–2 bedroom homes; that smaller assortment can cover a front entry, selected windows, and a central area without leaving a larger household with as many unused or missing pieces. Its included range extender helps round out the starter set, while the base station can sit on a flat surface or be wall-mounted.Compared with the 14-piece Ring kit, the key compromise is coverage and convenience: there is one keypad rather than two, and half as many contact sensors. Buyers who add rooms or want to arm the system from multiple entrances may soon need extra accessories. The core connected controls remain appealing, with app alerts, compatible device connections, and a 24-hour base station backup. As with its larger sibling, however, professional monitoring, cellular backup, and Alexa voice control require a compatible subscription. This is the better Ring choice for a compact layout or a household that wants to build gradually; choose the 14-piece kit when a broader set of sensors is useful from the start.
Pros:
- Starter kit includes four contact sensors, a motion detector, keypad, and range extender.
- Supports app alerts and keypad-based arming and disarming.
- Base station includes a rechargeable 24-hour battery backup.
- Can connect with compatible smart locks and other devices.
Cons:
- Professional monitoring, cellular backup, and Alexa voice control require a compatible subscription.
- Additional sensors and accessories are sold separately.
Best for: People in a 1–2 bedroom home who want Ring app and keypad controls in a compact starter kit.
Not ideal for: Larger homes, households needing multiple keypads, or buyers seeking included professional monitoring and cellular backup.
Bottom line: We would choose this over the 14-piece kit when a smaller home can use fewer sensors and one keypad.
“We would choose this over the 14-piece kit when a smaller home can use fewer sensors and one keypad.”
DEEPVIGLX 22-Piece Wireless Home Security Alarm System with WiFi and GSM
The DEEPVIGLX 22-Piece System takes a different approach from Ring: its bundle combines 10 door/window sensors, three motion sensors, a touchscreen panel, remotes, RFID tags, a siren, and an SOS button. For a buyer who wants coverage across many openings and several ways to interact with the alarm, that is an extensive starting set. It lists app push notifications, SMS, voice alarms, and an audible siren, plus Alexa and Google Assistant control. Expansion to as many as 100 wireless zones may also suit a home where the system is expected to grow.This breadth comes with a more involved compatibility decision than either Ring kit. WiFi is specified as 2.4 GHz only, so a 5 GHz-only network will not meet the listed requirement. Cellular support is stated as 2G, while the description also mentions 4G voice alarms; buyers should clarify which cellular functions are supported in their region before relying on them. The information also lists a 50-foot maximum range, which makes sensor placement worth checking against the layout. Compared with Ring, DEEPVIGLX supplies more sensors and alert channels, but Ring specifies Ethernet and a 24-hour base station backup, while the DEEPVIGLX listing describes the system as battery powered and does not establish the same backup arrangement. Choose it for its broad bundle and alert variety when its network and cellular details fit your setup.
Pros:
- Includes 10 door/window sensors, three motion sensors, remotes, RFID tags, siren, and SOS button.
- Lists app, SMS, voice, and audible siren alerts.
- Supports Alexa and Google Assistant control.
- Can expand to a stated maximum of 100 wireless zones.
Cons:
- WiFi support is limited to 2.4 GHz; 5 GHz is not supported.
- Cellular details are inconsistent: the specs state 2G while the description also mentions 4G voice alarms.
- A stated maximum range of 50 feet may constrain placement in some layouts.
Best for: Buyers who want many door and motion sensors, multiple alert methods, and a system with substantial stated zone expansion.
Not ideal for: Households using only 5 GHz WiFi or those who need clearly specified current cellular compatibility before purchase.
Bottom line: We would pick DEEPVIGLX for its large sensor bundle and varied alerts only after confirming the network and cellular specifications suit the home.
“We would pick DEEPVIGLX for its large sensor bundle and varied alerts only after confirming the network and cellular specifications suit the home.”
As an Amazon Associate we earn from qualifying purchases.
Before You Start
Choose a system that covers your main entry points and fits how you live. A typical setup might use a hub, sensors on exterior doors, a motion sensor in a shared area, and a camera at a front entrance. Cameras and microphones can capture neighbors or visitors, so aim them at your own property and follow local privacy rules. Use a unique password for the security account, and turn on two-factor authentication if the service offers it.
Check that your Wi-Fi reaches each planned device location. Some systems need a hub connected to the router; others connect each device directly. Do not mount devices until the app has accepted them and you have confirmed their settings.
Step-by-Step Instructions
Step 1: Map the areas you want to protect
Walk through your home and note exterior doors, accessible windows, and areas where an intruder might pass. Mark the main entrance, back or side doors, and ground-floor windows as priorities. Choose camera views that show your own entrances without pointing into a neighbor’s windows or private spaces.
Decide which events should trigger an alert, such as a door opening while you are away or motion in an empty room. Keep the plan simple enough that you can respond to alerts.
Tip: A camera does not replace an entry sensor: a closed door can block the camera’s view of someone opening it.
Check: You have a short device list and a planned location for each sensor or camera.
Step 2: Install the system app and create your account
Download the manufacturer’s official app from your phone’s app store. Create an account with a unique password, then turn on two-factor authentication when available. Add a recovery email or phone number that you can access if you lose your device.
Review the app’s notification and privacy settings. Invite household members through the app’s sharing feature instead of giving them your password.
Tip: Confirm that you are using the official app listed in the product manual or manufacturer’s website.
Check: You can sign in, find the device setup screen, and receive account verification messages.
Step 3: Prepare the hub and Wi-Fi
Place the hub near the router and a power outlet, following the manufacturer’s instructions. Connect it to the router or Wi-Fi as directed, then wait for the app to show that it is online. If devices connect directly to Wi-Fi, confirm that the network meets their band and password requirements.
Test the signal at each planned device location with your phone. Move the hub or router, or choose a closer location, if the signal is weak.
Tip: Some devices only support a 2.4 GHz Wi-Fi network. Check the device requirements before troubleshooting a failed connection.
Check: The app shows the hub online, and your phone has a usable Wi-Fi signal at planned installation points.
Step 4: Add and name each device
Use the app’s add-device flow to pair one device at a time. Follow the on-screen instructions for scanning a code, pressing a pairing button, or inserting batteries. Give each device a clear name based on its location, such as “Kitchen window” or “Front door.”
Keep devices near the hub or router during pairing if the instructions recommend it. After pairing, move the device to its planned location and check its connection status.
Tip: Do not pair every device at once. Naming and checking devices one by one makes connection problems easier to find.
Check: Every device appears in the app under a recognizable name and reports a connection or battery status.
Step 5: Mount sensors and cameras
Clean and dry mounting surfaces, then install each device using the supplied adhesive or hardware. Place door and window sensors so their two parts align when closed and separate when opened. Mount motion sensors at the height and angle specified in the manual, away from heating vents and direct sunlight.
Position cameras to show the entry or area you selected. Check the live view before tightening mounts, and adjust the angle to avoid blocked views, glare, or unnecessary coverage of public or neighboring spaces.
Tip: Test adhesive placement before pressing firmly. For rented homes, use removable mounting options where suitable and permitted.
Check: Sensors sit securely, their paired pieces align when closed, and each camera shows the intended area.
Step 6: Set detection and alert preferences
Open each device’s settings and choose sensible detection zones, motion sensitivity, and notification options. Exclude roads, moving trees, or other areas that may create repeated false alerts. Set entry and exit delays if the system supports them and you need time to leave or disarm it.
Choose an alert schedule that matches your routine. Give household members access to arm or disarm the system, and decide who should receive urgent alerts.
Tip: Start with moderate motion sensitivity. Raise or lower it after observing real activity rather than trying to eliminate every alert at once.
Check: The app shows the intended alert recipients, operating schedule, and detection settings.
Step 7: Set up access and backup options
Review which household members can view cameras, change settings, or manage the account. Remove access for people who no longer need it. If the system offers cellular backup, battery backup, or cloud recording, decide whether those features fit your needs and costs.
Keep any keypad code private and avoid easy-to-guess codes such as birthdays or repeated digits. Store recovery codes somewhere safe outside the app.
Tip: Check how the system behaves during an internet or power outage; backup features vary by model and plan.
Check: Only intended people have access, and you know which functions will continue during an outage.
Step 8: Test the full system
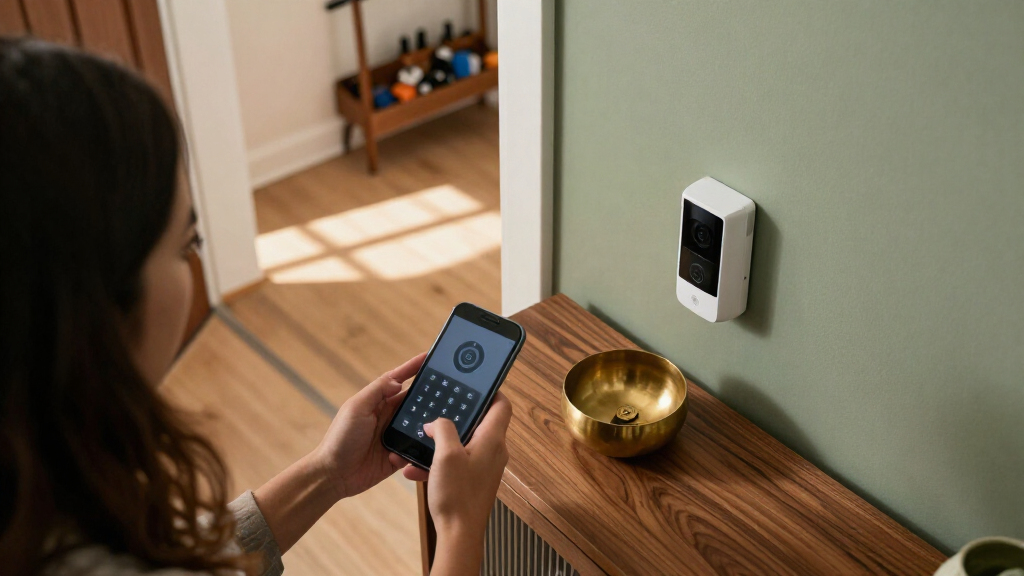
Put the system into its test mode if available. Open and close each protected door or window, walk through each motion sensor’s area, and check every camera’s live view. Confirm that the expected app alert arrives and identifies the correct device.
Test arming and disarming from the keypad or app, including any entry delay. Tell household members what an alert means and how to respond. Turn off test mode when checks are complete.
Tip: Testing may trigger a siren or monitoring call. Follow the app’s test instructions and contact the monitoring provider before testing a monitored alarm.
Check: Each device detects its intended event, alerts reach the right people, and the system arms and disarms as expected.
Common Mistakes to Avoid
- Mounting a sensor before checking whether it pairs and connects. — Pair each device and confirm its status in the app before installing it permanently.
- Pointing a camera at a bright window, street, or neighboring property. — Check the live view at different times of day and adjust the angle or detection zone to focus on your own entry.
- Setting motion sensitivity too high and receiving repeated alerts. — Begin at a moderate level, exclude predictable movement, then review alerts and tune settings.
- Sharing the main account password with everyone in the household. — Use individual app invitations and remove access when it is no longer needed.
Troubleshooting
Problem: A device will not pair.
Solution: Move it closer to the hub or router, check its battery, and repeat the manufacturer’s pairing steps. Confirm that the phone is connected to the required Wi-Fi band and that Bluetooth or location access is enabled if the app requires it.
Problem: A sensor shows the wrong status when a door or window is closed.
Solution: Check that the sensor pieces align within the spacing listed in the manual. Reposition them, then open and close the entry again to confirm the status changes.
Problem: Motion alerts arrive when nobody is in the room.
Solution: Review the camera or sensor view for moving plants, pets, sunlight, or heating vents. Adjust the angle, detection zone, or sensitivity, then test the area again.
Problem: Alerts do not reach your phone.
Solution: Check the app’s notification permissions in your phone settings, confirm that the correct person is selected as a recipient, and verify the system is online. Send a test alert if the app provides that option.
What Success Looks Like
Your system is ready when every planned device appears online under a clear name, sensors report open and closed states correctly, cameras show their intended views, and test events produce the right alerts. Household members should know how to arm and disarm the system, and you should know how it behaves during an internet or power outage.
Next Steps
Check the app weekly for offline devices, low batteries, or missed updates. Review camera angles and alert settings after moving furniture, changing routines, or adding pets. Replace batteries when prompted and repeat the device tests after maintenance. If a device remains offline after following its manual, contact the manufacturer or your monitoring provider with the model name and the error shown in the app.
Frequently Asked Questions
Do I need a professional to install a smart home security system?
Many wireless systems are designed for self-installation with adhesive mounts and app-based setup. A wired alarm, difficult mounting location, or monitored installation may call for a qualified installer. Follow the product instructions and local rules.
Will the system work if my Wi-Fi goes down?
It depends on the model. Some systems can still sound a local alarm or use cellular backup, while remote alerts and cloud video may stop. Check the outage behavior for your devices and plan before relying on those features.
Where should I put entry sensors?
Start with exterior doors and accessible windows. Place each sensor pair so the parts separate when the entry opens, and check the permitted gap in the manual.
How can I reduce false camera alerts?
Set detection zones around the area you want to watch, avoid pointing at roads or moving foliage, and lower sensitivity if needed. Make one change at a time and test again.
How often should I test the system?
Test after installation, after moving or replacing a device, and whenever an app reports a connection or battery problem. A monthly check is a useful routine for confirming that alerts still reach the right people.