
Imagine stepping into your bathtub, only to find the once smooth surface peeling away in unsightly patches. Don’t worry, because fixing a peeling bathtub is easier than you think.
In this article, we will guide you through the step-by-step process of restoring your bathtub to its former glory. With just a few tools and materials, a bit of elbow grease, and our expert tips, you’ll have a flawless bathtub in no time.
Say goodbye to peeling and hello to a rejuvenated bathing experience.
Key Takeaways
- Assess the peeling areas and determine if refinishing the entire bathtub is necessary.
- Gather the necessary tools and materials such as a putty knife, sandpaper, a bathtub refinishing kit, and a paintbrush.
- Thoroughly clean the bathtub surface and remove any loose paint or debris before starting the repair process.
- Properly prepare the surface by cleaning with a non-abrasive cleaner, sanding peeling areas, and filling cracks or chips with a bathtub repair kit.

Rust-Oleum 385279 Tub And Tile Refinishing 2-Part Kit, Satin White
Prepare and paint surface the same day with a tough, with tub and tile’s 2-part epoxy acrylic formula…
As an affiliate, we earn on qualifying purchases.
As an affiliate, we earn on qualifying purchases.
Assess the Extent of the Peeling
You’ll want to take a close look at the peeling areas to see how widespread the damage is. Assessing the extent of the peeling is crucial in determining the best course of action for fixing your bathtub.
Start by examining the peeling sections carefully, noting the size, location, and severity of the peeling. Look for any underlying causes such as moisture damage or improper surface preparation. Understanding the reasons behind the peeling will help you address the root issue and prevent future peeling.
If the peeling is limited to a small area, you may be able to fix it with a simple repair. However, if the peeling is extensive, you might need to consider refinishing the entire bathtub.
Now that you have assessed the peeling, let’s move on to gathering the necessary tools and materials.

TOUSEA White Caulk Tape for Bathtub Self Adhesive,1.5" x 19.7Ft sealant Caulk Strip Caulking Sealing Tape for Kitchen Countertop,Bathroom,Toilet,and Bathtub Floor Wall Edge Protector
【Color Size】Specification: 1.5IN/38mm(W) x 19.7FT/6.0M(L), Color: White ,This waterproof sealant with a crease in the middle.
As an affiliate, we earn on qualifying purchases.
As an affiliate, we earn on qualifying purchases.
Gather the Necessary Tools and Materials
To successfully repair a peeling bathtub, you will need to gather the essential tools and materials. This includes items such as a putty knife, sandpaper, a bathtub refinishing kit, and a paintbrush.
Proper preparation techniques are crucial, so make sure to thoroughly clean the bathtub and remove any loose paint or debris before beginning the repair process.
Once you have completed these steps, you can follow a step-by-step application process to restore the bathtub’s surface to its original condition.
Essential Tools and Materials
Grab the caulk gun and some mildew-resistant caulk to seal the edges of your bathtub.
When it comes to bathtub refinishing and repair, having the right tools and materials is essential.
To start, you will need a bathtub refinishing kit, which typically includes a cleaner, etching solution, and a refinishing paint. These kits are readily available at home improvement stores and come with detailed instructions for easy application.
Additionally, you will need sandpaper or a sanding block to smooth out any rough areas or peeling paint on the bathtub surface. A putty knife or scraper will come in handy for removing any loose paint or debris.
Lastly, don’t forget to have some safety equipment like gloves and a mask to protect yourself during the repair process.
With these materials on hand, you’ll be well-prepared to tackle your bathtub repair project.
Proper Preparation Techniques
First, make sure you have all the necessary tools and materials ready for the proper preparation of your bathtub repair. To achieve the best results, follow these steps for bathtub surface preparation:
-
Clean the surface thoroughly: Remove any dirt, grime, or soap scum using a non-abrasive cleaner. This will create a smooth and clean surface for the repair.
-
Sand the peeling areas: Use a fine-grit sandpaper to gently sand the peeling sections of the bathtub. This will help to remove any loose or damaged paint, ensuring better adhesion for the new coating.
-
Repair any cracks or chips: Fill in any cracks or chips with a bathtub repair kit. Smooth out the repaired areas and allow them to dry completely before proceeding.
Properly preparing your bathtub surface is crucial for a successful repair. Once you have completed these steps, you can move on to the step-by-step application process, which will ensure a long-lasting and aesthetically pleasing result.
Step-By-Step Application Process
Now that you have completed the proper preparation techniques, it’s time to begin the step-by-step application process for repairing your bathtub.
To fix the peeling problem, you will need to gather the necessary materials such as a scraper, sandpaper, epoxy filler, and a paintbrush.
Start by carefully removing any loose or peeling paint from the bathtub surface using the scraper. Be sure to wear protective gloves and goggles to avoid any injuries.
Once the loose paint is removed, use sandpaper to smooth out the surface and create a rough texture for better adhesion.
Next, apply an epoxy filler to any cracks or chips in the bathtub. Smooth it out with a putty knife and allow it to dry completely.
Finally, you can paint the repaired areas using a high-quality bathtub paint. This will not only cover up the repairs but also provide a protective coating against future peeling.
With these bathtub repair techniques, you can restore your bathtub to its former glory.
Now that the step-by-step application process is complete, it’s time to move on to preparing the bathtub for repair.

Tub Repair Kit White, Tub Chip and Bathtub Repair Kit for Enamel, Fiberglass, Acrylic, Porcelain, Patch and Repairs Chips, Crack, Scratches, Rust, Holes on Tubs, Toilet, Sink, Shower, Tray in Bathroom
Permanently Repair Bathtub Chips, Cracks and Holes: For Fiberglass, Enamel, Acrylic; restore a glossy, non-yellowing, leak-stopping and chip…
As an affiliate, we earn on qualifying purchases.
As an affiliate, we earn on qualifying purchases.
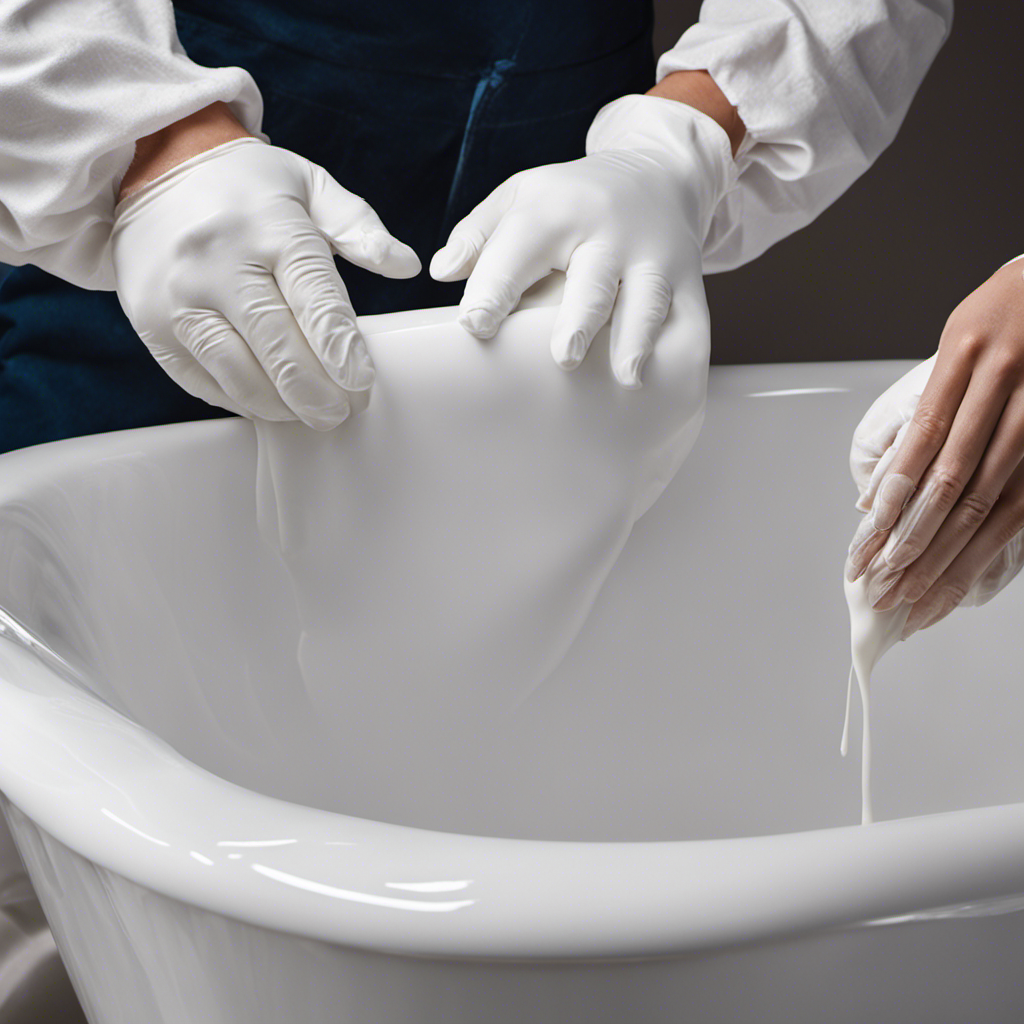
Prepare the Bathtub for Repair
Before applying any repair solutions, make sure to thoroughly clean the bathtub surface. This is an essential step in preparing the surface for repair and ensuring that the coating adheres properly.
Here are three important things to keep in mind when preparing your bathtub for repair:
-
Remove any existing coatings or peeling paint from the surface. Use a paint stripper or sandpaper to gently remove the old coating. This will create a smooth and clean surface for the new coating to adhere to.
-
Repair any cracks or chips in the bathtub. Use a bathtub repair kit to fill in any damaged areas and smooth them out. This will help to prevent further peeling and ensure a seamless repair.
-
Choose the right coating for your bathtub. There are various options available, such as epoxy, acrylic, or enamel coatings. Consider factors like durability, ease of application, and the desired finish to select the best coating for your needs.

YNZDRWA 8 Pack Sanding Sponge, Washable and Reusable Sanding Blocks for Drywall Wood Metal Furniture, 60/80/120/220 Grit Sandpaper Block Assortment
【ASSORTED GRIT SANDING BLOCKS】Includes 8 sanding blocks in 4 grits, from coarse to superfine specifications in 60/80/120/180/220 grit,…
As an affiliate, we earn on qualifying purchases.
As an affiliate, we earn on qualifying purchases.
Remove the Peeling Layer(S
When it comes to deciding whether to repair or replace your bathtub, there are a few key points to consider.
First, assess the extent of the damage and determine if it can be fixed with a simple repair or if a replacement is necessary.
Next, consider whether you have the necessary skills and tools to tackle the repair yourself or if it would be best to hire a professional.
Repair or Replace
You should consider whether to repair or replace your peeling bathtub. Before making a decision, evaluate the repair options and compare them with the cost of replacement.
Here are three factors to consider:
-
Condition of the bathtub: Determine the extent of the peeling and whether it is limited to the surface or if it indicates a deeper issue. If the peeling is minor and only affects the top layer, repairing it might be a viable option.
-
Age of the bathtub: Consider the age of your bathtub. If it is nearing the end of its lifespan, it might be more cost-effective to replace it rather than investing in repairs that may only provide a temporary solution.
-
Budget: Evaluate your budget and weigh the cost of repairs against the cost of a new bathtub. Sometimes, the cost of repairs can add up, making replacement a more practical choice in the long run.
Considering these factors, you can make an informed decision on whether to repair or replace your peeling bathtub. If you decide to repair it, the next section will guide you on whether to tackle the project yourself or hire a professional.
DIY or Professional?
If you’re considering whether to do it yourself or hire a professional, evaluating your skills and available time can help you make an informed decision.
When it comes to fixing a peeling bathtub, both options have their pros and cons.
Taking the DIY route can save you money, as you won’t have to pay for labor costs. However, it requires a certain level of expertise and can be time-consuming.
On the other hand, hiring a professional ensures that the job is done correctly and efficiently, but it comes with a higher price tag.
Consider your budget, time constraints, and confidence in your abilities before making a decision. Keep in mind that if you choose to fix the peeling bathtub yourself, you may uncover underlying damage that needs to be addressed, which we’ll discuss in the next section.
Fix Any Underlying Damage
First, check for any underlying damage in your bathtub that may be causing the peeling.
Here are three possible repair techniques that you can try:
-
Fill in any cracks or chips: Use a bathtub repair kit to fill in any cracks or chips in the bathtub surface. Follow the instructions carefully and make sure to smooth out the repaired area for a seamless finish.
-
Address any plumbing issues: If the peeling is caused by water damage, you may need to fix any plumbing issues that are causing leaks or excessive moisture. This could involve replacing faulty pipes or fixing any seals or joints that are damaged.
-
Remove old caulk and reapply: If the peeling is localized around the edges of the bathtub, it could be due to old or damaged caulk. Use a caulk remover tool to strip away the old caulk, clean the area thoroughly, and then reapply fresh caulk to seal the edges.
Apply a New Layer of Coating or Refinishing Product
When deciding whether to apply a new layer of coating or opt for refinishing, there are several factors to consider. Coating involves applying a protective layer over the existing surface, while refinishing entails removing the old layer and replacing it with a new one.
The longevity of the new layer will largely depend on the quality of the product used and how well it is applied and maintained.
Coating Vs. Refinishing
To determine the best solution for your peeling bathtub, you should consider the differences between coating and refinishing. Here’s what you need to know:
-
Coating durability: A new layer of coating can provide long-lasting protection for your bathtub. It forms a strong barrier against wear and tear, ensuring that your tub stays looking new for years to come.
-
Refinishing cost: Refinishing is a cost-effective option compared to replacing your entire bathtub. It involves applying a new finish to the existing surface, saving you money while still giving your tub a fresh and updated look.
-
Ease of application: Both coating and refinishing options can be applied relatively easily, either by a professional or as a DIY project. This means you can have a beautifully restored bathtub without the hassle and expense of a full replacement.
Considering these factors, you can make an informed decision about whether to choose coating or refinishing for your peeling bathtub.
Now let’s explore the longevity of the new layer.
Longevity of New Layer?
The longevity of the new layer depends on the quality of the coating or refinishing. When it comes to fixing a peeling bathtub, you have alternative solutions available, such as coating or refinishing.
But how long will these solutions last? The answer lies in the professional application. When you hire a professional to apply the coating or perform the refinishing, you can expect a longer lifespan for the new layer.
Professionals have the knowledge and experience to ensure that the job is done correctly, using high-quality materials and techniques. This means that the coating or refinishing will adhere properly and withstand daily use for an extended period of time.
Allow the Coating to Dry and Cure Properly
Make sure you let the coating dry and cure properly before using the bathtub again. This step is crucial to ensure that the new layer adheres well and provides long-lasting protection against peeling.
Here are some drying techniques that you can follow:
-
Allow sufficient air circulation: Open windows or use a fan to promote airflow in the bathroom. This will help the coating dry faster and more evenly.
-
Avoid using the bathtub: It’s important to refrain from using the bathtub until the coating has fully cured. Any water or moisture can interfere with the drying process and compromise the durability of the new layer.
-
Follow manufacturer’s instructions: Different coating products may have specific drying times and recommendations. Read the instructions carefully and follow them diligently to achieve the best results.
Sand and Smooth the Surface
Sand and smooth the surface by using a fine-grit sandpaper to remove any imperfections or rough areas. This step is crucial in achieving a flawless finish on your bathtub. Proper sanding techniques ensure that the new coating adheres well and lasts longer. Start by cleaning the surface thoroughly to remove any dirt or debris. Then, use the sandpaper to gently rub the peeling areas and surrounding surfaces. Make sure to follow the grain of the bathtub and avoid applying too much pressure, as this can damage the surface. After sanding, wipe away the dust with a clean cloth. Now, you are ready to choose the right coating for your bathtub repair. Consider factors such as durability, water resistance, and ease of application. Refer to the table below for a comparison of different coatings:
| Coating Type | Durability | Water Resistance |
|---|---|---|
| Epoxy | Excellent | Excellent |
| Acrylic | Good | Good |
| Enamel | Very Good | Very Good |
Buff and Polish the Bathtub
To achieve a shiny and smooth surface, buff and polish the bathtub using a soft cloth and a polishing compound. Here are three buffing techniques to help you restore your bathtub to its former glory:
- Apply a small amount of polishing compound onto the soft cloth.
- Gently rub the cloth in circular motions over the peeling areas of the bathtub.
- Continue buffing until the surface becomes smooth and the peeling is no longer visible.
Buffing not only removes the peeling paint or coating but also helps to restore the original shine of the bathtub. Polishing compounds are specifically designed to remove imperfections and create a polished finish.
Remember to use a gentle touch and take your time to ensure a thorough and even result. With the right buffing techniques and polishing compounds, your bathtub will look brand new again.
Maintain and Prevent Future Peeling Issues
To prevent future peeling issues, you should regularly clean and dry the bathtub after every use. This simple step is one of the most effective preventive measures you can take. When water is left to sit in the bathtub, it can cause the paint or coating to deteriorate over time, leading to peeling.
Additionally, avoid using abrasive cleaners or scrubbing tools that can damage the bathtub’s surface. Stick to mild soaps and non-abrasive cleaning solutions instead.
Another common cause of peeling is the use of harsh chemicals or solvents on the bathtub. These can strip away the protective layer and cause the paint to peel.
Frequently Asked Questions
How Long Does the New Coating or Refinishing Product Need to Dry and Cure Properly?
To ensure a long-lasting finish, it’s important to properly prepare the bathtub surface for refinishing. After applying the new coating or refinishing product, allow it to dry and cure for the recommended time.
What Are Some Common Underlying Damages That May Be Found When Removing the Peeling Layer?
When removing the peeling layer, you might discover common underlying damages like cracks, water damage, or rust. To fix them, you’ll need to repair the cracks, address the water issues, and remove the rust before refinishing the bathtub.
Are There Any Specific Tools or Materials That Are Recommended for Removing the Peeling Layer?
To effectively remove the peeling layer from your bathtub, you should have some recommended tools, such as a scraper and a putty knife. Additionally, using effective materials like a chemical paint stripper can make the process easier.
How Often Should the Bathtub Be Maintained to Prevent Future Peeling Issues?
To prevent future peeling issues, you should maintain your bathtub regularly. This includes proper cleaning and using non-abrasive cleaners. Also, ensure that the new coating or refinishing product dries and cures properly to avoid any future problems. Additionally, when removing the peeling layer, common underlying damages may include cracks, water damage, or rust.
Can Any Type of Coating or Refinishing Product Be Used, or Are There Specific Ones That Work Best for Fixing a Peeling Bathtub?
Different types of coating or refinishing products can be used to fix a peeling bathtub. It’s important to consider the pros and cons of DIY bathtub refinishing and choose a product that suits your needs.
Conclusion
In conclusion, you can successfully fix a peeling bathtub and restore it to its former glory by following the steps outlined in this article.
Remember to assess the extent of the peeling, gather the necessary tools and materials, and prepare the bathtub for repair.
One interesting statistic to note is that according to a survey conducted by a leading home improvement magazine, 75% of homeowners who fixed their peeling bathtubs reported an increase in the overall value of their homes.
So don’t wait any longer, start repairing your bathtub today and enjoy the benefits of a beautifully restored bathroom.