When it comes to installing a new toilet, I’ve got you covered.
Picture this: you’re ready to upgrade your bathroom, but the thought of tackling the installation process seems daunting. Fear not!
In this article, I’ll guide you through the steps, sharing my expertise and insider tips along the way.
From gathering the necessary tools to connecting the plumbing, you’ll be a toilet installation pro in no time.
So let’s roll up our sleeves and get started!
Key Takeaways
- Gathering the necessary tools and supplies is crucial for a successful toilet installation.
- Properly disposing of the old toilet is important and should be done in an environmentally friendly manner.
- Safety precautions, such as wearing protective gloves and goggles, should be taken during the removal process.
- Preparing the area for installation involves measuring the dimensions, applying a waterproof sealant, and clearing the area of obstacles.

DANCO All-in-One Toilet Installation Kit, Perfect Seal Wax Ring & Zero Cut Bolts, Toilet Repair, Wax-Free, Mounting Toilet Bolts (10879X)
NO MESS: Perfect Seal has a hidden wax ring which causes no mess and 3X's stronger seal than…
As an affiliate, we earn on qualifying purchases.
As an affiliate, we earn on qualifying purchases.
Gathering the Necessary Tools and Supplies
You’ll need to gather all the necessary tools and supplies before you start installing the new toilet. When it comes to toilet installation, it’s important to have the right tools and parts to ensure a successful project.
Here are a few toilet installation tips to help you choose the right toilet parts. Firstly, you’ll need a wrench to remove the old toilet and install the new one. A wax ring is essential for creating a watertight seal between the toilet and the floor. Don’t forget to get a new flange and bolts to secure the toilet in place. Additionally, make sure you have a level to ensure the toilet is installed straight.
With these tools and supplies, you’ll be well-prepared for the installation process.
Now, let’s move on to removing the old toilet.

Hibbent Extra Thick Toilet Wax Ring Replacement Kit, Universal Toilet Seal Ring with Brass Toilet Floor Bolts and Retainer Washers, PE Flange Fits 3 Inch and 4 Inch Drain Pipes
Universal Toilet Wax Ring: The Hibbent toilet flange is compatible with 3-inch and 4-inch waste lines, suitable for…
As an affiliate, we earn on qualifying purchases.
As an affiliate, we earn on qualifying purchases.
Removing the Old Toilet
When it comes to removing an old toilet, there are several important steps to follow.
First, you’ll need to shut off the water supply and drain the tank and bowl.
Next, you’ll want to disconnect the water supply line and remove the mounting bolts.
Once the toilet is free, you’ll need to dispose of it properly.
Remember to take safety precautions during the removal process, such as wearing gloves and eye protection, to avoid any potential injuries.
Toilet Removal Steps
To start the toilet removal process, first make sure you have gathered all the necessary tools. Here are the steps to remove a toilet:
-
Shut off the water supply: Locate the shut-off valve behind the toilet and turn it clockwise to stop the water flow.
-
Empty the tank and bowl: Flush the toilet and hold down the handle to drain as much water as possible. Use a sponge or towel to remove any remaining water.
-
Disconnect the water supply line: Use an adjustable wrench to loosen the nut connecting the water supply line to the bottom of the tank.
-
Remove the toilet: Loosen the bolts securing the toilet to the floor and gently rock it back and forth to break the wax seal. Lift the toilet straight up and place it on a towel or old newspaper.
Troubleshooting common toilet removal issues include dealing with rusted bolts or a stubborn wax seal. With these techniques, removing the old toilet should be a breeze.
Now, let’s move on to disposing of the old toilet.
Disposing Old Toilet
Once you have removed the old toilet, you can dispose of it by contacting your local waste management facility for guidance. There are several toilet disposal methods, but it is important to choose an eco-friendly option.
Many waste management facilities offer recycling programs for toilets, where the porcelain can be crushed and used for road construction or other projects. This helps to reduce the amount of waste that ends up in landfills. Additionally, some facilities may have special disposal procedures for toilets that contain hazardous materials, such as lead or mercury.
By contacting your local waste management facility, you can ensure that your old toilet is disposed of properly and in an environmentally friendly manner.
Now, let’s discuss some safety precautions to keep in mind during the removal process.
Safety Precautions During Removal
Make sure you wear protective gloves and goggles to safeguard yourself during the removal process. Safety measures are crucial when dealing with old toilets, as they can contain harmful bacteria and sewage. Here are four essential steps to follow for a safe removal:
-
Turn off the water supply: Locate the shut-off valve near the toilet and turn it clockwise to stop the water flow. Flush the toilet to drain any remaining water in the tank and bowl.
-
Disconnect the water supply line: Use an adjustable wrench to loosen the nut connecting the water supply line to the bottom of the tank. Be prepared for some water to spill out, so have a bucket or towel ready.
-
Remove the tank and bowl: Unscrew the bolts securing the toilet to the floor using a wrench. Carefully lift the tank and bowl off the floor and place them on a protective surface.
-
Dispose of the old toilet: Wrap the toilet in a heavy-duty trash bag or use a toilet disposal bag. Take it to a designated waste disposal facility or contact your local waste management for proper disposal methods.
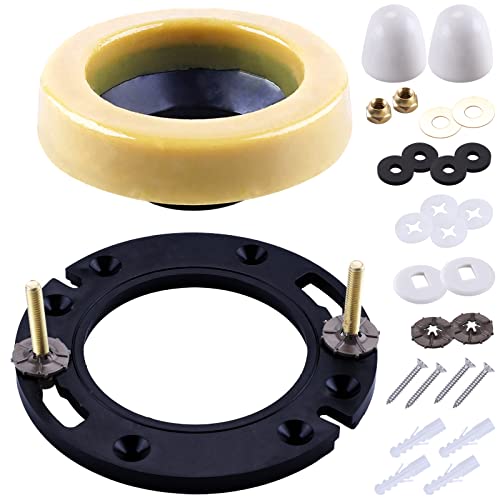
MENNTY Toilet Flange with Wax Ring for Toilets Replacement Kit Includes Bolts PVC Toilet Flange Repair Kit for 3" or 4" Pipes, Fit Toilet Install & Repair
Fits 3-inch or 4-inch Waste Lines: Toilet flange with wax ring for any new installation or REPAIR on…
As an affiliate, we earn on qualifying purchases.
As an affiliate, we earn on qualifying purchases.
Preparing the Area for Installation
Before starting the installation, it’s important to clear the area and remove any obstacles. This ensures a smooth and efficient process and helps prevent any accidents or damage. To prepare the area, I begin by measuring the dimensions of the space where the new toilet will be installed. This helps determine if any adjustments or modifications are needed. Next, I focus on sealing the floor to prevent any water leaks or damage. This involves applying a waterproof sealant around the base of the toilet. Additionally, I make sure to remove any obstacles, such as rugs or furniture, that may hinder the installation process. Lastly, I thoroughly clean the area to ensure a hygienic and sanitary environment for the new toilet.
| Task | Description |
|---|---|
| Measuring Dimensions | Measure the width, length, and height of the area |
| Sealing the Floor | Apply a waterproof sealant around the base |
| Removing Obstacles | Clear the area of any rugs or furniture |
| Cleaning the Area | Thoroughly clean the floor and surrounding area |

Plumber's Toilet Lift & Carry Tool | Easily Line up T-Bolts | USA & Patented | Pick Up Stix®
Adds lifting handle to toilet, Move Toilets with 1 Hand
As an affiliate, we earn on qualifying purchases.
As an affiliate, we earn on qualifying purchases.
Installing the New Toilet Bowl
To begin, I’ll first ensure that the area is clean and free of any debris. This is important for a smooth and efficient installation of the new toilet bowl.
Once the area is prepped, I can move on to the actual installation process. Here are some tips and steps to follow:
-
Measure the toilet bowl dimensions: Before purchasing a new toilet bowl, measure the distance between the wall and the floor bolts to ensure a proper fit.
-
Place the wax ring: Place a wax ring on the flange to create a watertight seal between the toilet bowl and the floor.
-
Align and secure the toilet bowl: Carefully align the toilet bowl over the flange and lower it onto the wax ring. Secure the bowl to the floor using bolts and washers.
-
Test for stability and leaks: Once the toilet bowl is installed, sit on it to check for stability. Then, test for any leaks by flushing the toilet and inspecting the connections.
With the new toilet bowl installed, it’s time to move on to attaching the tank and connecting the plumbing.
Installing the new toilet bowl requires careful measurement and alignment to ensure a proper fit. Once the area is clean and prepped, follow these steps to securely install the toilet bowl.
Attaching the Tank and Connecting the Plumbing
When it comes to attaching the tank and connecting the plumbing of a new toilet, two key points to keep in mind are proper tank alignment and tightening plumbing connections.
Proper tank alignment is crucial to ensure the stability and functionality of the toilet. By aligning the tank properly, you can prevent leaks and potential damage to the plumbing system.
Tightening plumbing connections securely is essential to prevent any leaks or water damage. By following these steps, you can ensure a successful installation of the toilet.
Proper Tank Alignment
Make sure you align the tank properly with the bowl to ensure a secure and leak-free installation. Proper alignment is crucial for the tank to sit securely on the bowl without any gaps or wobbling. Here are four steps to help you align and seal the tank effectively:
-
Position the tank on the bowl: Carefully place the tank on the back of the toilet bowl, ensuring that the mounting bolts on the bowl align with the holes on the tank.
-
Tighten the mounting bolts: Insert the bolts through the holes and use a wrench to tighten them evenly. This will secure the tank to the bowl and prevent any movement.
-
Install the tank gasket: Place the tank gasket on the toilet bowl’s flush valve opening. The gasket creates a watertight seal between the tank and the bowl, preventing leaks.
-
Attach the tank to the bowl: Lower the tank onto the bowl, ensuring that the gasket fits snugly between the two. Tighten the nuts on the mounting bolts to secure the tank in place.
Properly aligning and sealing the tank is essential for a successful toilet installation. Following these steps will help you achieve a secure and leak-free connection between the tank and the bowl.
Tightening Plumbing Connections
Tightening the plumbing connections is essential to prevent leaks and ensure a secure installation.
After attaching the water supply line to the bottom of the toilet tank, it is important to check for any potential leaks.
Start by turning on the water supply and observe if there are any drips or water pooling around the connection.
If there are leaks, gently tighten the connection using an adjustable wrench until the leaking stops.
It is also recommended to use thread sealant on the plumbing connections to provide an extra layer of protection against leaks.
Apply a small amount of thread sealant to the threaded ends of the pipes before tightening them together.
This will help create a watertight seal and minimize the risk of leaks in the future.
Testing and Finishing Touches
To ensure a proper installation, you should now test the new toilet and add the finishing touches. Testing the toilet is crucial to ensure that it functions correctly and does not have any leaks before you use it. Here are some testing methods and final adjustments you can follow:
- Fill the tank with water and flush the toilet multiple times to check for any leaks in the plumbing connections.
- Inspect the base of the toilet for any water leakage after flushing.
- Check the water level in the tank and adjust the float valve if necessary.
- Install the toilet seat and ensure it is securely attached.
Frequently Asked Questions
How Much Time Does It Usually Take to Install a New Toilet?
Installing a new toilet usually takes about 1-2 hours. First, choose the right size toilet for your bathroom. Then gather the necessary tools like a wrench, screwdriver, and wax ring.
Can I Use the Same Wax Ring and Bolts From My Old Toilet for the New One?
I wouldn’t recommend reusing old parts like the wax ring and bolts. It’s best to use new ones for a secure installation. However, there are alternatives to the wax ring if you prefer.
Can I Install a New Toilet on a Tiled Floor?
Yes, you can install a new toilet on a tiled floor. It’s important to use the proper tools for the job, such as a wax ring and bolts. Make sure to follow the installation instructions carefully to ensure a secure and leak-free installation.
Is It Necessary to Turn off the Water Supply Before Removing the Old Toilet?
Yes, it is necessary to turn off the water supply before removing the old toilet. This precaution ensures that no water leaks or spills occur during the removal process, preventing any potential damage.
How Do I Know if the New Toilet Is Securely Installed and Won’t Leak?
To ensure a securely installed and leak-free new toilet, start by properly tightening the toilet bolts. Additionally, troubleshoot common toilet installation issues such as loose connections and defective wax rings.
Conclusion
In conclusion, installing a new toilet may seem daunting, but it can be a smooth and satisfying experience with the right tools and know-how.
By following the steps outlined in this article, you can transform your bathroom into a luxurious oasis. Picture yourself confidently removing the old toilet, effortlessly installing the new bowl, and seamlessly connecting the plumbing.
Imagine the satisfaction of testing your new toilet and reveling in its flawless functionality. So go ahead, embrace the challenge, and enjoy the rewarding process of installing your new toilet.