
I’ve always found a freshly caulked bathtub to be a thing of beauty. The clean lines, the seamless edges, it’s like a comforting hug for your bathroom. And the best part? You can do it yourself!
In this article, I’ll guide you through the process of caulking your bathtub step by step. From gathering the necessary tools to choosing the right caulk, we’ll leave no stone unturned.
Get ready to transform your bathtub into a work of art!
Key Takeaways
- Caulking a bathtub is important for preventing water damage and ensuring the longevity of bathroom fixtures.
- Caulk acts as a barrier, preventing water from seeping into surrounding areas and helps prevent the growth of mold and mildew.
- Choosing the right type of caulk is crucial, considering factors such as water resistance, mold and mildew resistance, and color matching.
- Proper surface preparation, application, and curing of caulk are essential for achieving a neat and professional finish and maintaining a strong and durable seal.

600ml Sausage Pneumatic Caulking Gun Silicone Sealant Gun Air Rubber Gun Caulk Applicator Tool with 10 Transparent Glue Nozzles
It is suitable for most glass adhesives, sheet metal adhesives and structural adhesives. It is widely used in...
As an affiliate, we earn on qualifying purchases.
Understanding the Importance of Caulking a Bathtub
You need to understand why it’s important to caulk your bathtub.
Proper bathtub maintenance is crucial for preventing water damage and ensuring the longevity of your bathroom fixtures.
Caulking is a simple yet effective way to protect your bathtub from water leaks and potential structural damage.
By sealing the gaps between the bathtub and the walls or floor, caulk acts as a barrier, preventing water from seeping into the surrounding areas.
This helps to prevent the growth of mold and mildew, which can be harmful to your health and difficult to remove.
Additionally, caulk also helps to maintain the overall aesthetic appeal of your bathroom by preventing unsightly stains and discoloration.
Now that you understand the importance of caulking, let’s move on to gathering the necessary tools and materials.

SILIGUN™ Gen-3 Compact Caulking Gun - No Drip Caulk Gun - Patented Design - Lightweight ABS Frame - Works with All 10 oz Tubes
Compact Convenience – Seal up windows, trim, tile, and more with your innovative no drip caulk gun from...
As an affiliate, we earn on qualifying purchases.
Gathering the Necessary Tools and Materials
Before starting, make sure you have all the necessary tools and materials for the task. Choosing the right tools is crucial to ensure a successful caulk job.
Firstly, you will need a caulk gun to dispense the caulk smoothly and evenly. Make sure it is compatible with the type of caulk you are using.
Additionally, you will need a caulk removal tool, such as a putty knife or a caulk scraper, to remove any old caulk or debris from the bathtub surface.
Next, gather the materials needed for caulking. These include a tube of caulk that is suitable for use in wet areas, such as a silicone or acrylic-latex caulk.
You will also need a caulk smoothing tool, like a caulk finishing tool or a damp cloth, to create a neat and professional finish.

Saker Caulk Gun Kit, Manual Caulking Gun with 11-in-1 Caulking Tool Set, Silicone Sealant Finishing Tools, Grout Scrapers & Shapers with Masking Tape for Bathroom, Kitchen, Window & Home Repair
Easy, Smooth, Dripless Operation:The Saker Caulking Tool Set features a lightweight, manual dripless caulk gun with a smooth...
As an affiliate, we earn on qualifying purchases.
Preparing the Surface for Caulking
To prepare the surface for a successful caulk job, start by removing any old caulk or debris using a caulk removal tool. This step is crucial in ensuring that the new caulk adheres properly and creates a watertight seal. After removing the old caulk, thoroughly clean the surface with a mild detergent and warm water. Make sure to remove any dirt, grime, or soap scum that may be present. Once the surface is clean, dry it completely before proceeding with the caulk application. To help visualize the importance of surface preparation, here is a table illustrating the potential consequences of skipping this step:
| Surface Preparation | Consequences |
|---|---|
| Properly cleaned and dried surface | Strong and long-lasting caulk bond |
| Surface with debris or old caulk | Weak caulk bond, potential for leaks |
| Surface with dirt or soap scum | Difficulty in achieving smooth caulk application |

Caulk Gun Kit Smooths No-drip Silicone Caulking Gun and Caulking Tools, Sealant Tools Grout Scraper For Kitchen Bathroom Sink Joint,With Gift Box Works 10OZ Tubes blue
Leikius caulk gun kit, a premium set designed for professionals and DIY user. Each caulking tool in our...
As an affiliate, we earn on qualifying purchases.
Choosing the Right Caulk for Your Bathtub
Now that you have prepared the surface, it’s important to select the correct caulk for your bathtub. Choosing the right caulk is crucial to ensure a long-lasting and watertight seal. Here are some tips to help you make the right selection:
-
Consider the type of caulk: There are different types of caulk available, such as silicone, acrylic, and latex. Each type has its own properties, so choose one that suits your needs.
-
Check for water resistance: Make sure the caulk you choose is specifically designed for bathrooms and is resistant to water and moisture.
-
Look for mold and mildew resistance: To prevent the growth of mold and mildew, opt for a caulk that has antimicrobial properties.
-
Consider the color: Select a caulk color that matches or complements your bathtub and bathroom decor.
-
Read product reviews: Before making a purchase, take the time to read reviews from other users to ensure the caulk you choose is reliable and durable.
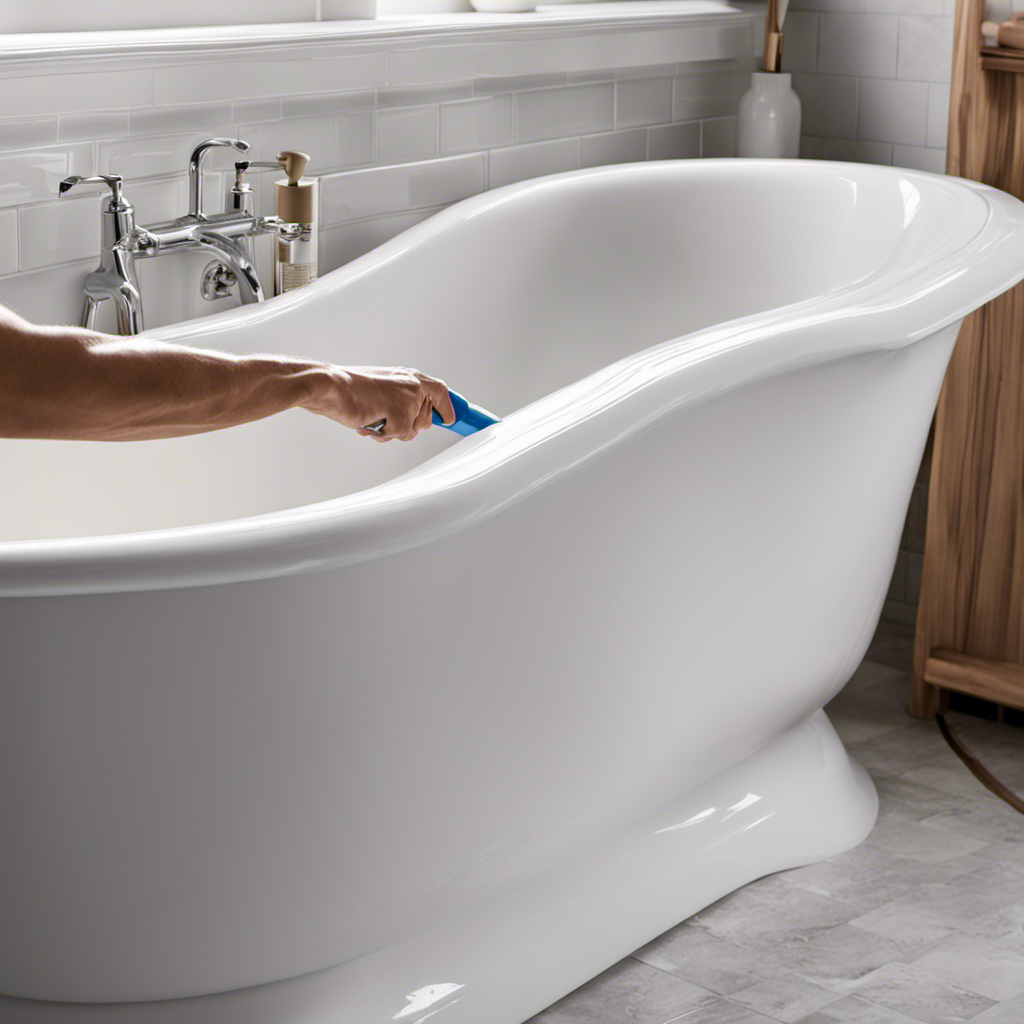
Applying the Caulk to the Bathtub
Once you have chosen the right caulk for your bathtub, it’s time to apply it to the surface. Caulk application techniques are crucial to ensure a proper seal and prevent any leaks or damage.
To start, make sure the surface is clean and dry. Use a caulk gun to apply a steady and even bead of caulk along the joint or gap. Hold the gun at a 45-degree angle and apply consistent pressure to get a smooth line.
Use a caulk smoothing tool or your finger to smooth out the caulk and remove any excess. Pay close attention to corners and seams, ensuring full coverage. It’s important to work quickly as caulk can dry fast.
Common caulk mistakes include applying too much or too little caulk, not smoothing it out properly, and not cleaning the surface beforehand.
Smoothing and Shaping the Caulk Line
When smoothing and shaping the caulk line, it’s important to use a caulk smoothing tool or your finger to achieve a clean and seamless finish. This step is crucial in ensuring that the caulk adheres properly and provides an effective barrier against water damage.
Here are some essential techniques to keep in mind:
- Hold the caulk smoothing tool at a 45-degree angle and gently glide it over the caulk line.
- Apply consistent pressure to create a smooth and even surface.
- If you don’t have a caulk smoothing tool, you can use your finger. Wet your finger with water and run it along the caulk line, smoothing out any imperfections.
- Be careful not to apply too much pressure, as it may cause the caulk to squeeze out.
- If you make a mistake, don’t worry! Simply remove the excess caulk using a caulk removal tool or a putty knife.
By using these smoothing techniques and ensuring proper caulk removal, you’ll be well on your way to achieving a professional-looking caulk line.
Now, let’s move on to the next important step: allowing the caulk to cure properly.
Allowing the Caulk to Cure Properly
When it comes to caulking, one crucial step that often gets overlooked is allowing the caulk to cure properly. The curing time for caulk can vary depending on the type and brand, but it is typically recommended to wait at least 24 hours before exposing it to water or other elements.
Proper curing is essential because it ensures that the caulk forms a strong and durable seal, preventing any water or moisture from seeping through. To ensure proper curing, it is important to follow the manufacturer’s instructions, provide adequate ventilation, and avoid touching or disturbing the caulk during the curing process.
Curing Time for Caulk
The caulk should dry completely before using the bathtub. It is important to allow the caulk to properly cure in order to ensure a long-lasting and effective seal.
The curing time of caulk can be influenced by several factors, including:
- Temperature: Higher temperatures generally result in faster drying times, while colder temperatures can slow down the curing process.
- Humidity: High humidity levels can prolong the drying time of caulk, as moisture in the air can hinder the evaporation of water from the caulk.
- Type of caulk: Different types of caulk have different curing times. Silicone caulk, for example, typically takes longer to dry compared to acrylic caulk.
- Thickness of caulk bead: Thicker caulk beads may require more time to fully dry and cure.
- Ventilation: Proper ventilation can help expedite the drying process by allowing fresh air to circulate and aid in the evaporation of moisture.
Taking these factors into consideration and allowing the caulk to dry completely will ensure a successful caulking job that will stand the test of time.
Importance of Proper Curing
To ensure a long-lasting and effective seal, it’s important to properly cure the caulk. This involves considering factors like temperature, humidity, type of caulk, thickness of caulk bead, and ventilation.
Proper curing techniques are crucial because they allow the caulk to dry and form a strong bond with the surface. The importance of proper drying cannot be overstated as it ensures that the caulk adheres well and prevents any water or moisture from penetrating the seal.
By following the recommended curing time, which can vary depending on the type of caulk used, you can ensure that the seal will last for years to come. It’s also essential to keep in mind the surrounding conditions such as temperature and humidity, as they can affect the drying time and overall effectiveness of the caulk.
Adequate ventilation is necessary to facilitate the drying process and prevent any moisture buildup. By paying attention to these details and employing proper curing techniques, you can achieve a professional and long-lasting caulk seal.
How to Ensure Curing
By following the recommended curing time and ensuring proper ventilation, you can achieve a strong and long-lasting caulk seal. Curing is a crucial step in the caulk application process as it allows the caulk to fully dry and harden, ensuring durability and preventing premature cracking or shrinking.
To ensure proper curing, here are some key steps to follow:
- Clean the surface thoroughly before applying the caulk to remove any dirt or debris.
- Apply the caulk evenly and smoothly, using a caulk gun or squeeze tube.
- Allow the caulk to cure undisturbed for the recommended time, usually 24 to 48 hours.
- Ensure adequate ventilation in the area to expedite the curing process and prevent the buildup of moisture.
- Avoid exposing the caulked area to water or excessive moisture until the curing process is complete.
Following these steps will help you achieve a long-lasting caulk seal and avoid common mistakes that can compromise the durability of your caulked surfaces.
Cleaning Up Excess Caulk and Finishing Touches
After smoothing the caulk with a damp cloth, you’ll want to remove any excess caulk using a utility knife. Cleaning up the excess caulk is an important step in achieving a professional-looking finish for your bathtub caulking job.
To ensure a clean and polished result, follow these cleaning techniques and final touches:
-
Clean with Soap and Water: Use a mild soap and warm water to remove any residue left behind by the caulk. This will help to remove any dirt or grime that may have accumulated during the caulking process.
-
Scrape Away Excess Caulk: With a utility knife, carefully scrape away any excess caulk that may have oozed out during application. Be sure to hold the knife at a shallow angle to avoid damaging the surrounding surfaces.
-
Smooth with a Damp Cloth: Once the excess caulk has been removed, dampen a cloth with water and run it along the caulk line to smooth out any imperfections. This will give your caulk a seamless and professional appearance.
Maintaining and Inspecting the Caulk Over Time
As a homeowner, it’s important to understand the proper lifespan of caulk and the signs of deterioration. This will ensure the integrity of your bathtub or shower. Typically, caulk can last anywhere from five to ten years, depending on the quality of the product and the conditions it’s exposed to.
To prevent any potential water damage, it’s recommended to establish a regular inspection routine. This will help you check for any cracks, gaps, or discoloration in the caulk.
Proper Caulk Lifespan
The proper caulk lifespan for a bathtub is typically around 5 to 10 years. However, various factors can affect the longevity of caulk, so it’s essential to understand how to maintain and inspect it over time.
Here are some caulk maintenance tips and caulk lifespan factors to keep in mind:
-
Regular cleaning: Clean the caulk regularly to prevent the build-up of dirt, grime, and mold.
-
Proper ventilation: Ensure proper ventilation in the bathroom to reduce moisture levels, which can cause caulk to deteriorate faster.
-
Avoid harsh cleaners: Use mild cleaners when cleaning the caulk to prevent damage.
-
Check for cracks or gaps: Inspect the caulk periodically for any cracks or gaps and reapply as needed.
-
Avoid excessive movement: Limit excessive movement of the bathtub, as it can cause the caulk to crack or loosen prematurely.
Signs of Deterioration
Regular cleaning and proper ventilation are important for maintaining the longevity of caulk in your bathtub. Neglecting these maintenance tasks can lead to the deterioration of caulk, which can cause water leaks and damage to the surrounding areas. It is crucial to recognize the signs of deteriorating caulk to prevent further issues. Here are some common signs that indicate the need for replacing old caulk:
| Signs of Deterioration |
|---|
| Discoloration |
| Cracking |
| Peeling |
| Mold or mildew growth |
| Soft or spongy texture |
If you notice any of these signs, it is essential to take immediate action. Removing the old caulk and applying fresh caulk will ensure a watertight seal and prevent further damage. Regular maintenance and timely replacement of caulk will not only prolong the life of your bathtub but also maintain a clean and hygienic bathroom environment.
Regular Inspection Routine
It’s important to incorporate a regular inspection routine to identify any signs of deteriorating caulk in your bathroom. Regular maintenance is key to preventing water damage and ensuring the longevity of your caulk. Here are five simple steps to help you develop an effective inspection routine:
-
Check the caulking around your bathtub: Look for any cracks, gaps, or discoloration that may indicate deterioration.
-
Inspect the caulking around your shower: Pay attention to the corners, edges, and seams where water can seep through.
-
Examine the caulking around your sink: Check for any loose or peeling caulk that could allow water to seep into the countertop or cabinet below.
-
Evaluate the caulking around your toilet: Look for any signs of cracking or gaps that could lead to water leakage.
-
Inspect the caulking around your windows: Check for any gaps or cracks that could allow water to enter your bathroom.
Frequently Asked Questions
How Long Does Caulk Typically Last in a Bathtub?
Caulk in a bathtub typically lasts for several years, depending on usage and maintenance. To maintain caulk, regularly clean and dry the area to prevent mold and mildew buildup. Apply a silicone caulk and avoid excessive water exposure to prevent cracking.
Can I Use Caulk to Fix a Cracked Bathtub?
Yes, you can use caulk to temporarily fix a cracked bathtub. However, it is not a long-term solution and may require frequent reapplication. There are alternative solutions available for repairing cracked surfaces.
Is It Necessary to Remove Old Caulk Before Applying New Caulk?
Yes, it is necessary to remove old caulk before applying new caulk. By using a caulk removal tool, you can ensure a clean surface for better adhesion. This will result in a smooth and professional caulk application.
Can I Use a Hairdryer to Speed up the Curing Process of the Caulk?
Sure, using a hairdryer to speed up the curing process of caulk may seem like a brilliant idea. However, it’s important to consider the pros and cons before attempting it.
What Is the Best Way to Remove Excess Caulk From the Bathtub Surface?
To remove excess caulk from the bathtub surface, there are a few tips and tricks that work well. The best tools for removing caulk include a utility knife, a caulk scraper, and a gentle solvent.
Conclusion
In conclusion, caulking a bathtub is a simple yet crucial task that can make all the difference in maintaining the integrity of your bathroom. By using the right tools and materials, preparing the surface properly, and applying the caulk with precision, you can ensure a watertight seal that will protect your bathtub for years to come.
So, don’t underestimate the power of a well-caulked bathtub. It’s the small detail that can lead to big peace of mind and a well-maintained bathroom oasis.