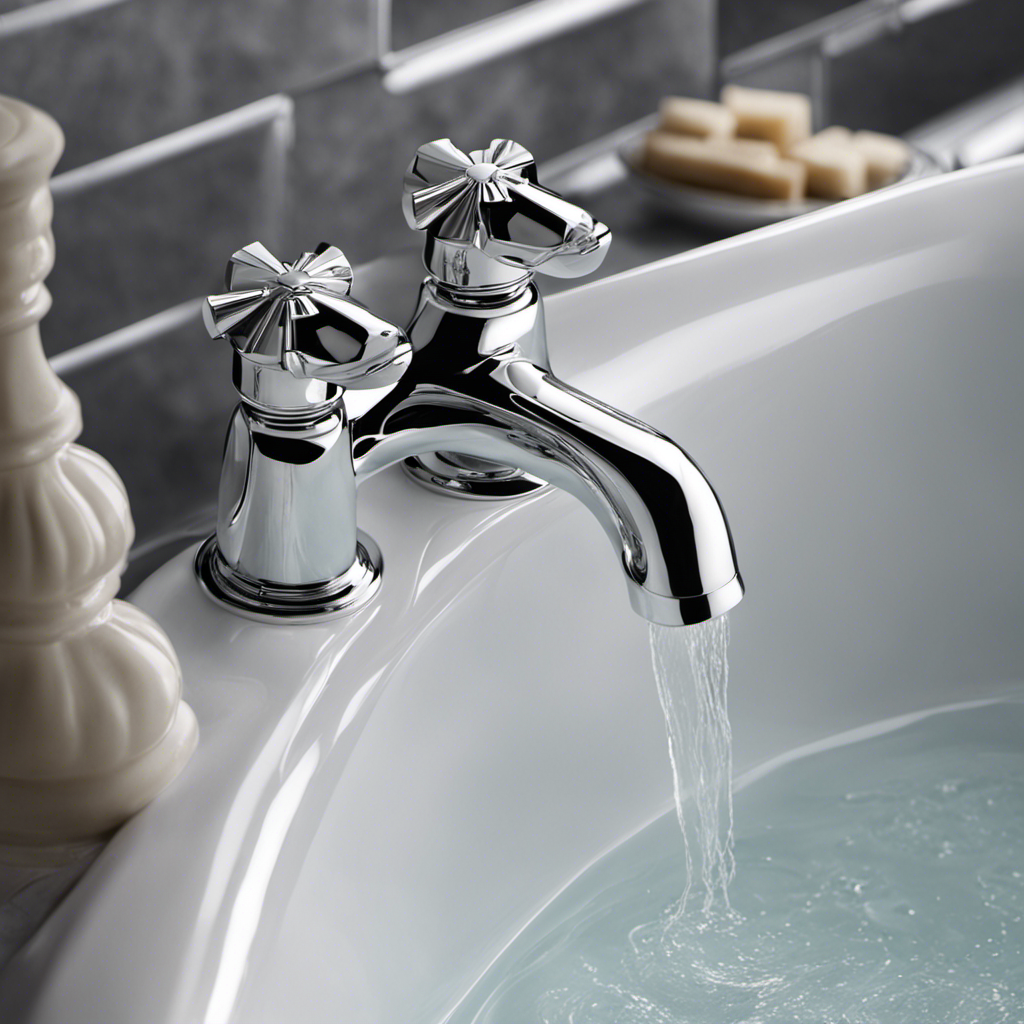

As a DIY enthusiast, I’ve encountered my fair share of leaky faucets. One common culprit? The worn-out washer in the bathtub faucet.
If you’re tired of those annoying drips and want to fix them yourself, you’re in the right place. In this step-by-step guide, I’ll show you how to change the bathtub faucet washer with ease.
With a few simple tools and a little know-how, you’ll have your faucet working like new in no time.
Let’s dive in and get those leaks under control!
Key Takeaways
- Choose the right size adjustable wrench and screwdriver to avoid damaging the faucet.
- Select the appropriate type of faucet washer for a proper seal, considering factors like durability and resistance to corrosion.
- Shut off the water supply by turning the valve clockwise and test for any leaks around the faucet.
- Carefully remove the handle and trim using the set screw and pliers, then replace the old washer with the appropriate type.

XBVV 106 PCS Faucet Washer Assortment Kit with Assorted Flat and Beveled Rubber Washers for Outdoor Garden Faucet Stem Leak Worn Replacement Repair
Multiple sizes: 106 Pcs faucet washer kit with assorted different flat beveled common sizes: 3/8, 1/4L, 1/4, 1/4M…
As an affiliate, we earn on qualifying purchases.
As an affiliate, we earn on qualifying purchases.
Tools and Materials Needed
You’ll need a few tools and materials to change the bathtub faucet washer.
First, you’ll need an adjustable wrench to loosen and tighten the faucet. It’s important to choose the right size wrench to avoid damaging the faucet.
Next, you’ll need a screwdriver to remove any screws holding the faucet in place. Make sure to use the correct type and size of screwdriver to prevent stripping the screws.
Additionally, you’ll need a new faucet washer. There are different types of faucet washers available, such as rubber, silicone, and brass. Each type has its advantages, such as durability, flexibility, or resistance to corrosion.
It’s important to choose the right washer for your specific faucet to ensure a proper seal and prevent leaks.

QHAJRYYC 58 PCS Faucet Washers Assortment Kit, Flat & Beveled Rubber Faucet Washers, Brass Bibb Screws, Multi-Size Faucet Stem Washers, Outdoor Faucet Repair Kit
Package Includes: You will get 52 multi size faucet bibb washers assortment with 6 brass screws. contains 10…
As an affiliate, we earn on qualifying purchases.
As an affiliate, we earn on qualifying purchases.
Step 1: Shut off the Water Supply
To start, make sure the water supply is shut off before proceeding with the rest of the steps. This is crucial to avoid any water damage or accidents during the faucet repair.
Here are three important things to know about properly shutting off the water supply for faucet repair:
-
Locate the water shut-off valve: It is usually found under the sink or near the water meter. Turn it clockwise to shut off the water supply to the faucet. This will prevent any water from flowing while you work on the washer replacement.
-
Test the water supply: After shutting off the valve, turn on the faucet to ensure the water flow has stopped completely. If any water continues to come out, there may be another valve that needs to be closed.
-
Double-check for leaks: Once the water supply is shut off, inspect the area around the faucet for any leaks. It is important to fix any existing leaks before proceeding with the washer replacement.
Following these steps will ensure a safe and successful faucet repair.

Amazon Basics Plumbing Adjustable Wrench with Soft Grip, Wide Mouth, 6.34 x 2.83 x 0.59 inches (LxWxH)
6 inch (150mm) wide jaw adjustable plumbing wrench with inch/metric measurement scale
As an affiliate, we earn on qualifying purchases.
As an affiliate, we earn on qualifying purchases.
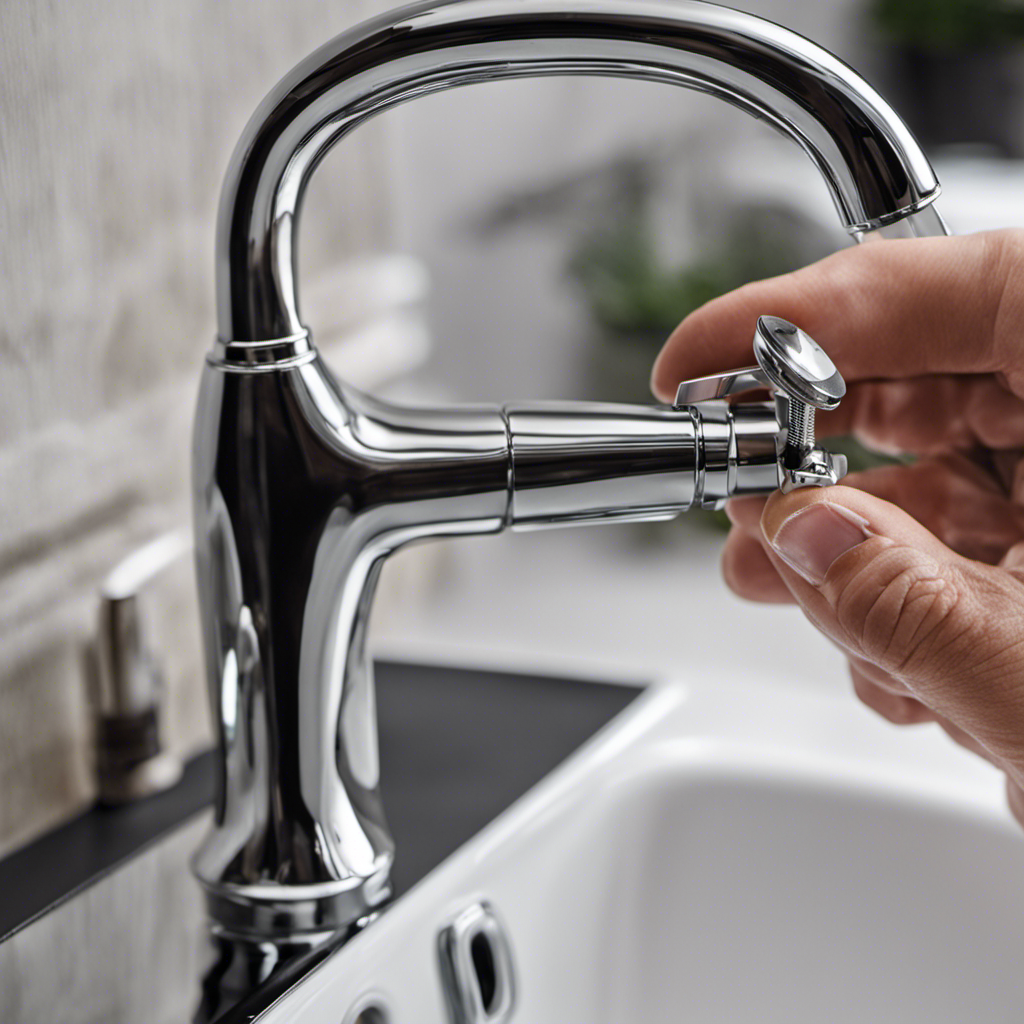
Step 2: Remove the Handle and Trim
Once the water supply is shut off, I begin by removing the handle and trim of the faucet. This step is crucial in order to access the inner components of the faucet and replace the old washer. Here is a table outlining the tools and steps required to successfully remove the handle and trim:
| Tools Needed | Steps to Remove Handle and Trim |
|---|---|
| Adjustable wrench | 1. Locate the set screw under the handle and loosen it using the wrench. |
| Screwdriver | 2. Gently pry off the handle from the base to expose the trim. |
| Pliers | 3. Use the pliers to unscrew the trim counterclockwise and remove it. |
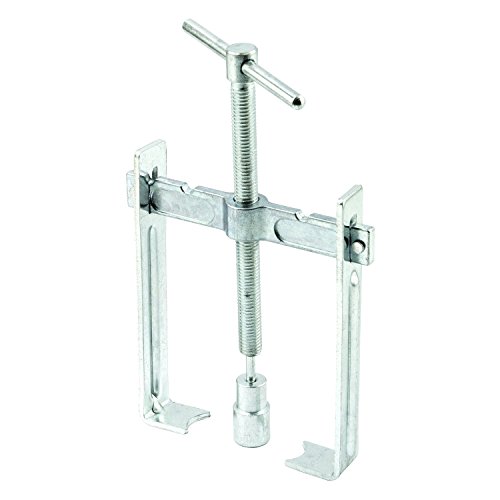
Prime-Line RP77233 Adjustable Faucet Handle and Compression Sleeve Puller (Single Pack)
Used to remove old faucet handles and seats easily
As an affiliate, we earn on qualifying purchases.
As an affiliate, we earn on qualifying purchases.
Step 3: Replace the Faucet Washer
Now, grab your pliers and carefully remove the old washer from inside the faucet.
Leaking: One of the most common signs of a worn out bathtub faucet washer is a persistent leak. If you notice water dripping from the spout even when the faucet is turned off, it’s likely that the washer needs to be replaced.
Reduced water flow: Another indication of a worn out washer is reduced water flow. If you’re experiencing a decrease in water pressure when using your bathtub faucet, it could be due to a faulty washer that is blocking the water flow.
Noisy operation: A worn out washer can cause your bathtub faucet to make loud, unpleasant noises when you turn it on or off. These noises, such as squeaking or grinding, can be a clear sign that the washer needs to be replaced.
There are different types of faucet washers available, each with its own pros and cons. Some common types include rubber washers, silicone washers, and ceramic disc washers. Rubber washers are affordable but may wear out quickly. Silicone washers are more durable and resistant to heat and chemicals. Ceramic disc washers are the most durable and long-lasting, but they tend to be more expensive.
Choose the type of washer that best suits your needs and budget.
Step 4: Reassemble the Faucet
When reassembling the faucet, make sure to carefully tighten all the connections to prevent any leaks.
After replacing the faucet washer, it is crucial to reinstall the various components of the faucet correctly.
Begin by placing the spout back onto the faucet body, ensuring that it aligns properly. Use a wrench to tighten the spout onto the body, ensuring a secure fit.
Next, attach the handles to the faucet stems, making sure they are aligned correctly and tighten them firmly.
Lastly, reattach the aerator to the end of the spout, ensuring it is screwed on tightly.
Once all the components are reassembled, it is essential to test the water flow. Turn on the water supply and check for any leaks or irregularities.
If everything looks good, congratulations on successfully reassembling your faucet. If not, double-check the connections and tighten them further if necessary.
Conclusion
In conclusion, changing a bathtub faucet washer is a relatively simple task that can be accomplished with a few basic tools and materials. By following the steps outlined in this article, you can easily replace the worn-out washer and restore proper functioning to your faucet.
Remember to shut off the water supply before beginning the process and carefully reassemble the faucet afterwards. With a little time and effort, you can have your faucet working like new again, without breaking the bank.
As the saying goes, ‘A stitch in time saves nine,’ so don’t delay in fixing that leaky faucet!