So, you’ve got a leaky bathtub spout, huh? Well, fear not, my friend, because I’ve got just the solution for you. In this handy guide, I’m going to walk you through the steps to fix that pesky problem yourself.
No need to call a plumber or spend a fortune on repairs. With a few simple tools and a little know-how, you’ll have your bathtub spout working like new in no time.
So, let’s dive in and get to fixing, shall we?
Key Takeaways
- Properly identify and troubleshoot the problem with the bathtub spout before proceeding with repairs or replacements.
- Shut off the water supply and remove the old bathtub spout by locating the main water valve, closing it, and using tools to remove the spout.
- Install a new bathtub spout by choosing the appropriate type, applying plumber’s tape for a watertight seal, and securely screwing it onto the pipe.
- Test the functionality of the new bathtub spout by checking water flow, engagement of the diverter valve, and operation of the handle.
Ensurix 1200W Macerator Pump – 2800GPH, 28FT Vertical Lift Toilet Water Pump with Anti-Backflow, PCB Smart Control, IPX4 Waterproof, Macerator Pump Basement for Toilet, Sink, Bathroom etc.
STRONG POWER & HIGH EFFICIENCY – Equipped with a 1.6HP motor, this macerator pump supports 28ft vertical and...
As an affiliate, we earn on qualifying purchases.
Identify the Problem With Your Bathtub Spout
First, you need to determine what’s wrong with your bathtub spout. Identifying the problem is the first step in troubleshooting.
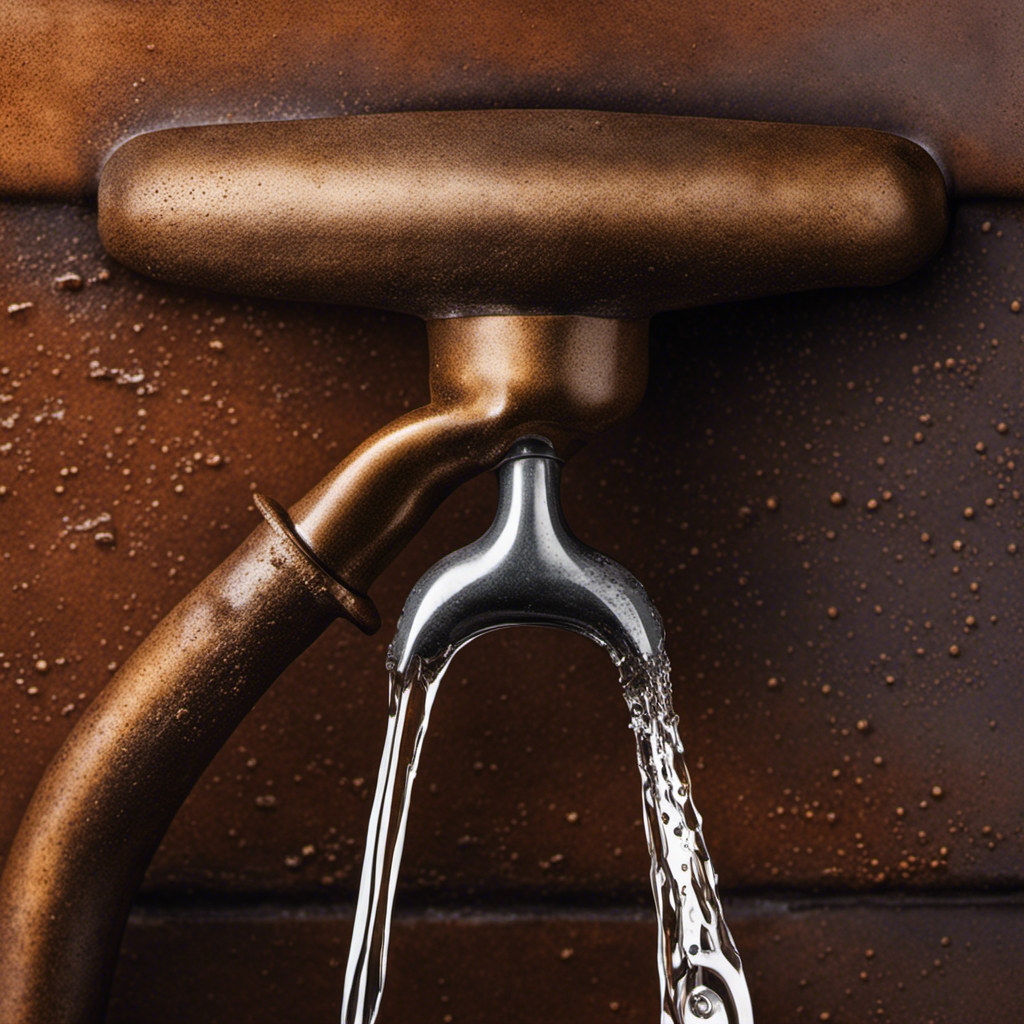
Start by checking if the water flow is weak or if there are any leaks around the spout. If the water flow is weak, it could be due to a clogged aerator or a problem with the diverter valve. Leaks could indicate a loose connection or a worn-out gasket.
Inspect the spout for any visible damage or corrosion. Additionally, listen for any unusual sounds when you turn on the water.
These troubleshooting steps will help you identify the specific issue with your bathtub spout, allowing you to proceed with the appropriate repairs or replacements.

600W Macerating Toilet for Basement,Upflush Toilet System Connect Dual Flush & Rear Outlet Toilet, Sink & Tub,included Toilet Bowl, Water Tank & Macerator Pump SUPERFLO
Macerating toilet system: Toilet pump sewage upwards to 32.8 feet and/or 263 feet horizontally, effectively solving sewage problems...
As an affiliate, we earn on qualifying purchases.
Gather the Necessary Tools for the Repair
Before starting, make sure you have all the tools you’ll need for the repair. Identifying common bathtub spout problems and troubleshooting bathtub spout issues can be a daunting task. However, with the right tools and knowledge, you can easily fix these problems yourself. Here is a table outlining the necessary tools for the repair:
| Tools | Description |
|---|---|
| Adjustable wrench | Used to loosen and tighten connections |
| Screwdriver | Used to remove screws |
| Plumber’s tape | Used to create a watertight seal |
| Pipe cutter | Used to cut and remove damaged pipes |
| Replacement parts | Such as spout diverter or O-rings |
Simple Project 750W PRO Macerating Toilet System - High Powerful, Upflush Toilet for Basement with 4 Water Inlet & Attics, Dual Flush Toilets with Macerator Pump, Quiet Operation, Space Saving
【Powerful 750W Macerator Pump】This compost toilet Equipped with a 750W motor and sharp stainless steel blades to efficiently...
As an affiliate, we earn on qualifying purchases.
Shut off the Water Supply to the Bathtub
When it comes to repairing a bathtub spout, one of the most important steps is shutting off the water supply. This is crucial because it ensures that no water is flowing through the pipes while you work, preventing any potential leaks or accidents.
To shut off the water, locate the main water valve for your home and turn it clockwise until it is fully closed. This will effectively stop the water flow to the bathtub, allowing you to safely proceed with the repair.
Importance of Shutting off Water
It’s important to shut off the water before attempting to fix a bathtub spout. Proper maintenance is crucial to prevent water damage and costly repairs. Here are four reasons why shutting off the water is essential:
-
Avoid leaks: By turning off the water supply, you prevent any potential leaks during the repair process, keeping your bathroom dry and damage-free.
-
Safety first: Shutting off the water ensures a safe environment, reducing the risk of accidental water flow or pressure-related accidents.
-
Easier repairs: With the water supply turned off, you have complete control over the situation, allowing you to focus on fixing the spout without any distractions.
-
Minimize water waste: By shutting off the water, you conserve water resources and contribute to environmental sustainability.
Now that you understand the importance of shutting off the water, let’s move on to the next section: the steps for shutting off the water supply to your bathtub spout.
Steps for Shutting off
To properly shut off the water, you’ll need to locate the main water valve in your home. Turning off the water supply is an essential step when fixing a bathtub spout to prevent any leaks or accidents.
Follow these steps for turning off the water and ensure your safety throughout the process.
First, locate the main water valve, usually found near the water meter or in the basement. Use a wrench to turn the valve clockwise until it is fully closed. This will stop the flow of water to your entire home. It’s important to exercise caution and wear protective gloves when handling the valve.
Once the water is shut off, you can proceed to remove the old bathtub spout.
1500W Macerator Pump with Grinding Blade Toilet Pump Utility Sink Pump Upflush to 32.8FT 2800GPH Macerating Toilet System with 4 Water Inlets 2 Outlets for Toilet Sink Shower Laundry Kitchen Basement
FULLY AUTOMATIC MACERATOR PUMP : 1500W | 110V-120V/60Hz | 32.8 ft Vertical/328 ft Horizontal | 8000 RMP. Designed...
As an affiliate, we earn on qualifying purchases.
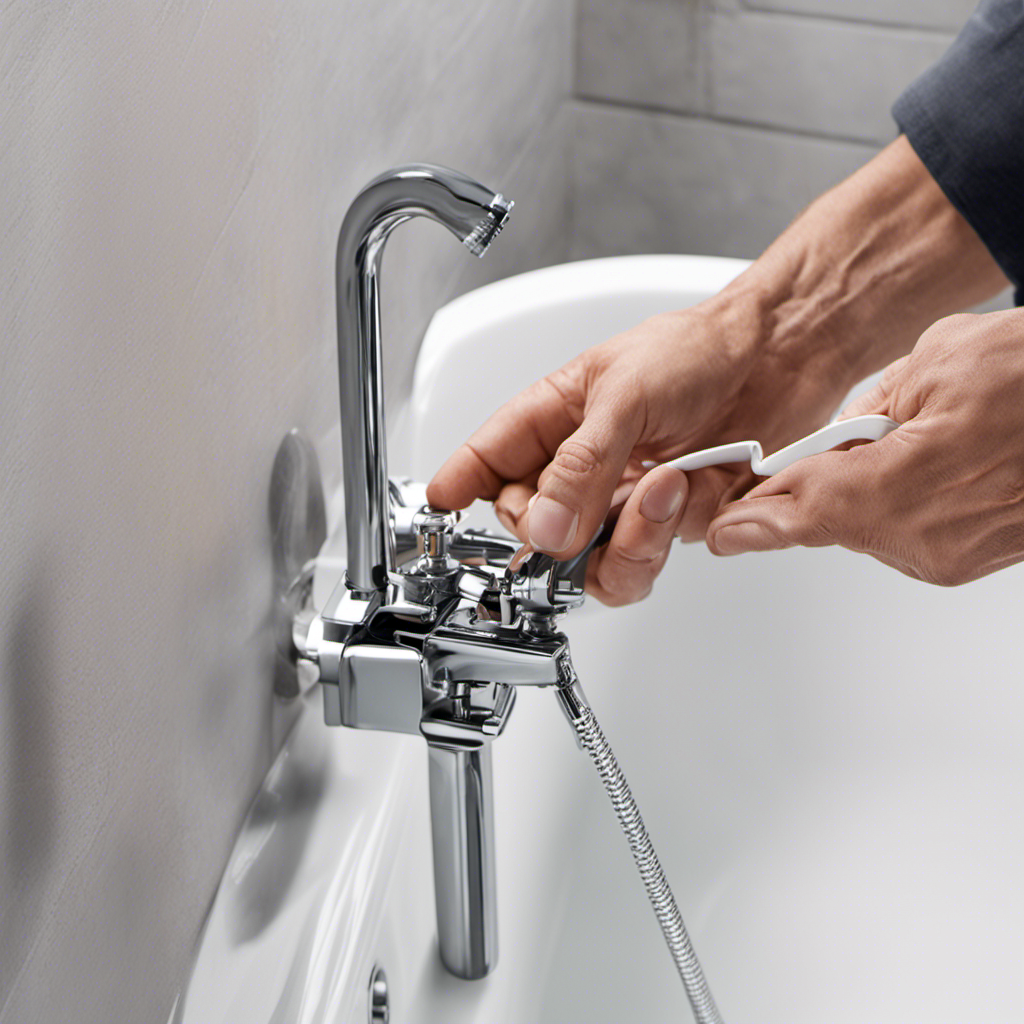
Remove the Old Bathtub Spout
First, you’ll need to locate the set screw on the underside of the old bathtub spout. This screw holds the spout in place and needs to be removed before you can proceed with the spout replacement.
Here are the steps to remove the old bathtub spout:
- Use a screwdriver or Allen wrench to loosen and remove the set screw.
- Once the screw is removed, grip the spout firmly and twist it counterclockwise to unscrew it from the pipe.
- If the spout is difficult to remove, apply some penetrating oil or heat it with a hairdryer to loosen any mineral deposits or corrosion.
- Once the spout is unscrewed, pull it straight out from the wall pipe.
Install a New Bathtub Spout
Now that we have successfully removed the old bathtub spout, it’s time to install a new one.
When choosing the right bathtub spout, there are a few factors to consider. First, determine whether you need a wall-mounted or deck-mounted spout. Wall-mounted spouts are attached to the wall above the tub, while deck-mounted spouts are installed directly onto the tub itself.
Next, consider the style and finish that best matches your bathroom decor.
Once you have selected the perfect spout, it’s time to install it. Start by applying plumber’s tape to the pipe threads to ensure a tight seal. Then, simply screw the spout onto the pipe, making sure it is secure.
Test the New Bathtub Spout for Functionality
Before you can fully enjoy your newly installed bathtub spout, it’s important to ensure that it functions properly. To do this, you should perform a water flow check to ensure that the water is flowing smoothly and at the desired rate.
Additionally, conducting a handle operation test will confirm that the spout’s handle operates smoothly and without any resistance.
Lastly, it’s crucial to adjust the temperature properly to ensure a comfortable and safe bathing experience.
Water Flow Check
To check the water flow, make sure the bathtub spout is fully open and the diverter valve is engaged. This step is crucial in troubleshooting issues with water pressure and determining if a spout replacement is necessary. Here’s a simple process to follow:
-
Turn on the water: Start by fully opening the bathtub spout. This will allow water to flow freely and give you an accurate reading of the water pressure.
-
Observe the flow: Pay attention to the water coming out of the spout. Is it strong and consistent? Or is it weak and sputtering? This will help you determine if there are any blockages or issues with the water flow.
-
Check the diverter valve: Ensure that the diverter valve is engaged properly. This valve controls the flow of water between the spout and the showerhead. If the valve is not engaged correctly, it can affect the water flow.
-
Note any abnormalities: If you notice any irregularities with the water flow, such as low pressure or inconsistent flow, it may indicate a problem with the spout. Consider replacing it to improve the water pressure and overall functionality of your bathtub.
Handle Operation Test
Make sure you test the operation of the handle to ensure it is working properly. This is an important step when troubleshooting bathtub spout issues. To assist you in this process, I have provided a table below that outlines common handle problems and their potential solutions.
| Handle Problem | Potential Solution |
|---|---|
| Loose handle | Tighten the handle screw or replace it |
| Stiff handle | Lubricate the handle mechanism |
| Handle not turning | Check for obstructions and clear if necessary |
Proper Temperature Adjustment
Now that we’ve tested the handle operation, let’s move on to the next step: proper temperature adjustment.
It’s important to have control over the temperature of the water coming out of your bathtub spout for a comfortable bathing experience. However, there are some common issues that can arise when adjusting the temperature. Here are a few things to keep in mind:
-
Check the temperature control valve: Ensure that the valve is functioning properly and not stuck in one position.
-
Monitor the water temperature: Use a thermometer to check the actual temperature of the water coming out of the spout.
-
Adjust the mixing valve: If the water is too hot or too cold, adjust the mixing valve accordingly to achieve the desired temperature.
-
Consider water pressure: High water pressure can affect temperature control, so make sure the pressure is at an appropriate level.
By following these steps, you can achieve proper temperature control in your bathtub.
Now, let’s move on to the next section where we’ll discuss how to clean up and enjoy your fixed bathtub spout.
Clean up and Enjoy Your Fixed Bathtub Spout
Once you’ve finished fixing your bathtub spout, it’s time to clean up and start enjoying your newly repaired fixture. Cleaning the spout regularly is essential for maintaining its functionality and appearance.
To remove any mineral deposits or grime, use a mixture of warm water and mild soap. Gently scrub the surface with a soft cloth or sponge, paying attention to hard-to-reach areas. Avoid using abrasive cleaners or harsh chemicals, as they can damage the finish.
After cleaning, rinse the spout thoroughly to remove any soap residue. To maintain the spout’s performance, it’s also important to check for any leaks or loose connections periodically. Tighten any loose fittings and repair any leaks promptly to prevent further damage.
Conclusion
In conclusion, fixing a bathtub spout is a simple and satisfying task. By following the steps outlined in this article, you can swiftly solve the problem and restore the functionality of your spout.
Remember to gather the necessary tools, shut off the water supply, remove and install the new spout, and finally test it for functionality.
With a little effort and attention to detail, you can enjoy a fixed and flawlessly flowing bathtub spout.
So, start your journey to a rejuvenating and refreshing bathing experience today!