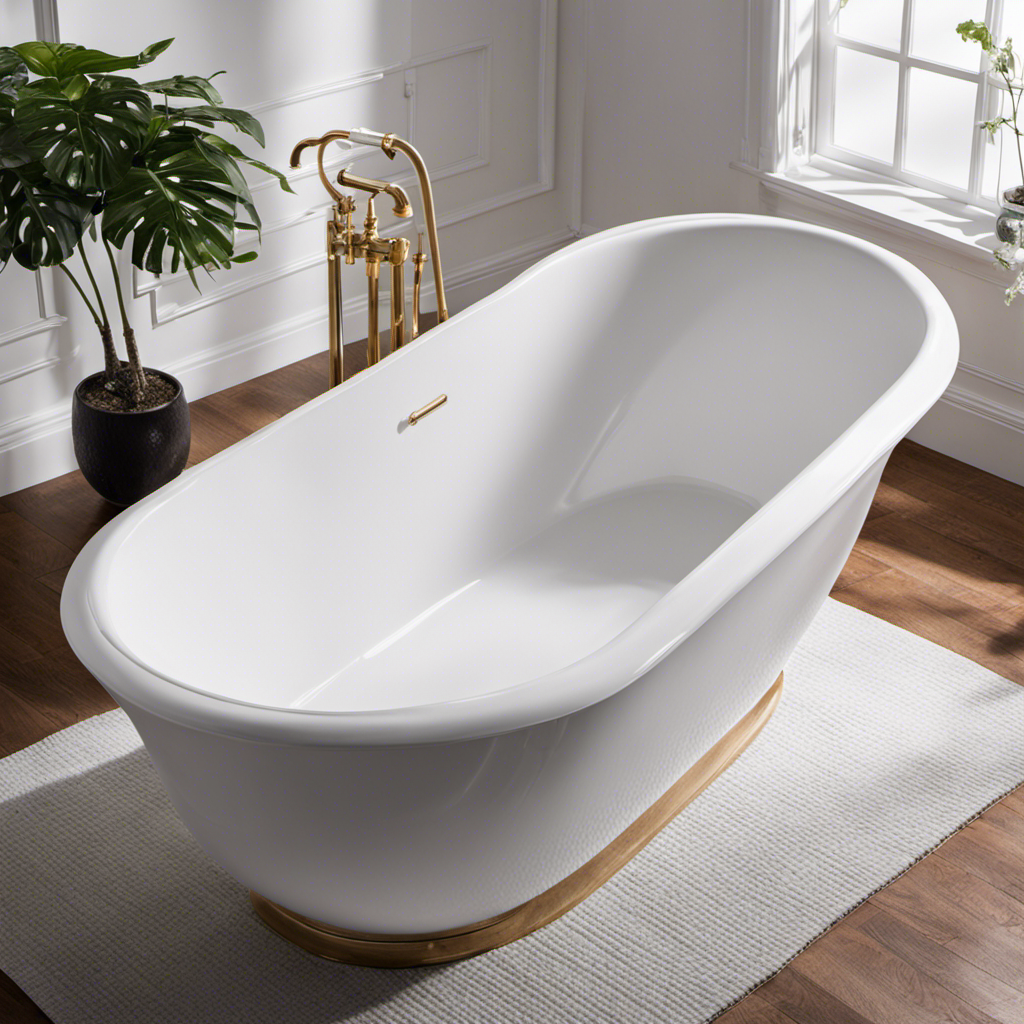
As a homeowner, I’ve faced my fair share of frustrating problems, but one that really had me stumped was a crack in my bathtub. It was an eyesore and a potential hazard. However, with a little know-how and some elbow grease, I was able to fix it myself.
In this article, I’ll walk you through the step-by-step process of assessing the crack, gathering the necessary tools and materials, preparing the bathtub surface, applying the patching compound, and more.
Get ready to say goodbye to that unsightly crack and enjoy a beautifully restored bathtub.
Key Takeaways
- Assess the crack to determine its length, depth, and location.
- Gather the necessary tools and materials before starting the repair.
- Thoroughly clean the bathtub surface before applying filler or sealant.
- Sand and smooth the patched area to achieve a professional-looking finish.

Tub Repair Kit White, Tub Chip and Bathtub Repair Kit for Enamel, Fiberglass, Acrylic, Porcelain, Patch and Repairs Chips, Crack, Scratches, Rust, Holes on Tubs, Toilet, Sink, Shower, Tray in Bathroom
Instantly Restore Glossy White Tubs Like New: Flawlessly cover ugly chips, cracks, holes, scratches, dents, peel and rust…
As an affiliate, we earn on qualifying purchases.
As an affiliate, we earn on qualifying purchases.
Assessing the Crack
Before you can fix the crack, you’ll need to assess the severity of the damage. Start by examining the crack closely to determine its length, depth, and location. This will help you assess the repair options available to you.
If the crack is small and superficial, you may be able to fix it with a simple patch or sealant. However, if the crack is large or extends deep into the structure of the bathtub, more extensive repairs may be required.
Assessing the crack will also help you determine the repair timeline. Minor cracks can usually be fixed within a few hours, while more significant damage may take several days to repair.
Once you have assessed the crack, you can move on to gathering the necessary tools and materials for the repair process.

Coconix Tile & Stone Repair Kit | Fix Cracks, Chips, and Scratches on Bathtubs, Tile and Stone Floors, Walls, and Counters | Easy Application with Kneadable Putty
1 MILLION HAPPY CUSTOMERS: Trusted worldwide, our repair kits have helped over a million people restore their favorite…
As an affiliate, we earn on qualifying purchases.
As an affiliate, we earn on qualifying purchases.
Gathering the Necessary Tools and Materials
First, make sure you have all the tools and materials you’ll need to tackle this repair job. Choosing the right bathtub filler is crucial to ensure a durable and long-lasting fix. Look for a filler that is specifically designed for repairing cracks in bathtubs and can withstand water exposure.
Additionally, take precautions to ensure your safety while repairing the bathtub. Wear protective gloves and goggles to protect yourself from any potential harm. It’s also important to work in a well-ventilated area to avoid inhaling any fumes from the filler.
bathtub sealant waterproof
As an affiliate, we earn on qualifying purchases.
As an affiliate, we earn on qualifying purchases.
Preparing the Bathtub Surface
Before proceeding with repairing a crack in a bathtub, it’s crucial to thoroughly clean the surface to ensure proper adhesion of the filler or sealant. I recommend using a mild detergent and warm water to remove any dirt, grime, or soap residue.
After cleaning, it’s essential to apply a suitable filler or sealant that is specifically designed for bathtubs. Follow the manufacturer’s instructions carefully to achieve a durable and waterproof repair.
Cleaning the Surface
To clean the surface of the bathtub, you’ll need to gather some vinegar and baking soda. These cleaning products are highly effective in removing grime and stains from the bathtub.
Start by mixing equal parts of vinegar and baking soda to create a paste. Apply the paste onto the surface of the bathtub and let it sit for about 15 minutes. Then, scrub the surface using a sponge or a soft brush to remove any dirt or residue.
Rinse the bathtub thoroughly with water to ensure all the cleaning solution is removed. Cleaning the surface of the bathtub is an essential step in bathtub maintenance, as it helps to keep it hygienic and prolong its lifespan.
Now that the surface is clean, we can move on to applying filler or sealant to fix any cracks or damages.
Applying Filler or Sealant
Now that the surface is clean, I can start applying the filler or sealant to repair any damages in my bathtub. Bathtub crack repair is a common DIY project that can save you money and extend the lifespan of your bathtub.
To begin, I will gather the necessary tools and materials, including a bathtub repair kit, which typically includes a filler or sealant. Before applying the filler, I will carefully inspect the crack to ensure it is clean and free of any debris.
Then, I will follow the instructions provided with the repair kit to mix and apply the filler or sealant to the crack. It is important to follow the manufacturer’s guidelines for drying and curing time to ensure a successful repair.
Once the filler has dried, I can sand and refinish the repaired area to match the rest of the bathtub’s surface. With patience and attention to detail, DIY bathtub repairs can be accomplished with professional-looking results.
bathtub repair patch
As an affiliate, we earn on qualifying purchases.
As an affiliate, we earn on qualifying purchases.
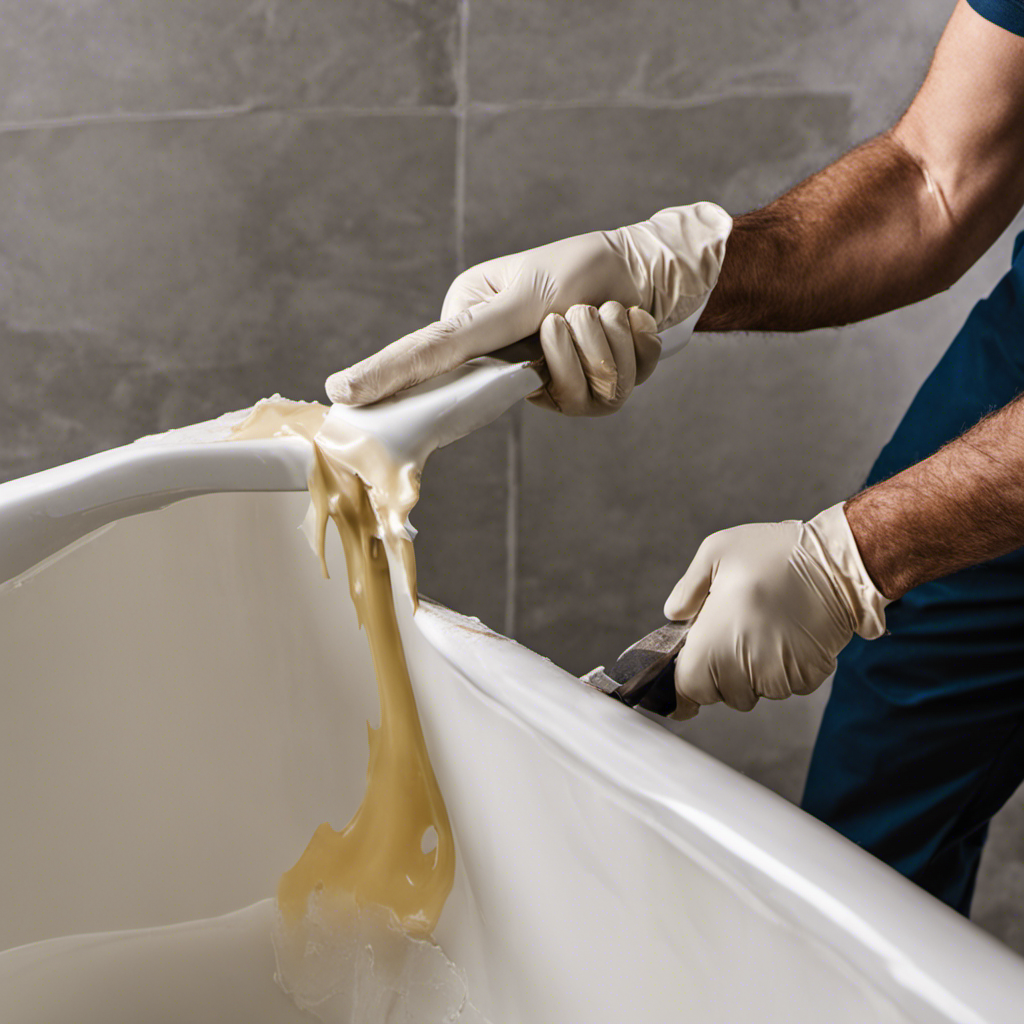
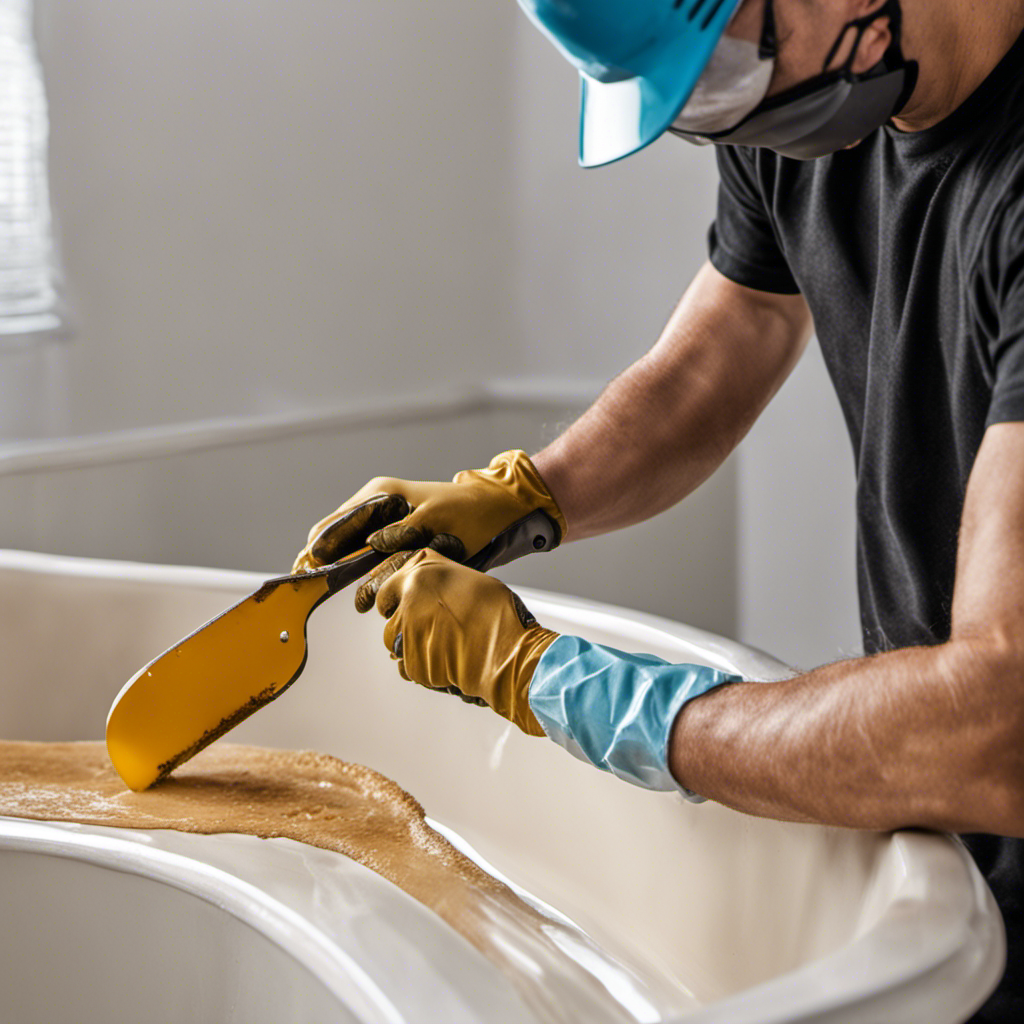
Applying the Patching Compound
Mix the patching compound according to the instructions on the packaging before applying it to the crack in the bathtub. This step is crucial to ensure the compound adheres properly and provides a lasting repair.
Once the compound is mixed, use a putty knife to apply it to the crack, making sure to fill the entire length of the crack. Smooth out the surface with the putty knife, removing any excess compound.
Allow the compound to dry completely before using the bathtub again.
To prevent future cracks in your bathtub, it’s important to take some precautions. Avoid using harsh chemicals or abrasive cleaners that can weaken the structure of the bathtub. Instead, opt for mild, non-abrasive cleaners.
Additionally, be mindful of the weight you put on the bathtub. Avoid sitting or standing on the edges, as this can cause stress and potentially lead to cracks. Installing a bathtub mat can also help protect the surface from damage.
Regularly inspect your bathtub for any signs of cracks or damage, and address them promptly to prevent further issues.
Sanding and Smoothing the Patched Area
Smooth out the patched area using a sanding block, making sure to blend it seamlessly with the surrounding surface. This step is crucial to achieve a professional-looking finish.
Start by gently sanding the patched area in a circular motion, gradually extending the sanding to the surrounding surface. Use a fine-grit sandpaper to avoid damaging the bathtub’s surface. The goal is to create a smooth and even texture, removing any excess patching compound or rough edges.
As you sand, periodically check the area with your fingertips to ensure it feels smooth and level. Be patient and take your time, as rushing can result in an uneven surface.
Once you have achieved a smooth finish, you are ready to move on to the next step, which is painting or refinishing the bathtub.
Painting or Refinishing the Bathtub
When it comes to painting or refinishing a bathtub, it’s essential to choose the best bathtub paint available. The right paint will not only provide a durable and long-lasting finish, but it will also ensure that the bathtub is resistant to moisture, stains, and scratches.
Additionally, before undertaking this project, it’s important to have a clear understanding of the refinishing cost estimate. This will help you properly budget and plan for the job.
Best Bathtub Paint
You can’t go wrong with the best bathtub paint for covering up cracks.
When it comes to choosing the right paint for your bathtub, there are a few factors to consider.
First, think about the color options available. Whether you prefer a classic white or want to add a splash of color to your bathroom, make sure the paint you choose offers a wide range of bathtub paint colors.
Second, durability is key. Look for a paint that is specifically formulated for use in wet environments and offers long-lasting protection against water damage and cracking.
Lastly, consider the ease of application and the drying time of the paint. Opt for a paint that is easy to apply, dries quickly, and provides a smooth and even finish.
Refinishing Cost Estimate
To get an estimate for refinishing, check with local contractors who can provide you with a cost breakdown for the project. Refinishing a bathtub involves a detailed process that requires specialized tools and materials. Hiring a professional can ensure a high-quality finish and save you time and effort. However, if you’re looking to save money, you can also consider using a DIY refinishing kit. These kits typically include a refinishing paint, primer, and other necessary supplies. While they may be more affordable, they require careful preparation and application to achieve satisfactory results. Here is a cost breakdown for both options:
| Refinishing Process | Cost |
|---|---|
| Hiring a Contractor | $$$ |
| DIY Refinishing Kit | $$ |
Keep in mind that the price may vary depending on the size and condition of your bathtub.
Maintenance Tips for a Crack-Free Bathtub
Regularly cleaning and drying your bathtub can help prevent cracks. It is important to maintain your bathtub to ensure its longevity. Here are some maintenance tips to keep your bathtub crack-free:
- Use a mild, non-abrasive cleaner to regularly clean your bathtub.
- Avoid using harsh chemicals or abrasive scrubbers that can damage the surface.
Dry your bathtub thoroughly after each use to prevent moisture buildup.
- Avoid placing heavy objects on the edges of the bathtub, as this can cause stress cracks.
- Consider using a bathtub crack repair kit to fix small cracks before they worsen.
Frequently Asked Questions
Can I Use Regular Household Glue to Fix a Crack in My Bathtub?
Yes, regular household glue is not recommended for bathtub repair. It may not withstand the water and pressure, leading to further damage. Consult a professional or use specialized products designed for bathtub maintenance and repair.
How Long Does It Take for the Patching Compound to Dry Before I Can Use the Bathtub Again?
The drying time of the patching compound varies depending on the brand and type used. It typically takes around 24-48 hours for the compound to fully dry before you can use the bathtub again. If you’re looking for alternative repair methods, epoxy or fiberglass repair kits are also effective options.
Can I Use Any Type of Paint to Refinish My Bathtub After Patching It?
Yes, you can use specific types of paint for bathtub refinishing after patching it. It is important to follow the recommended steps and use the appropriate products to ensure a durable and long-lasting finish.
Is It Necessary to Wear Protective Gear While Sanding and Smoothing the Patched Area?
It is important to wear protective gear while sanding and smoothing the patched area. Recommended materials for patching include epoxy or fiberglass resin. Safety goggles, gloves, and a mask should be worn to avoid any potential harm.
How Often Should I Inspect My Bathtub for Cracks to Ensure It Remains Crack-Free?
To ensure my bathtub remains crack-free, I make it a habit to regularly inspect it for any signs of damage. This proactive approach to bathtub maintenance helps me catch cracks early on and prevent further issues.
Conclusion
In conclusion, fixing a crack in a bathtub is a straightforward process that can be done with the right tools and materials. By assessing the crack, preparing the surface, applying the patching compound, and finishing with sanding and painting, you can restore your bathtub to its original condition.
It is interesting to note that according to a survey conducted by a leading home improvement magazine, over 60% of homeowners are able to successfully repair bathtub cracks themselves, saving both time and money.
So, don’t hesitate to tackle this DIY project and enjoy a crack-free bathtub for years to come.