So, you’ve finally decided to tackle the daunting task of removing that old bathtub. Well, fear not! In this step-by-step guide, we’ll walk you through the process of safely and effectively removing your old bathtub.
You’ll be amazed at how easy it is once you have the right tools and materials gathered. So, roll up your sleeves and get ready to bid farewell to that dated bathtub.
It’s time for a fresh start in your bathroom!
Key Takeaways
- Assess the condition of the old bathtub before proceeding with removal.
- Gather the necessary tools and materials for the removal process.
- Disconnect the plumbing and water supply before removing the bathtub.
- Remove any surrounding fixtures or tiles carefully to avoid damage.

Instant Pot 4QT RIO Mini 7-in-1 Multi-Cooker, Pressure Cooker, Slow cook, Sauté, Steam, Rice Maker, Yogurt, & Warmer, Black, 4 Quarts
- 7-in-1 Multi-Cooker Functions: Pressure, slow, sauté, steam, rice, yogurt, warm
- Compact and Space-Saving: Mini size with full cooking surface
- Ideal for Small Meals: 4-quart capacity for up to 4 servings
As an affiliate, we earn on qualifying purchases.
Assessing the Condition of the Old Bathtub
You should start by checking if the old bathtub has any cracks or leaks. Evaluating the durability of the bathtub is important before removing it.
First, examine the surface for any visible cracks or damage. Use a flashlight to inspect the underside of the bathtub as well. Look for any signs of water leakage, such as dampness or discoloration.
If you find any cracks or leaks, it’s essential to address them before proceeding with the removal. Consider alternative options if the bathtub is severely damaged or if repairs would be too costly. This could include replacing the bathtub with a new one or exploring other options like a shower stall or walk-in tub.
Taking the time to assess the condition of the old bathtub will help you make an informed decision about the next steps in the removal process.
Gathering the Necessary Tools and Materials
To start, gather all the necessary tools and materials for the bathtub removal process. Here are three essential items you will need:
- Safety goggles and gloves: Protect yourself from any potential hazards, such as sharp edges or debris.
- Pry bar and hammer: These tools will help you remove the old bathtub by loosening and prying away any screws, nails, or adhesive.
- Bucket and drop cloth: Place a bucket nearby to collect any water or debris that may come out during the removal process. Use a drop cloth to protect the surrounding area from scratches or damage.
Once you have these tools ready, you can move on to the next step of removing the old bathtub. Remember to choose the right replacement bathtub that fits your needs and preferences.
Additionally, it is important to properly dispose of the old bathtub to comply with waste management regulations.
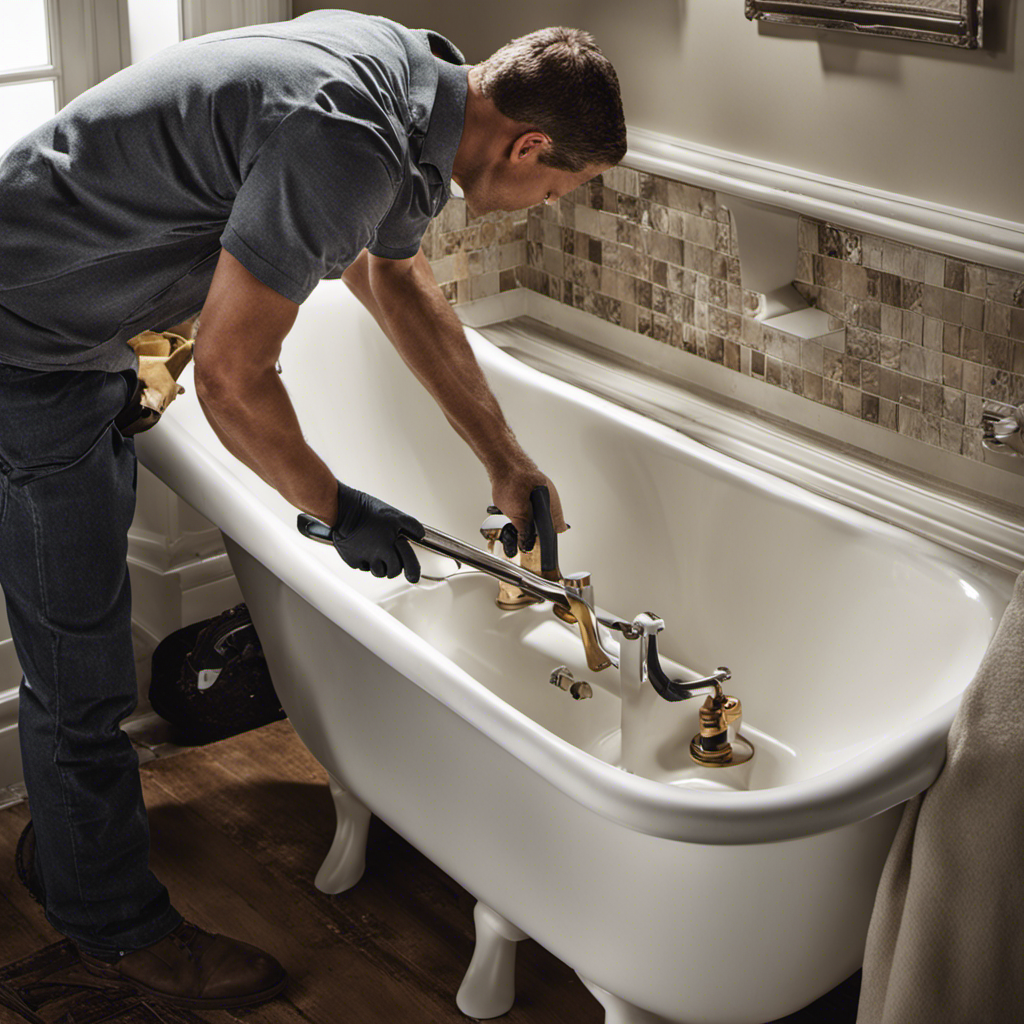
Disconnecting the Plumbing and Water Supply
Before starting, make sure you’ve turned off the water supply and disconnected the plumbing to safely disconnect the bathtub. Inspecting for any leaks is crucial to ensure a smooth removal process.
To drain the water supply, locate the shut-off valve, usually found under the sink or near the bathtub. Turn it clockwise to close and stop the water flow.
Next, disconnect the plumbing by following these steps:
-
Remove the access panel: Look for a panel near the bathtub, usually in the wall behind it. Use a screwdriver to unscrew the panel and expose the plumbing connections.
-
Disconnect the drain: Locate the drainpipe connected to the bathtub drain and use a wrench to loosen the nut. Once loose, pull the drainpipe away from the bathtub drain.
-
Disconnect the water supply lines: Use a wrench to remove the nuts connecting the water supply lines to the bathtub. Once loosened, gently pull the lines away from the bathtub.
Removing Any Surrounding Fixtures or Tiles
After draining the water supply and disconnecting the plumbing, it’s time to assess the surrounding fixtures and tiles. Here are three important steps to follow for removing any fixtures or tiles:
-
Patching and repairing any damage to the walls or floor: Start by inspecting the walls and floor around the bathtub for any signs of damage. If there are any cracks, holes, or loose tiles, it’s important to patch them up or repair them before proceeding.
-
Removing old fixtures: Carefully remove any fixtures attached to the walls, such as towel racks or soap dishes. Use a screwdriver or a wrench to disconnect them from the wall, being cautious not to damage the surrounding tiles or walls.
-
Removing old tiles: Once the fixtures are removed, it’s time to remove the tiles. Start by using a grout saw or a utility knife to cut through the grout lines around the tiles. Then, gently pry the tiles away from the wall using a putty knife or a chisel, being careful not to damage the underlying wall or floor.
After removing the fixtures and tiles, you can proceed with installing new fixtures and tiles to match the new bathtub.
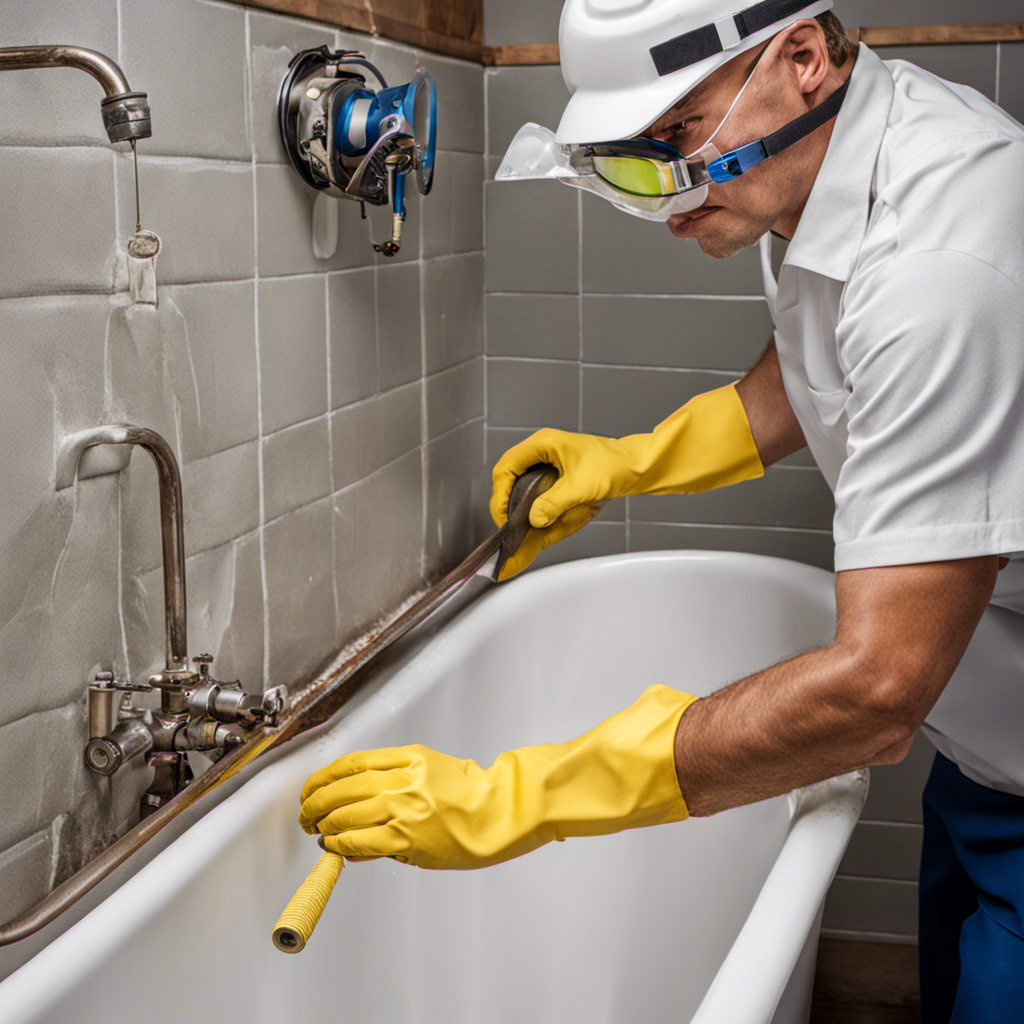
Removing the Old Bathtub Safely and Effectively
It’s essential to ensure the safe and effective removal of the bathtub when you’re planning a bathtub replacement or disposal. Here’s a step-by-step guide to help you through the process.
First, gather all the necessary tools: a pry bar, adjustable wrench, utility knife, and safety goggles.
Turn off the water supply and remove the drain cover. Disconnect the drain pipe using the adjustable wrench.
Next, remove any surrounding fixtures like faucets and handles.
Use the utility knife to cut through the caulk or sealant along the edges of the bathtub.
Once the caulk is cut, carefully pry the bathtub away from the walls, starting from one corner and working your way around. Take your time to avoid damaging the walls or floor.
Frequently Asked Questions
How Do I Prepare the Area Before Removing the Old Bathtub?
To prepare the area before removing the old bathtub, take safety precautions by wearing gloves and goggles. Gather the necessary tools such as a utility knife, pry bar, and pliers. Now, let’s move on to the step-by-step process.
Can I Remove a Bathtub Without Professional Help?
You can remove a bathtub without professional help by using alternative methods. However, it’s important to take safety precautions to avoid injuries. Here’s a step-by-step guide to help you with the process.
How Long Does It Usually Take to Remove an Old Bathtub?
To remove an old bathtub, it usually takes a few hours. Some factors that may affect the time include the complexity of the plumbing and the type of bathtub. Consider these bathtub removal tips and the potential bathtub removal cost before starting the project.
What Should I Do if the Old Bathtub Is Stuck or Difficult to Remove?
If your old bathtub is stuck or difficult to remove, take safety precautions first. Try alternative methods like using a pry bar or cutting through the tub. Seek professional help if needed.
What Are Some Common Mistakes to Avoid During the Bathtub Removal Process?
Common mistakes to avoid during the bathtub removal process are not turning off the water supply, not protecting the surrounding area, not wearing protective gear, and not disconnecting the plumbing properly.
Conclusion
In conclusion, you’ve successfully removed your old bathtub! Congratulations on a job well done.
By following the step-by-step instructions and using the right tools, you were able to safely and effectively remove the tub.
Remember, Rome wasn’t built in a day, and neither was your bathroom renovation. Patience is a virtue, and with a little elbow grease, you can achieve great things.
So don’t throw in the towel just yet, keep pushing forward and soon enough, you’ll have the bathroom of your dreams.