Are you tired of dealing with a stubborn bathtub stopper pop-up? Well, fret no more! In this step-by-step guide, we’ll show you how to easily remove that pesky stopper and get your bathtub back in working order.
With just a few tools and a little bit of know-how, you’ll be able to tackle this task like a pro.
So, grab your wrench and let’s dive in!
Key Takeaways
- The tools and materials needed for removing a bathtub stopper pop-up include pliers, a screwdriver, an access panel, screws, and the stopper assembly.
- The bathtub stopper pop-up can be located and identified in the drain area, and it can be a toe-touch, lift-and-turn, or push-pull stopper. It may also be clogged with debris or hair.
- To remove the overflow plate and trip lever mechanism, you need to identify the type of stopper, remove the screws securing the overflow plate, pull the plate away from the wall, and detach the trip lever cover plate and drain linkage.
- To detach the stopper assembly, you need to unscrew the top cap, loosen the retaining nut, remove the rod from the lever, and lift the stopper out of the drain opening.

HAUTMEC Tub Drain Remover Wrench Tool Heavy Duty Aluminum Shower Bathtub Drain Removal Tool PL0030
The dual ended tub drain wrench fits most inner diameter 1 3/8" and 1 1/2" tub drain shoe,ideal…
As an affiliate, we earn on qualifying purchases.
As an affiliate, we earn on qualifying purchases.
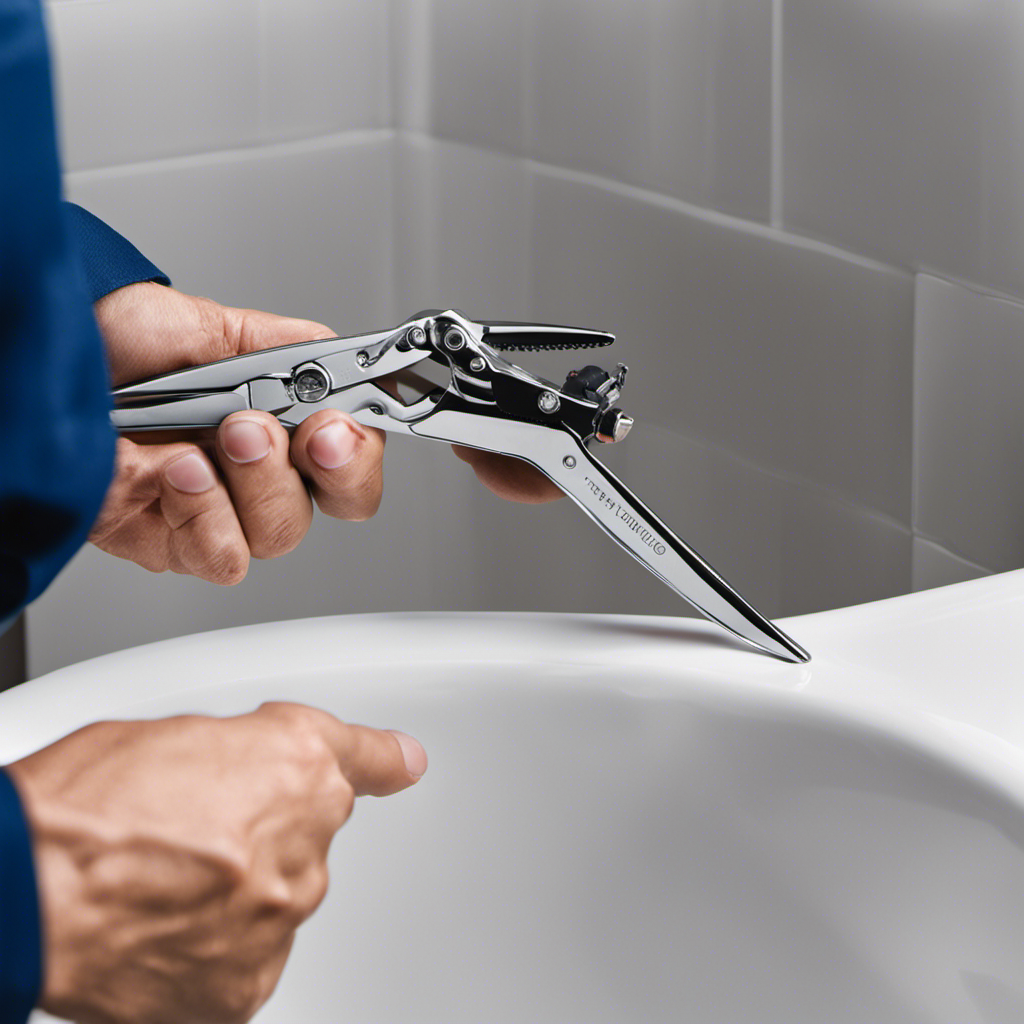
Tools Needed for Removing Bathtub Stopper Pop-Up
You’ll need a pair of pliers and a screwdriver to remove the bathtub stopper pop-up.
To begin troubleshooting the stopper pop-up, first, locate the access panel on the tub’s side or underneath. Use the screwdriver to remove the screws securing the panel. Once the panel is off, you’ll see the stopper assembly.
Next, use the pliers to grip the stopper rod located in the center of the assembly. Rotate the rod counterclockwise to unscrew it from the drain. Keep rotating until the stopper is completely detached. Gently pull the stopper out of the drain. If the stopper is stuck, apply some lubricant and try again.
With the stopper removed, you can now clean or replace it as needed.
HAUTMEC Tub Drain Remover Wrench Tool Heavy Duty Aluminum Shower Bathtub Drain Removal Tool PL0030
The dual ended tub drain wrench fits most inner diameter 1 3/8" and 1 1/2" tub drain shoe,ideal…
As an affiliate, we earn on qualifying purchases.
As an affiliate, we earn on qualifying purchases.
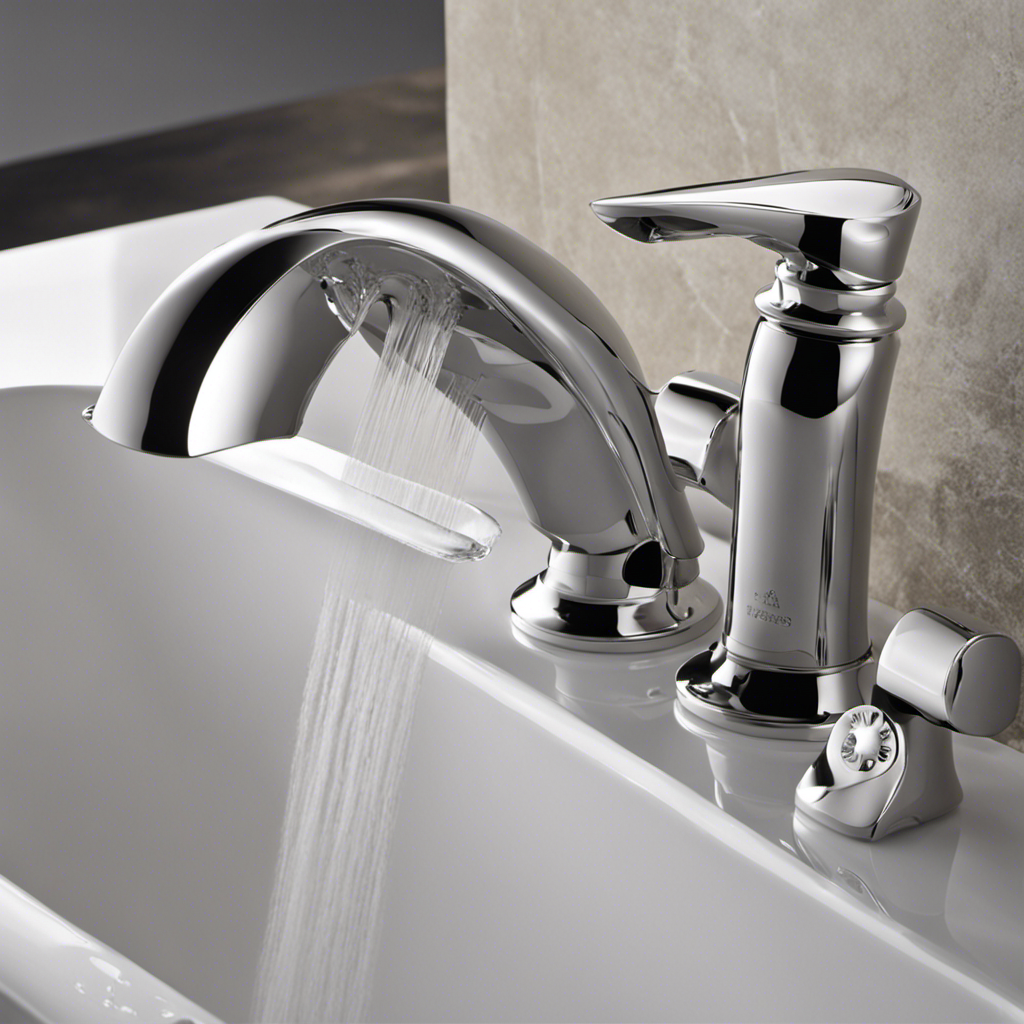
Locating the Bathtub Stopper Pop-Up
To find the bathtub stopper pop-up, start by examining the drain area. This is where you will locate the various types of bathtub stoppers. Here are some common types you may encounter:
-
Toe-touch stopper: This type is operated by pressing it down with your foot. If it’s not popping up properly, check for any debris or hair clogging the drain.
-
Lift-and-turn stopper: This stopper requires you to lift and then turn it to open or close the drain. If it’s not turning smoothly, it may need lubrication or adjustment.
-
Push-pull stopper: To operate this stopper, you simply push it down to close the drain and pull it up to open it. If it’s not sealing correctly, check for any damage or wear on the stopper.
bathtub overflow plate screws
As an affiliate, we earn on qualifying purchases.
As an affiliate, we earn on qualifying purchases.
Removing the Overflow Plate
Once you’ve identified the type of stopper you have, it’s time to take off the overflow plate.
Removing the overflow plate is an essential step in troubleshooting overflow plate installation. To begin, locate the screws that secure the plate to the bathtub wall. These screws are usually found at the bottom or side of the plate.
Using a screwdriver, carefully remove these screws. Be sure to hold the plate securely as you remove the screws to prevent it from falling into the tub.
Once the screws are removed, gently pull the overflow plate away from the wall. If it feels stuck, try wiggling it slightly or using a flathead screwdriver to pry it loose.
With the overflow plate removed, you can now proceed with further inspection or repairs.
bathtub stopper assembly replacement
As an affiliate, we earn on qualifying purchases.
As an affiliate, we earn on qualifying purchases.
Disconnecting the Trip Lever Mechanism
To disconnect the trip lever mechanism in your bathtub, start by removing the trip lever cover plate. Use a screwdriver to unscrew the screws holding the plate in place, and carefully lift it off.
Once the cover plate is removed, you can detach the connecting rod by unscrewing the nut that holds it in place.
Finally, disconnect the drain linkage by unscrewing the nut that connects it to the drain pipe.
These steps will allow you to remove the trip lever mechanism and continue with any necessary repairs or replacements.
Removing Trip Lever
You’ll need to locate the trip lever on your bathtub stopper in order to remove it. The trip lever is the mechanism that operates the stopper, allowing you to open and close the drain. Here’s how you can remove the trip lever:
-
Start by removing the cover plate on the overflow opening of your bathtub. This is usually located directly below the faucet.
-
Once the cover plate is removed, you’ll see the trip lever assembly. It consists of the trip lever, connecting rod, and clevis.
-
Use a screwdriver to loosen the screws holding the trip lever in place.
-
Once the screws are loose, you can pull the trip lever out of the overflow opening.
-
Inspect the trip lever for any damage or debris that may be causing it to malfunction. Troubleshooting the trip lever before removing it can save you time and effort.
With the trip lever removed, you can now move on to detaching the connecting rod, which we will discuss in the next section.
Detaching Connecting Rod
Now that the trip lever is out of the way, it’s time to detach the connecting rod from the assembly.
The connecting rod is an essential part of the bathtub stopper pop-up mechanism. To detach it, locate the clevis screw at the bottom of the rod. Using a screwdriver or pliers, loosen the screw counterclockwise until it is fully unscrewed.
Once the clevis screw is loose, slide it off the rod and set it aside. Now, you can remove the connecting rod from the stopper assembly. Gently pull the rod out of the assembly, making sure not to damage any surrounding components.
If you encounter any difficulties during this process, refer to troubleshooting techniques or seek professional assistance to prevent further damage.
Disconnecting Drain Linkage
First, locate the nut connecting the drain linkage to the pipe. Use a wrench to loosen and remove the nut, disconnecting the drain linkage. This step is crucial for removing the bathtub stopper pop-up.
Troubleshooting common issues when disconnecting the drain linkage:
- If the nut is difficult to loosen, apply penetrating oil to help loosen any rust or debris.
- If the drain linkage is stuck, gently wiggle it back and forth while pulling upwards to release it.
- If the drain linkage is damaged or broken, replace it with a new one to ensure proper functioning.
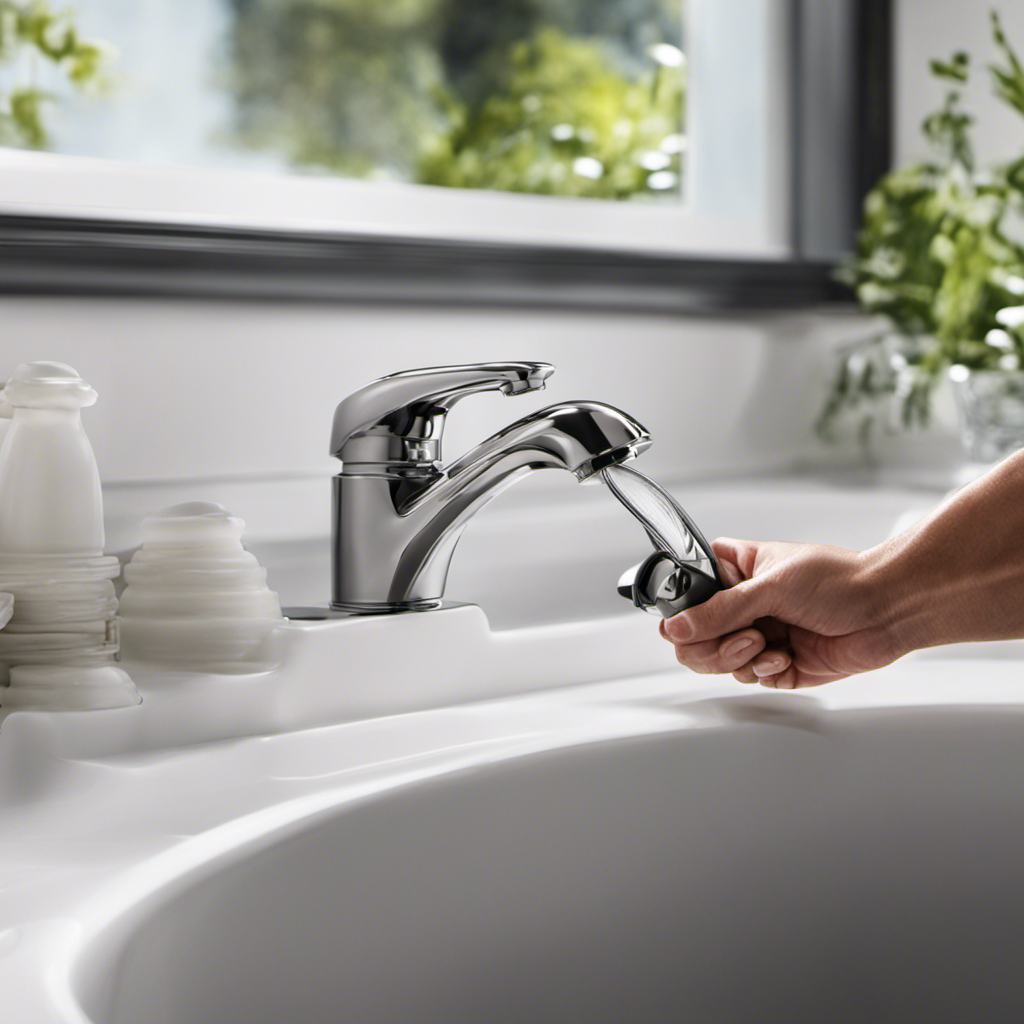
Detaching the Stopper Assembly
To detach the stopper assembly, simply unscrew the top cap counterclockwise until it comes off. The stopper assembly is located underneath the bathtub drain cover.
Once the top cap is removed, you will see the stopper mechanism exposed. It consists of a lever, a rod, and a stopper. The lever is connected to the rod, which in turn controls the movement of the stopper.
To disconnect the stopper assembly, you may need to loosen the retaining nut that secures the rod in place. Once the nut is loose, carefully remove the rod from the lever.
Now, you can lift the stopper out of the drain opening. Congratulations, you have successfully removed the bathtub stopper assembly!
Now, it’s time to move on to cleaning and inspecting the stopper assembly.
Cleaning and Inspecting the Stopper Assembly
When cleaning and inspecting the stopper assembly, make sure to thoroughly remove any debris or buildup that may be present. This is crucial for maintaining the proper functioning of your bathtub stopper. Here are some cleaning tips to help you with this task:
- Use a damp cloth or sponge to wipe down the stopper assembly, removing any surface dirt or grime.
- For more stubborn buildup, mix a solution of warm water and mild dish soap. Dip a soft-bristle brush into the solution and gently scrub the stopper assembly.
- Pay special attention to the underside of the stopper and the drain opening, as these areas tend to accumulate the most debris.
Common stopper issues that can be addressed during cleaning and inspection include:
- Clogged drain: If you notice water draining slowly or not at all, debris may be blocking the drain. Remove the stopper assembly and clear any obstructions.
- Leaking water: Inspect the stopper assembly for any cracks or damaged seals. Replace any faulty parts to prevent further leakage.
- Stuck stopper: If the stopper is difficult to move or won’t stay in the open or closed position, check for debris or corrosion that may be hindering its movement.
Reassembling the Stopper Assembly
After cleaning and inspecting the stopper assembly, you’ll need to reassemble it by carefully aligning the different components in the correct order. To ensure a successful reassembly, follow these reassembling techniques and troubleshooting tips.
Start by placing the rubber gasket onto the bottom of the stopper assembly, ensuring it is centered and snugly fitted.
Next, insert the threaded rod through the hole in the stopper, making sure it goes through the gasket as well. Screw the nut onto the threaded rod, tightening it securely.
Then, attach the linkage assembly to the lever arm, ensuring proper alignment.
Finally, insert the lever arm into the overflow drain and tighten the screw to secure it in place.
Test the stopper’s functionality by operating the lever arm up and down. If it moves smoothly and effectively stops the water flow, you have successfully reassembled the stopper assembly. If not, double-check the alignment and tightness of each component.
Reattaching the Trip Lever Mechanism
When reattaching the trip lever mechanism, it’s important to ensure proper lever reattachment. This ensures the proper functioning of the bathtub stopper. Common lever misplacements can lead to issues such as the stopper not sealing correctly or not fully opening and closing.
To troubleshoot any lever-related problems, check for loose screws, misaligned levers, or damaged components that may require replacement.
Proper Lever Reattachment
To properly reattach the lever, you’ll need to align the holes on the lever with the holes on the stopper assembly and secure them with the retaining screw. Follow these steps for proper lever reattachment:
- Start by locating the lever and the corresponding holes on the stopper assembly.
- Carefully align the holes on the lever with the holes on the stopper assembly.
- Once aligned, insert the retaining screw into the holes and tighten it securely using a screwdriver.
It’s important to ensure that the lever is properly aligned and securely fastened to prevent any issues with the stopper mechanism. Incorrect alignment may lead to the lever not functioning properly, resulting in difficulties in opening and closing the stopper.
Take your time to align the holes accurately and tighten the retaining screw firmly. With the lever reattached correctly, you can now use the bathtub stopper pop-up with ease.
Common Lever Misplacements
It’s common for levers to be misplaced, leading to difficulties in using the stopper mechanism. Proper lever installation and maintenance is crucial for the smooth operation of a bathtub stopper.
When installing the lever, ensure that it is securely attached to the stopper mechanism, using the provided screws or fasteners. Be sure to position the lever in a way that allows for easy access and operation.
Regular lever maintenance is important to prevent misplacements. Check the lever periodically to ensure it is tightly secured and aligned with the stopper mechanism. If you notice any looseness or misalignment, tighten the screws or fasteners as needed.
Lever Troubleshooting Tips
Now that you’re aware of common lever misplacements, let’s explore some troubleshooting tips for your bathtub stopper pop-up lever.
Here are some useful techniques to keep in mind:
-
Lever Lubrication
-
Apply a silicone-based lubricant to the lever mechanism to ensure smooth operation.
-
Avoid using oil-based lubricants as they can attract dirt and cause further issues.
-
Regularly clean the lever with a mild detergent to remove any built-up grime or residue.
-
Lever Replacement
-
If the lever is damaged beyond repair or no longer functions properly, consider replacing it.
-
Start by shutting off the water supply to the bathtub.
-
Remove the old lever by unscrewing it counterclockwise and carefully disconnecting it from the connecting rod.
-
Install the new lever by following the manufacturer’s instructions and reconnecting the connecting rod.
Testing and Adjusting the Bathtub Stopper Pop-Up
First, let’s check and adjust the bathtub stopper pop-up to ensure it functions properly.
To adjust the stopper height, locate the adjustment screw on the side of the overflow plate. Using a screwdriver, turn the screw clockwise to raise the stopper or counterclockwise to lower it. It is important to find the right height to allow water to drain effectively without causing clogs.
If you are experiencing drain clogs, troubleshooting the stopper pop-up can help identify the issue. Remove the stopper by twisting it counterclockwise or pulling it straight up, depending on the type of stopper. Check for any debris or hair that may be causing the clog and remove it.
Once adjusted and cleaned, test the stopper pop-up by filling the bathtub with water and observing if it drains properly.
Frequently Asked Questions
How Do I Know if My Bathtub Stopper Pop-Up Needs to Be Replaced?
To determine if your bathtub stopper pop-up needs replacement, look for signs of a faulty stopper such as water leakage or difficulty in opening/closing. Regularly clean and maintain the stopper to prolong its lifespan.
Can I Remove the Bathtub Stopper Pop-Up Without Disconnecting the Trip Lever Mechanism?
You can remove the bathtub stopper pop-up without disconnecting the trip lever mechanism by using alternative methods. Troubleshooting common issues with bathtub stopper pop-ups can help you identify the best approach.
Is It Necessary to Clean and Inspect the Stopper Assembly Regularly?
Regular cleaning and inspection of the stopper assembly is essential for maintaining the bathtub stopper pop-up. It helps prevent clogs, ensures proper functioning, and identifies any potential issues early on for timely repairs.
What Should I Do if the Bathtub Stopper Pop-Up Is Not Adjusting Properly?
If the bathtub stopper pop-up is not adjusting properly, troubleshoot the issue by checking for any debris or obstructions that may be preventing proper movement. Clean and inspect the stopper assembly regularly to prevent further problems.
Can I Use Any Type of Cleaning Solution to Clean the Stopper Assembly?
To clean the stopper assembly, use a non-abrasive cleaning solution specifically designed for bathroom fixtures. Avoid using harsh chemicals, as they can damage the finish. Alternatively, you can try using a mixture of vinegar and baking soda for a more natural cleaning option.
Conclusion
In conclusion, you can successfully remove the bathtub stopper pop-up by following these steps.
First, gather the necessary tools, like pliers or a screwdriver. These will help you locate, disconnect, and detach the stopper assembly.
Next, clean and inspect the assembly to ensure it functions properly. This step is important for maintaining the stopper’s efficiency.
After that, reassemble and reattach the trip lever mechanism. This is a crucial step in restoring the stopper’s functionality.
Finally, test and adjust the bathtub stopper pop-up. This will guarantee its efficiency and effectiveness.
By following these precise instructions, you can easily complete this task.