As I stood in front of my leaky Moen bathtub faucet, frustration mounting, I knew it was time for a replacement cartridge. The constant drips were not only wasting water but also driving me crazy.
Luckily, I discovered a step-by-step guide to conquer this plumbing challenge. In this article, I will share with you the precise techniques and detailed instructions on how to replace your Moen bathtub faucet cartridge.
Get ready to bid farewell to those annoying drips and hello to a smoothly functioning faucet.
Key Takeaways
- Regularly replacing the Moen bathtub faucet cartridge is important for proper functioning and to prevent leaks or reduced water flow.
- Proper removal of the old cartridge and choosing the right replacement cartridge is crucial to avoid damage to the faucet and ensure a proper fit.
- Preparing the faucet by cleaning the area and removing old caulking is necessary for a proper seal when installing the new cartridge.
- Regular maintenance of the cartridge, including cleaning and lubrication, is essential to extend its lifespan and maintain optimal functionality of the bathtub faucet.
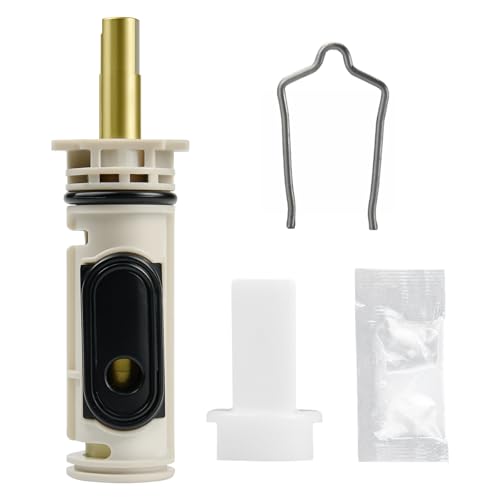
1222 Replacement Cartridge Kit for Moen One Handle Posi Temp Faucet, Compatible with Moen Bathtub & Shower Valve Cartridge, Durable Brass & Plastic Construction
- Durable Construction: High-density brass and engineering plastics
- Corrosion Resistant: Anti-rust and anti-corrosion design
- High-Pressure Tolerance: Resistant to high pressure and temperature
As an affiliate, we earn on qualifying purchases.
As an affiliate, we earn on qualifying purchases.
Removing the Old Cartridge
To start, you’ll need to shut off the water supply to the faucet. This is crucial for your safety and to prevent any water damage.
Once the water is turned off, you can proceed with replacing the cartridge. Regular maintenance of your bathtub faucet is essential to ensure its proper functioning. Over time, the cartridge may wear out or become clogged, leading to leaks or reduced water flow. By replacing the cartridge, you can restore the performance of your faucet and prevent any potential issues.
To remove the old cartridge, you’ll need to locate the retaining clip and use pliers to pull it out. Then, carefully pull the cartridge straight out of the faucet body. Make sure to clean the area before installing the new cartridge.
Choosing the Right Replacement Cartridge
When choosing the right replacement, make sure you select the correct size and type of cartridge for your specific bathtub faucet. This is crucial in ensuring a proper fit and optimal functionality. To help you navigate through the process, here are some tips:
-
Finding the right cartridge brand:
-
Identify the brand of your current faucet.
-
Research the compatible cartridge brands for that specific faucet brand.
-
Understanding cartridge functionality:
-
Learn about the different types of cartridges available, such as ceramic or brass.
-
Familiarize yourself with the features and benefits of each type.
Preparing the Faucet for Cartridge Replacement
Before starting the replacement process, it’s important to prepare the faucet for the new cartridge.
Begin by cleaning the bathtub surface around the faucet area to ensure a clean and smooth working environment. Use a mild detergent and a soft cloth to remove any dirt or debris.
Next, inspect the caulking around the faucet and if it is old or damaged, it must be removed. Carefully scrape off the old caulking using a putty knife or a caulk removal tool. Make sure to remove all traces of the old caulking to ensure a proper seal when installing the new cartridge.
Once the surface is clean and the old caulking is removed, you are ready to move on to installing the new cartridge for your Moen bathtub faucet.
Installing the New Cartridge
Now that you’ve cleaned the surface and removed the old caulking, it’s time to install the new cartridge for your bathtub. Here’s how you can do it:
- Ensure you have the right replacement cartridge for your specific faucet model.
- Remove the protective cap from the new cartridge.
- Insert the cartridge into the valve body, making sure it is aligned correctly.
- Use the retaining clip or nut to secure the cartridge in place.
- Reassemble the faucet handle and tighten any screws or bolts.
- Turn on the water supply to check for any leaks.
- Test the faucet to ensure the cartridge is working properly.
Cartridge maintenance tips:
- Regularly clean the cartridge to remove any debris or mineral buildup.
- Lubricate the cartridge with silicone grease to ensure smooth operation.
Different types of bathtub faucets:
- Single-handle faucets: These have one handle that controls both the temperature and flow of water.
- Two-handle faucets: These have separate handles for hot and cold water.
With the new cartridge installed, you’re now ready to move on to testing and troubleshooting to ensure everything is functioning correctly.
Testing and Troubleshooting
To check for any issues, make sure you turn on the water supply and test the functionality of your newly installed cartridge. Common problems with Moen bathtub faucets include leaking, low water pressure, and difficulty turning the handle.
Here is a step-by-step guide for testing faucet cartridge performance.
First, turn on the water supply and check for any leaks around the cartridge.
Next, try turning the handle to see if it moves smoothly. If the handle is stiff or difficult to turn, there may be an issue with the cartridge.
You can also test the water pressure by turning on the faucet and observing the flow. If the water pressure is low, it could indicate a problem with the cartridge or other parts of the faucet.
Conclusion
In conclusion, replacing a Moen bathtub faucet cartridge is a relatively straightforward process that can be done by following a few simple steps.
First, remove the old cartridge. This can usually be done by unscrewing a retaining nut or using a cartridge removal tool provided by Moen.
Next, choose the right replacement cartridge. Moen offers a variety of options, so make sure to select the correct one for your specific faucet model.
Once you have the replacement cartridge, prepare the faucet by cleaning any debris or buildup from the cartridge housing. This will ensure a proper fit and prevent any future issues.
Finally, install the new cartridge by aligning it with the housing and pushing it firmly into place. Make sure it is secure before reassembling the faucet.
It’s important to note that a study conducted by Moen found that a faulty cartridge is one of the most common causes of leaks in faucets, accounting for 37% of all reported issues.
Therefore, regularly replacing the cartridge can significantly reduce the risk of leaks and water damage in your bathroom.