
So, you’ve noticed that pesky bathtub faucet handle starting to loosen up? Don’t worry, I’ve got you covered.
In this article, I’ll show you step-by-step how to tighten that handle and keep it securely in place. With just a few tools and a little know-how, you’ll have your faucet handle working like new in no time.
Say goodbye to that annoying wobble and hello to a perfectly functioning bathtub faucet.
Let’s dive in and get started!
Key Takeaways
- The tools needed for tightening a bathtub faucet handle include a screwdriver or Allen wrench, pliers, a wrench, and a handle puller tool (or a hairdryer/heat gun for stubborn handles).
- The step-by-step instructions for removing the faucet handle include locating the hidden screw underneath the handle, unscrewing it counterclockwise, lifting the handle straight up and off the stem, and using a handle puller tool or applying heat if the handle is stuck.
- Loose connections within the handle mechanism can be identified and fixed by inspecting and tightening screws or bolts, checking the stem or spindle assembly for play or wobbling, and tightening the packing nut or replacing the O-ring if needed.
- Properly aligning and reattaching the faucet handle involves checking for worn or damaged parts and replacing them, aligning the handle with the valve stem using the grooves, tightening the retaining nut with a wrench or pliers, and testing the handle by turning on the water and ensuring it remains tight and does not wobble.
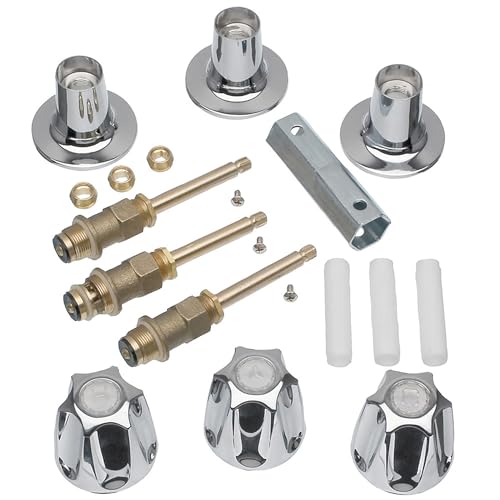
DANCO Bathtub and Shower 3-Handle Remodel/Rebuild Trim Kit for Price Pfister Verve Faucets | Knob Handle Replacement | Chrome (39619)
Made in China
As an affiliate, we earn on qualifying purchases.
As an affiliate, we earn on qualifying purchases.
Tools Needed for Tightening Bathtub Faucet Handle
You’ll need a few tools for tightening the bathtub faucet handle. Common causes of a loose bathtub faucet handle include worn-out screws or threads, a damaged valve stem, or a loose handle base.
To tighten the handle, you can try using a screwdriver or an Allen wrench to tighten the screws or set screws holding the handle in place. Alternatively, you can use pliers to tighten the handle base or a wrench to tighten the valve stem. It’s important to be gentle and not over-tighten, as this can cause further damage.
Once you’ve tightened the handle, check for any remaining looseness or wobbling. If the problem persists, you may need to proceed with removing the faucet handle for further inspection and repair.

Enhon Faucet Handle Puller, Compression Sleeve Puller Tool with 1/2 Inch Compression Sleeve Removal Adapter, Adjustable Handle Sleeve Puller, Corroded & Frozen Supply Stops, Compression Ring Puller
2 In 1 Design: This 2 in 1 faucet handle puller pulls the most stubborn faucet handles and…
As an affiliate, we earn on qualifying purchases.
As an affiliate, we earn on qualifying purchases.
Step-By-Step Instructions for Removing the Faucet Handle
To start removing the faucet handle, first, locate the screw underneath it. This screw is usually hidden under a decorative cap or cover. Use a flathead screwdriver or an Allen wrench to unscrew it counterclockwise. Once the screw is loose, you should be able to lift the handle straight up and off the stem.
However, if the handle is stuck and won’t budge, there are alternative methods you can try. One option is to use a handle puller tool specifically designed for this purpose. Another method is to apply heat to the handle with a hairdryer or heat gun to expand the metal and loosen it. If all else fails, you may need to consult a professional plumber for assistance.
Now, let’s move on to how to identify and fix loose connections within the handle mechanism.

240 Pcs Set Screws Assortment Kit (M3, M4, M5, M6, M8) with Allen Keys–Durable Metric Cup Point 304 Stainless Steel for Bathroom Fixtures, Light Fixture Screws,Door Knobs, Faucets, Plumbing, and More
Premium Material: All hex grub screws for door handles are made of outstanding stainless steel material, which has…
As an affiliate, we earn on qualifying purchases.
As an affiliate, we earn on qualifying purchases.
How to Identify and Fix Loose Connections Within the Handle Mechanism
Once you’ve removed the faucet handle, the next step is to examine the connections inside for any signs of looseness. It’s important to ensure that all the connections are secure to prevent future handle looseness.
Start by inspecting the screws or bolts that hold the handle in place. Use a screwdriver or wrench to tighten them if necessary.
Next, check the stem or spindle assembly, which connects the handle to the valve. If there is any play or wobbling, you may need to tighten the packing nut or replace the O-ring.
Additionally, inspect the cartridge or valve body for any signs of wear or damage.
Troubleshooting common faucet handle issues involves thoroughly examining these connections and taking appropriate action to tighten and secure them, ensuring a properly functioning faucet.
shower faucet handle tightening tools
As an affiliate, we earn on qualifying purchases.
As an affiliate, we earn on qualifying purchases.
Tips for Properly Aligning and Reattaching the Faucet Handle
After examining the connections inside, it’s important to properly align and reattach the faucet handle to ensure a secure fit. Here are some alignment techniques to help you with this task:
-
Check for worn or damaged parts: Loose faucet handles are often caused by worn or damaged parts such as screws, washers, or cartridges. Replace any damaged parts before reattaching the handle.
-
Align the handle with the valve stem: The handle should be aligned with the valve stem to ensure a proper fit. Make sure the handle is facing the correct direction and align it with the grooves on the valve stem.
-
Tighten the retaining nut: Once the handle is aligned, use a wrench or pliers to tighten the retaining nut. This will secure the handle in place and prevent it from becoming loose again.
-
Test the handle: After aligning and reattaching the handle, turn on the water to test if it is secure. If the handle remains tight and does not wobble, you have successfully aligned and reattached it.
Testing the Tightened Faucet Handle for Functionality and Leaks
To check if the faucet handle is secure and functioning properly, turn on the water and observe for any leaks or wobbling. Once you have tightened the faucet handle according to the previous subtopic instructions, it’s important to test its functionality and troubleshoot any potential leaks.
To do this, follow these steps:
-
Turn on the water: Start by turning the faucet handle to the on position. This will allow water to flow through the faucet.
-
Observe for leaks: Carefully inspect the area around the faucet handle and the base of the faucet for any signs of water leaks. Look for dripping water or any dampness.
-
Check for wobbling: Gently move the faucet handle from side to side to check for any wobbling or looseness. A secure handle should not move or wobble excessively.
Conclusion
In conclusion, tightening a bathtub faucet handle is a simple task that can be done with just a few tools and some patience. By following the step-by-step instructions provided, you can easily remove the handle, identify any loose connections, and fix them accordingly.
Remember to properly align and reattach the handle to ensure a secure fit. Once you have completed the process, test the faucet for functionality and leaks. Rest assured, with a little effort, you’ll have your faucet handle tightened in no time, and your bathroom will be back in tip-top shape.
Now, it’s time to sit back, relax, and enjoy a nice, warm bath with your newly tightened faucet handle.