
Hey there!
Ever wanted to give your bathtub a fresh, new look? Well, look no further because I’ve got you covered.
In this article, I’m going to show you step-by-step how to tile your bathtub wall like a pro. From choosing the right tiles to grouting and sealing, I’ll break it down for you in a way that’s easy to follow and understand.
So, roll up your sleeves and get ready to transform your bathroom into a stunning oasis.
Let’s dive in!
Key Takeaways
- Consider the dimensions and desired aesthetic when choosing tiles for a bathtub wall.
- Larger tiles create a seamless look with fewer grout lines, while smaller tiles add intricate patterns and textures.
- Ceramic and porcelain tiles are commonly used, while natural stone tiles like marble or granite add a luxurious touch.
- Proper surface preparation, including cleaning, repairing, priming, and measuring, is essential before tiling.

Globalcom Heavy Duty Construction Adhesive, Tile and Stone Marble Granite Wood Floor Adhesive, Gap Filling and Waterproof – 5.3 oz White
【Strong Bonding Performance】- This is a new type of heavy duty construction adhesive, the main material is modified…
As an affiliate, we earn on qualifying purchases.
As an affiliate, we earn on qualifying purchases.
Choosing the Right Tiles
Before you begin tiling, make sure you’re choosing the right tiles for your bathtub wall. When it comes to tile size and pattern, it’s important to consider the dimensions of your bathtub wall and the overall aesthetic you’re going for.
Larger tiles can create a seamless look with fewer grout lines, while smaller tiles can add intricate patterns and textures. Additionally, think about the material and durability of the tiles.
Ceramic and porcelain tiles are commonly used for bathtub walls due to their water resistance and durability. Natural stone tiles, such as marble or granite, can add a luxurious touch but require more maintenance.
Remember to choose tiles that not only fit your design preferences but also withstand the damp environment of the bathroom.

4×4 White Glossy Finish 4 1/4×4 1/4 Ceramic Subway Tile Shower Walls Backsplashes
4 1/4"x4 1/4" White Ceramic tile, thickness: 1/4"
As an affiliate, we earn on qualifying purchases.
As an affiliate, we earn on qualifying purchases.
Preparing the Bathtub Wall Surface
Make sure you’ve cleaned and smoothed the surface before starting to tile. Preparing the wall surface is an essential step to ensure a successful tile installation. First, clean the surface thoroughly to remove any dirt, grease, or old adhesive. Repair any cracks or holes in the wall with a suitable filler and let it dry completely. Next, prime the surface to create a strong bond between the wall and the tile adhesive. Measure and mark the area where the tiles will be placed, taking into account any fixtures or outlets that need to be removed. Carefully remove these fixtures using the appropriate tools, ensuring not to damage the surrounding area. By following these steps, you’ll create a clean, smooth surface that is ready for tiling.
| Prep Steps: | Description: | Tools Needed: |
|---|---|---|
| Cleaning | Remove dirt, grease, and old adhesive. | Scrub brush, mild detergent, sponge |
| Repairing | Fill cracks and holes in the wall. | Filler, putty knife |
| Priming | Apply a primer to create a strong bond. | Primer, paintbrush |
| Measuring | Measure and mark the area for tiling. | Tape measure, pencil |
| Removing Fixtures | Take out any fixtures or outlets. | Screwdriver, pliers |
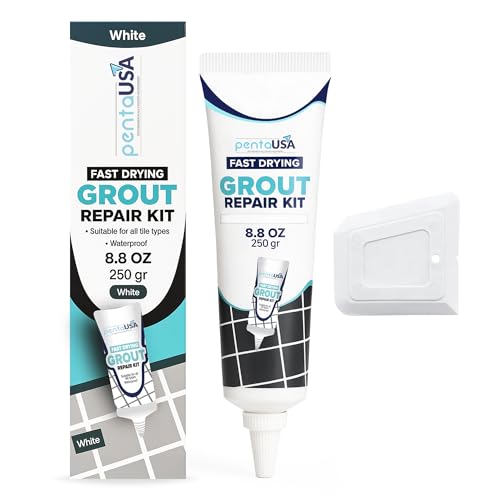
PentaUSA Tile Grout Repair Kit – White Grout Filler, Triple Protection, Fast Drying Formula Restores and Renews Grout Lines with Scraper (White, 8.8oz / 250gr)
UNIQUE FORMULA – Premixed grout is squeezable like caulk, after it dries, it becomes a REAL SANDED GROUT….
As an affiliate, we earn on qualifying purchases.
As an affiliate, we earn on qualifying purchases.
Applying the Tile Adhesive
Once you’ve prepared the surface, it’s time to apply the tile adhesive for a strong bond. Properly mixing the adhesive is essential for a successful application. Follow these steps to ensure the adhesive is mixed correctly:
- Start by pouring a measured amount of water into a clean bucket.
- Gradually add the adhesive powder while stirring continuously.
- Use a mixing paddle or a drill with a mixing attachment to achieve a smooth consistency.
- Let the mixture sit for a few minutes before giving it a final stir.
When applying the adhesive, it’s important to troubleshoot common issues that may arise:
- Ensure the adhesive is spread evenly using a notched trowel to prevent lumps or gaps.
- Avoid applying too much adhesive, as it can lead to tile slippage.
- Work in small sections to prevent the adhesive from drying out before placing the tiles.
- Clean any excess adhesive from the tile surface immediately to avoid a messy finish.

Grout Sealer, 7oz/200g Waterproof Grout Sealant Spray with Squeeze Tip, 100% Safe Grouts Repair Kit for Shower, Bathroom, Floors, Clear Tile Sealer Protector for Ceramic, Marble, Granite & Stone
Superior Grout Protection & Easy Application: Our premium grout sealer creates a powerful, invisible shield against water, oil,…
As an affiliate, we earn on qualifying purchases.
As an affiliate, we earn on qualifying purchases.
Installing the Tiles
To ensure a secure installation, it’s important to evenly spread the adhesive on the prepared surface. Once the adhesive is ready, it’s time to begin installing the tiles on the bathtub wall.
Proper tile spacing is crucial to achieve a professional and polished look. The recommended spacing between tiles is typically 1/8 inch, but it may vary depending on the desired aesthetic. Using tile spacers can help maintain consistent spacing throughout the installation process.
Additionally, it’s essential to use proper tile cutting techniques to ensure accurate and precise cuts. A wet tile saw or a tile cutter can be used to make straight cuts, while a tile nipper is useful for more intricate cuts. Remember to measure twice and cut once to avoid any unnecessary mistakes.
Grouting and Sealing the Tiles
When grouting and sealing the tiles, it’s important to apply the grout at a 45-degree angle to ensure full coverage and prevent any air bubbles from forming. This technique allows the grout to penetrate the gaps between the tiles effectively, creating a strong and durable bond.
Here are some key points to consider during the grouting and sealing process:
-
Importance of proper ventilation during grouting and sealing process
Ensure the room is well-ventilated to avoid inhaling any fumes from the grout and sealer. Open windows or use fans to promote air circulation. -
Common mistakes to avoid when grouting and sealing bathtub tiles
Avoid applying excessive pressure on the grout float as it may push the grout out of the joints. Take your time and apply gentle pressure to achieve a uniform finish. -
Use a grout sealer to protect the grout from stains and moisture. Apply the sealer according to the manufacturer’s instructions, ensuring complete coverage.
-
Regularly clean and maintain the grout and sealer to prolong their lifespan. Use mild cleaners and avoid abrasive materials that can damage the surface.
Conclusion
In conclusion, tiling a bathtub wall requires careful planning and attention to detail. By selecting the appropriate tiles and properly preparing the surface, you can achieve a polished and professional look.
Applying the tile adhesive and installing the tiles with precision is essential for a sturdy and long-lasting finish. Finally, grouting and sealing the tiles will provide the necessary protection against moisture.
Remember, like pieces of a puzzle, each tile fits together seamlessly, creating a stunning mosaic of beauty in your bathroom.