
As I plunge into the depths of bathtub maintenance, I find myself confronted with a perplexing challenge: how to unscrew a stubborn bathtub drain.
Fear not, for I have delved into the depths of knowledge and emerged with a solution.
In this guide, I will lead you through the intricate process of disassembling your bathtub drain, armed with the necessary tools and a steadfast determination.
So, let us embark on this journey together, as we unravel the mysteries of the bathtub drain and restore order to our bathing sanctuaries.
Key Takeaways
- Pliers, a drain key, and a wrench are important tools for unscrewing a bathtub drain.
- Before unscrewing the drain, it is necessary to remove the drain cover using a screwdriver and clean the area around the drain.
- Applying plumber’s putty to create a watertight seal and tightening the fittings with a pipe wrench are essential steps in preparing the bathtub drain.
- When encountering challenges like a stuck or rusted drain, it is advisable to use penetrating oil or heat and to wear gloves and eye protection for safety.

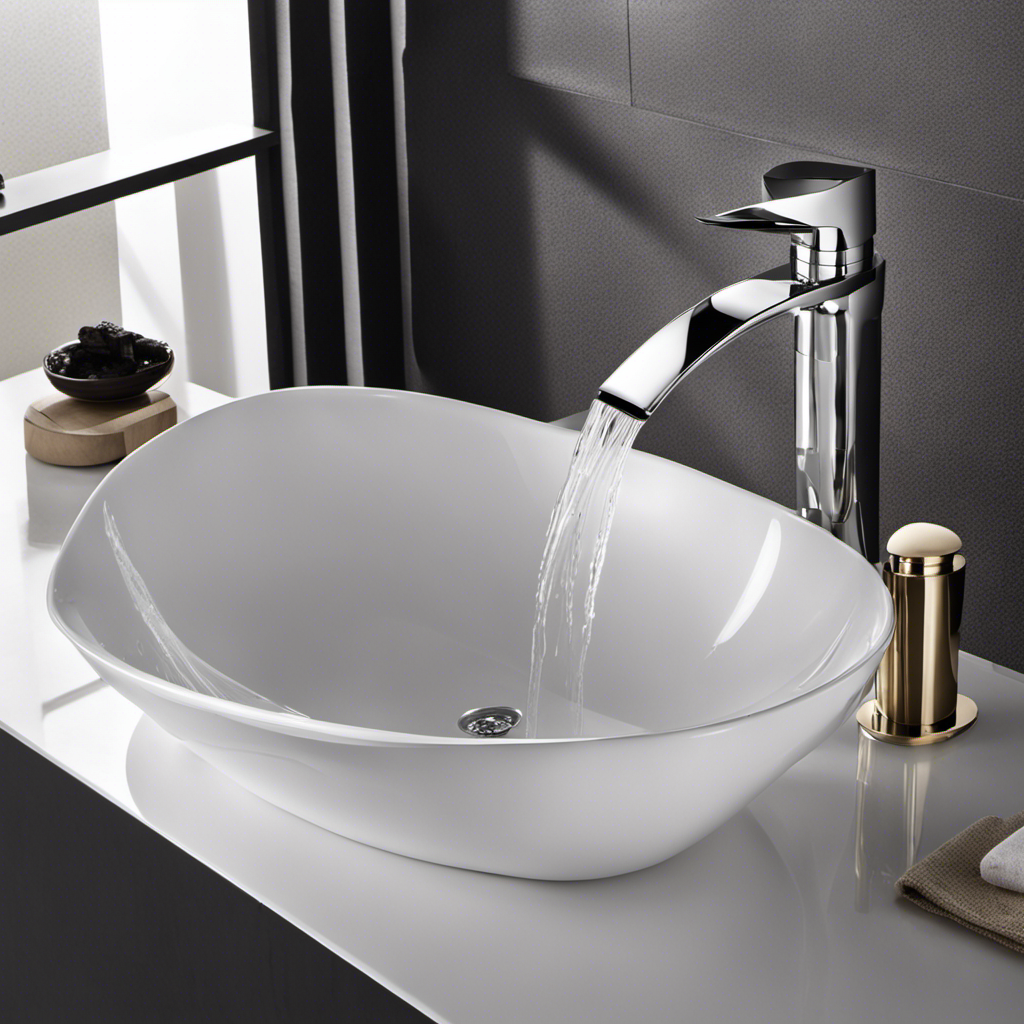
WOODBRIDGE 67" Stone Resin Freestanding Soaking Tub, Modern Oval Solid Surface Bathtub with Integrated Slotted Overflow & Drain, Matte White
✅ Superior Heat Performance: Designed with thick solid walls to retain warmth longer for a relaxing soak. The...
As an affiliate, we earn on qualifying purchases.
Tools You’ll Need
You’ll need a pair of pliers and a screwdriver to unscrew the bathtub drain. The pliers will allow you to grip and turn the drain cover, while the screwdriver will enable you to remove any screws holding the cover in place.
When it comes to hair clog solutions and drain cleaning techniques, having the right tools is essential. To start, locate the small slot or screw on the drain cover and use the screwdriver to loosen it. Once loosened, use the pliers to grip the edges of the drain cover and turn it counterclockwise until it comes off. Be careful not to apply too much force, as you don’t want to damage the drain or surrounding area.
With these tools, you’ll be well-equipped to tackle any hair clogs and clean your drain effectively.

MEDUNJESS 65'' Stone Resin Solid Surface Freestanding Bathtub, Modern Elegant Design Soaking Stand Alone Tub, Light Gray, Drain and Overflow Included
Specification - Exterior Dimension: 64.96"(L) x 33.46"(W) x 25.19"(H) x 14.72"(D) – Effective Tub Capacity: 71 Gallons.Weight about...
As an affiliate, we earn on qualifying purchases.
Preparing the Bathtub Drain
Before starting, make sure the necessary tools are readily available. Preparing the bathtub drain for installation or maintenance requires careful attention to detail and the right equipment. Here is a list of items you will need:
| Tools | Quantity | Purpose |
|---|---|---|
| Screwdriver | 1 | To remove screws holding the drain cover |
| Plunger | 1 | To create suction and remove any clogs |
| Pipe wrench | 1 | To loosen and tighten the drain fittings |
| Plumber’s putty | 1 | To create a watertight seal between the drain and tub |
| Bucket | 1 | To catch any water or debris during the process |
To install a bathtub drain, start by removing the drain cover using a screwdriver. Next, use a pipe wrench to loosen the drain fittings, allowing you to remove the old drain. Clean the area around the drain thoroughly and apply plumber’s putty to the new drain before installing it. Finally, use the pipe wrench to tighten the fittings and ensure a secure connection. For maintenance, regularly check the drain for any clogs or leaks and use a plunger to remove any blockages.

MEDUNJESS 51" Stone Resin Freestanding Bathtub, Modern Oval Solid Surface Soaking Tub, Solid Surface Stand Alone Bathtub with Drain & Integrated Slotted Overflow Matte White AM303-1300
【Specification】Exterior Dimension: 51"L x 26.77"W x 22"T. Soaking Depth: 15". Effective Capacity: 60 gallon. 0.47 inch extremely thin...
As an affiliate, we earn on qualifying purchases.
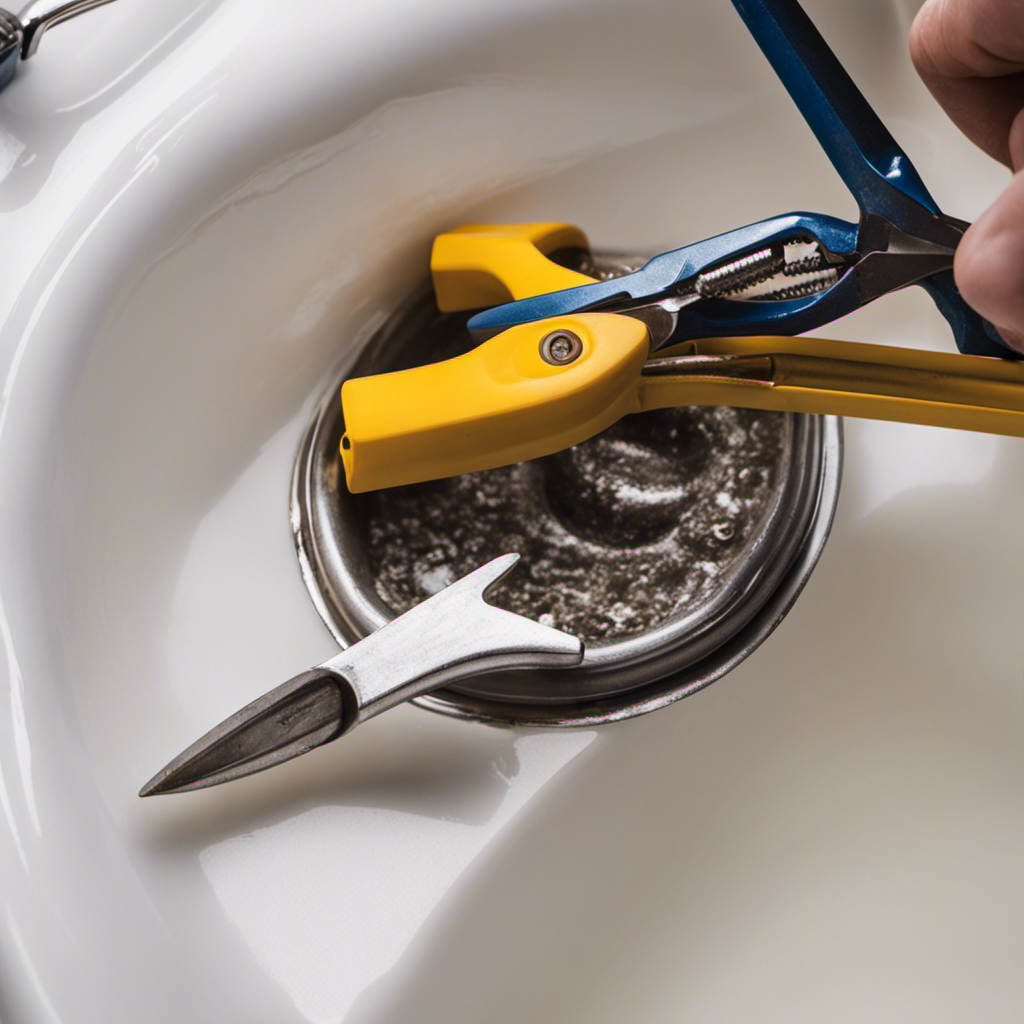
Removing the Drain Cover
To remove the cover, all you need is a screwdriver and a little bit of effort. Here are the steps to remove a rusted cover from a bathtub drain:
-
First, locate the screws holding the cover in place. These are usually located around the perimeter of the cover.
-
Using a screwdriver, carefully unscrew the screws counterclockwise. Be sure to apply steady pressure to avoid slipping and damaging the cover.
-
Once the screws are removed, gently lift the cover off the drain. If it’s stuck due to rust, you can use penetrating oil to loosen it. Apply the oil around the edges of the cover and let it sit for a few minutes before attempting to remove it again.
Now that the cover is off, we can move on to the next step: loosening the drain flange.
Amazon Product B0FKT6VPC7
As an affiliate, we earn on qualifying purchases.
Loosening the Drain Flange
Now that the cover is off, it’s time to loosen the flange by using a pair of pliers to grip and turn it counterclockwise. The flange is the circular piece that sits on top of the drain and is connected to the drain pipe. It is responsible for keeping water from leaking out of the bathtub. To successfully loosen the flange, follow these steps:
- Place the jaws of the pliers around the flange, making sure to get a firm grip.
- Slowly turn the pliers counterclockwise, applying steady pressure.
- As you turn the flange, you may encounter some resistance due to buildup or corrosion. If this happens, try applying some penetrating oil to help loosen it.
By following these DIY plumbing tips for bathtub drain repair, you can successfully loosen the flange and continue with your repairs. Remember to always exercise caution and turn off the water supply before attempting any plumbing repairs. Happy fixing!
| Step | Instruction |
|---|---|
| 1 | Place the jaws of the pliers around the flange |
| 2 | Slowly turn the pliers counterclockwise |
| 3 | Apply penetrating oil if encountering resistance |
Unscrewing the Bathtub Drain
When it comes to unscrewing a bathtub drain, there are a few key points to consider.
Firstly, you will need some tools to get the job done. A pair of pliers or a drain wrench will come in handy for this task.
Next, it’s important to be aware of the common challenges you may encounter. One of these challenges is a stuck or rusted drain. However, there are solutions available. For example, you can try using penetrating oil to loosen the drain. Another option is to heat the drain with a hairdryer, which can help expand the metal and make it easier to unscrew.
Lastly, it’s crucial to prioritize safety precautions. Make sure to wear gloves and eye protection to protect yourself from any potential hazards. Additionally, be cautious of sharp edges or hot surfaces that you may come across during the process.
Tools Needed for Unscrewing
You’ll need a pair of pliers to unscrew the bathtub drain. This tool will provide the necessary grip and leverage to remove the drain cover.
Here are some essential tools for the process:
-
Pliers: Use a pair of adjustable pliers to grip the drain cover firmly and turn it counterclockwise to unscrew it.
-
Plunger: Before attempting to unscrew the drain, it’s advisable to try using a plunger to clear any hair clogs that may be causing the blockage. Apply firm pressure and create a seal around the drain with the plunger, then vigorously push and pull to dislodge the clog.
-
Screwdriver: In some cases, the drain cover may have screws holding it in place. In such instances, a screwdriver will be needed to remove the screws.
Now that you have the necessary tools, let’s explore the common challenges and solutions that may arise during the process.
Common Challenges and Solutions
One common challenge that may arise during this process is dealing with stubborn screws on the drain cover. It is not uncommon for these screws to become corroded or stuck over time, making them difficult to remove.
One of the most common mistakes people make when faced with stubborn screws is using the wrong tools or applying too much force, which can lead to damage to the drain cover or surrounding area.
An alternative method to tackle this challenge is to use penetrating oil, such as WD-40, to loosen the screws. Simply spray the oil onto the screws and let it sit for a few minutes to penetrate the rust or corrosion. This will make it easier to unscrew the drain cover without causing any damage.
Transitioning into the next section on safety precautions, it is important to remember to always use caution when working with penetrating oil and to follow the manufacturer’s instructions for safe usage.
Safety Precautions to Consider
To ensure your safety while working with penetrating oil, make sure to read and follow the manufacturer’s instructions for proper usage.
Penetrating oil is a useful tool when unscrewing a stubborn bathtub drain, but it’s important to take precautions to prevent water damage and avoid injury. Here are some safety measures to consider:
- Wear protective gloves and safety goggles to protect your hands and eyes from any splashing or contact with the oil.
- Work in a well-ventilated area to avoid inhaling any harmful fumes.
- Keep a fire extinguisher nearby in case of any accidental fires caused by the oil.
Dealing With Stubborn Drains
When it comes to dealing with stubborn drains, there are several key points to consider.
The first is removing hair clogs, which can be a common cause of blockages.
Using a plunger is another effective method, as the suction created can help dislodge any debris.
Lastly, chemical drain cleaners can be used, but caution should be exercised as they can be harsh on pipes and may require proper ventilation.
Removing Hair Clogs
Start by using a drain snake to remove any hair clogs from the bathtub drain. This is an effective method for clearing blockages caused by hair buildup. Here are some steps to follow:
- Insert the drain snake into the drain opening.
- Rotate the handle clockwise to extend the snake deeper into the drain.
- Once you feel resistance, rotate the handle counterclockwise to retrieve the clog.
If the hair clog is particularly stubborn or if you prefer to use natural drain cleaners, there are a few options available. One option is to mix equal parts baking soda and vinegar and pour it down the drain. Let it sit for about 30 minutes, then flush with hot water.
Another natural option is to use a combination of salt and boiling water. Simply pour a cup of salt down the drain followed by boiling water. These methods can help break down the clog and clear your drain.
Using a Plunger
Using a plunger is an effective way to clear clogs in your bathtub. When faced with a stubborn blockage, the plunger can be your go-to tool.
To begin, make sure the bathtub is partially filled with water, as this will create the necessary suction. Place the plunger over the drain and press it down firmly to create a seal. Then, rapidly push and pull the plunger to create a vacuum effect. This action will dislodge the blockage and allow the water to flow freely. Remember to maintain a steady rhythm and apply enough force for optimal results.
However, if the plunger fails to clear the clog, there are alternative methods to consider, such as using a drain snake or chemical cleaners.
Chemical Drain Cleaners
Chemical drain cleaners can be an effective solution for clearing clogs in your bathtub. These powerful substances work by breaking down the clog and allowing it to flow down the drain. However, it is important to take safety measures when using these cleaners, as they can be hazardous to your health and the environment.
Here are a few tips to keep in mind:
- Always wear gloves and protective eyewear when handling chemical drain cleaners.
- Ensure proper ventilation by opening windows or using a fan to prevent inhaling fumes.
- Keep children and pets away from the area where the cleaner is being used.
While chemical drain cleaners can be effective, they are not the most eco-friendly option. Consider these eco-friendly alternatives:
- Baking soda and vinegar: Mix equal parts of baking soda and vinegar and pour it down the drain. Let it sit for a while before flushing with hot water.
- Drain snakes or augers: These tools physically remove clogs by breaking them apart or pulling them out.
Cleaning the Drain Components
To clean the drain components, you’ll want to first remove any visible debris. This is an important step in maintaining a clean and clog-free drain. Start by wearing gloves and using a flashlight to inspect the drain. Look for hair, soap scum, and other debris that may be causing blockages. Use a pair of tweezers or needle-nose pliers to carefully remove any visible debris from the drain.
Once you have cleared the visible debris, it is important to clean the drain thoroughly. You can use a mixture of baking soda and vinegar or a commercial drain cleaner to dissolve any remaining residue. After cleaning, rinse the drain with hot water to flush out any remaining debris.
To prevent future clogs, consider using a drain cover to catch hair and other debris before it enters the drain. Regularly cleaning the drain components and using preventive measures will help keep your drain free from clogs.
Reassembling the Bathtub Drain
Once you’ve removed all visible debris from the drain components, it’s time to reassemble them.
Reassembling the bathtub drain can pose some challenges, but with the right knowledge and techniques, it can be done smoothly.
Here are some safety precautions to keep in mind during the reassembly process:
- Wear protective gloves to prevent any injuries while handling sharp or potentially harmful objects.
- Use a flashlight to ensure that all parts are properly aligned and connected.
- Double-check the tightness of each screw or bolt to avoid any leaks or loose fittings.
Reassembling the bathtub drain requires attention to detail and patience. Take your time to carefully align and tighten each component to ensure a proper seal.
Frequently Asked Questions
Can I Use Household Items as Alternatives to the Tools Mentioned?
Yes, household alternatives can be used in place of the tools mentioned. However, it is important to be cautious as common mistakes may occur. It is advisable to use proper tools for best results.
How Long Does It Usually Take to Unscrew a Bathtub Drain?
Usually, unscrewing a bathtub drain takes about 15-30 minutes. However, alternative methods and tips and tricks can help speed up the process. It’s important to have the right tools and follow proper techniques for efficiency.
Can I Use Any Type of Lubricant to Loosen a Stubborn Drain Flange?
Using WD-40 as a lubricant can help loosen a stubborn drain flange. However, it’s important to note that using heat, such as a heat gun or torch, is not recommended as it can damage the surrounding materials.
What Should I Do if I Accidentally Damage the Drain Components While Unscrewing?
If I accidentally damage the drain components while unscrewing, I would first stop and assess the extent of the damage. Then, I would consider alternative solutions like using a drain extractor tool. It’s important to avoid common mistakes like forcing the components or using excessive pressure.
Is It Necessary to Clean the Drain Components Before Reassembling the Bathtub Drain?
Sure, you can skip cleaning the drain components before reassembling the bathtub drain. But beware! Neglecting this crucial step may lead to clogs, foul odors, and even damage to your plumbing system. Don’t risk it!
Conclusion
As I carefully reassemble the bathtub drain, I can’t help but feel a sense of accomplishment. Unscrewing the drain was no easy task, but with the right tools and techniques, it is definitely possible.
The stubbornness of some drains may test your patience, but don’t give up. Keep trying different approaches until you find the one that works.
Remember, a clean and functioning drain is essential for a smooth bathing experience. So, keep up the determination and never shy away from a little DIY plumbing adventure.