If you’re struggling with a continuously running toilet, I have an easy fix for you.
In this article, I’ll show you step-by-step how to fix this issue and regain control over your water bill.
By following these instructions, you’ll learn how to locate the water supply valve, adjust the float, and clear any clogs or debris in the flush valve.
Get ready to become a master of toilet maintenance in no time!

Key Takeaways
- Shut off the water supply using the valve near the base of the toilet to troubleshoot and clear blockages.
- Understand and adjust the components inside the toilet tank, such as the fill valve and float, to regulate water level and fix common issues.
- Troubleshoot and resolve issues with the toilet tank by inspecting the flapper and flush valve for damage or wear, and checking for blockages.
- Consider water-saving flush options like silent flush mechanisms, dual flush toilets, and water-efficient toilet models to conserve water and test the toilet without running water.
Locate the Toilet’s Water Supply Valve
To locate the toilet’s water supply valve, I recommend turning off the water using the valve located near the base of the toilet. This valve is typically a small lever or knob that you can turn clockwise to shut off the water supply. It’s important to know the location of this valve in case you need to troubleshoot toilet leaks or adjust the toilet water pressure.
When it comes to troubleshooting toilet leaks, the first step is to turn off the water supply using the valve. This will prevent any further water from entering the toilet tank and potentially causing more damage. Once the water supply is turned off, you can inspect the toilet for any visible leaks or signs of water damage.
If you notice water pooling around the base of the toilet, it could be a sign of a leaky wax ring or a loose connection between the toilet and the floor. In this case, you may need to replace the wax ring or tighten the bolts that secure the toilet to the floor.
If the toilet is constantly running or the water pressure is too high, adjusting the water supply valve can help. By turning the valve clockwise, you can decrease the water pressure and potentially solve the issue of a constantly running toilet.

Turn off the Water Supply to the Toilet
I usually start by reaching down and turning off the water supply valve to the toilet. This valve is typically located on the wall or floor near the base of the toilet. By shutting off the water supply, you can prevent any further water from entering the toilet tank and help troubleshoot any issues or clear blockages.
To provide a visual representation of ideas, here is a table highlighting the steps to turn off the water supply:
| Steps to Turn off Water Supply |
|---|
| Locate the water supply valve near the base of the toilet |
| Turn the valve clockwise to shut off the water supply |
| Ensure the valve is fully closed |
| Test the water flow by flushing the toilet |
Turning off the water supply is an essential step when dealing with a running toilet or blockages. It allows you to work on the toilet without the risk of water overflow or flooding. Additionally, troubleshooting issues often require the water supply to be turned off to assess and fix the problem effectively.
Remove the Toilet Tank Lid
To access the inner workings of the toilet, I begin by lifting off the lid of the toilet tank. This step is crucial in order to make any necessary adjustments to the float or other components inside the tank.

To remove the lid, locate the handle or knob on top of the tank, usually towards the center or side. Gently lift the lid straight up and set it aside in a safe place, ensuring it’s secure and won’t accidentally fall or break.
Once the lid is removed, you’ll have a clear view of the various parts inside the toilet tank. Take a moment to familiarize yourself with the layout and identify the float, which is usually a ball or a cylinder attached to a metal or plastic arm. The float is responsible for regulating the water level in the tank. If the water level is too high or too low, it may indicate a problem with the float that needs adjustment.
With the lid removed and the float identified, you’re now ready to proceed to the next step: identifying the fill valve in the toilet tank. This valve controls the flow of water into the tank and is another component that may need adjustment to resolve the issue of a running toilet.
Identify the Fill Valve in the Toilet Tank
Identifying the fill valve in the toilet tank involves locating the mechanism responsible for controlling the flow of water into the tank. The fill valve is an essential component of the toilet’s flushing system, and it ensures that the tank fills up with water after each flush.

To inspect the fill valve, start by removing the toilet tank lid, as discussed in the previous subtopic. Once the lid is off, look for a vertical tube or pipe that’s connected to the bottom of the tank. This tube is usually made of plastic or metal and is attached to the fill valve.
To further inspect the fill valve, you may need to flush the toilet and observe its operation. As the tank empties, the fill valve should open to allow water to flow into the tank. Once the tank is filled to the desired level, the fill valve should close to stop the flow of water. If you notice any issues, such as a constantly running toilet or a delay in the tank filling up, it may indicate a problem with the fill valve.
If you need to replace the fill valve, it’s important to first turn off the water supply to the toilet. This can usually be done by shutting off the valve located on the wall behind the toilet. Once the water supply is off, you can disconnect the fill valve from the bottom of the tank and remove it.
Follow the manufacturer’s instructions to install the new fill valve, making sure to properly secure it and reconnect any necessary tubes or pipes. After installing the new fill valve, turn the water supply back on and test the toilet to ensure it’s working properly.

Adjust the Float to Lower the Water Level
Inspecting the fill valve and identifying any issues with its operation, I now move on to adjusting the float to lower the water level in the toilet tank. Adjusting the float height is essential to ensure the toilet flushes properly and doesn’t waste water.
Here are the steps to adjust the float:
- Locate the float: The float is usually a plastic or rubber ball attached to a rod. It’s connected to the fill valve assembly inside the toilet tank.
- Adjust the float height: To lower the water level, you need to lower the float. This can typically be done by turning a screw or sliding the float along the rod. Consult the manufacturer’s instructions for your specific toilet model.
- Test the water level: After adjusting the float, flush the toilet and observe the water level. It should stop filling when it reaches the desired level, which is usually about an inch below the top of the overflow tube.
- Troubleshoot float issues: If the float doesn’t adjust properly or the water level is still too high, check for any obstructions or damage to the float mechanism. Clean or replace any faulty components.
Check for Any Blockages in the Toilet Tank
Now let’s move on to the next step in troubleshooting a running toilet: checking for any blockages in the toilet tank.
Blockages can prevent the proper flow of water, causing the toilet to run continuously.

To clear any blockages, carefully inspect the components inside the tank, such as the flapper, fill valve, and overflow tube, ensuring they’re free from any debris or obstructions.
Clearing Toilet Tank Blockages
First, I’ll check for any blockages in the toilet tank. This is an essential step in toilet tank maintenance and troubleshooting common toilet issues. To clear any blockages, follow these steps:
- Shut off the water supply: Locate the water shut-off valve near the base of the toilet and turn it clockwise to stop the water flow.
- Remove the tank lid: Carefully lift the lid off the tank and set it aside.
- Inspect for blockages: Look for any objects, debris, or sediment that may be obstructing the toilet tank’s mechanisms or the water flow.
- Clear the blockage: Use a toilet brush, plunger, or a flexible auger to dislodge and remove any blockages. Be gentle to avoid damaging the tank or its components.
Once the blockage is cleared, replace the tank lid and turn the water supply back on. This simple process can help resolve many toilet tank issues and ensure proper functioning.
Troubleshooting Toilet Tank
To continue troubleshooting the toilet tank for any blockages, I will carefully inspect the mechanisms and water flow for potential obstructions. One common issue that can occur with toilet tanks is leaking. If you notice water pooling around the base of the toilet or a constant dripping sound, it may indicate a leak in the tank. To address this problem, start by checking the water supply line and ensure it is tightly connected. Next, examine the flapper valve and flush valve for any signs of wear or damage. Replace these components if necessary. Additionally, inspect the overflow tube and make sure it is not blocked. A blocked overflow tube can cause water to continuously flow into the tank, leading to a constantly running toilet. By thoroughly examining these components, you can troubleshoot and resolve any issues with your toilet tank.

| Common Issues | Possible Solutions |
|---|---|
| Leaking around the base of the toilet | Check the water supply line and tighten if necessary. Inspect the flapper valve and flush valve for wear or damage. Replace if needed. Examine the overflow tube for blockages. |
| Constantly running toilet | Ensure the flapper valve is sealing properly. Check the fill valve and adjust the water level if needed. Inspect the flush valve for any obstructions. |
| Weak or incomplete flush | Clean the rim jets and flush holes to remove any mineral deposits. Adjust the water level in the tank if necessary. Check the flapper valve for proper sealing. |
| Gurgling or bubbling sounds | Clear any blockages in the vent pipe or drain line. Check the tank for proper water level. Inspect the fill valve and adjust if needed. |
Inspect the Flapper for Any Damage or Wear
I usually start by checking the flapper for any signs of damage or wear. The flapper is a rubber valve that controls the flow of water from the tank to the bowl. If it’s damaged or worn out, it can cause a continuous flow of water, leading to a running toilet.
Here are some steps to inspect the flapper:
- Lift the lid of the toilet tank and locate the flapper. It’s usually at the bottom of the tank and connected to the flush valve.
- Check for any cracks or tears in the flapper. These can prevent it from creating a proper seal and cause water to leak into the bowl.
- Look for any signs of wear on the flapper’s edges. Over time, the rubber can deteriorate, leading to leaks.
- Test the flapper by flushing the toilet and observing its movement. It should lift up when you press the flush lever and then settle back into place once the tank is empty.
If you notice any damage or wear during the inspection, it’s important to replace the flapper. A worn-out or damaged flapper can’t effectively seal the tank, resulting in water wastage and a running toilet.
Clean or Replace the Flapper if Necessary
When cleaning or replacing the flapper, I typically start by turning off the water supply to the toilet. This is an important step to ensure no water flows into the tank while working on the flapper. Once the water supply is turned off, I remove the lid of the toilet tank and locate the flapper. The flapper is a rubber valve that controls the flow of water from the tank to the bowl during flushing. Over time, the flapper can become dirty or worn out, leading to leaks and a running toilet. To clean the flapper, I gently scrub it with a soft brush and water to remove any debris or mineral deposits. If the flapper is damaged or worn out, it is necessary to replace it with a new one. Here is a table showcasing the steps to clean or replace the flapper:

| Steps to Clean or Replace the Flapper |
|---|
| 1. Turn off the water supply |
| 2. Remove the lid of the toilet tank |
| 3. Locate the flapper |
| 4. Clean the flapper with a soft brush and water |
| 5. If necessary, replace the flapper with a new one |
Cleaning or replacing the flapper can resolve issues with a running toilet caused by a faulty flapper. Once the flapper is cleaned or replaced, it is important to check the flush valve for any clogs or debris, as this can also contribute to a running toilet.
Check the Flush Valve for Any Clogs or Debris
After cleaning or replacing the flapper, the next step is to check the flush valve for any clogs or debris. This is an important troubleshooting step to ensure the proper functioning of your toilet.
Here are four key things to keep in mind when clearing clogs or troubleshooting the flush valve:
- Inspect the flush valve: Start by lifting the toilet tank lid and locating the flush valve. It’s typically a large rubber or plastic piece at the bottom of the tank. Check for any visible clogs or debris that may be obstructing the valve.
- Remove any obstructions: If you notice any clogs or debris, use a pair of gloves or pliers to carefully remove them. Make sure to dispose of any waste properly.
- Clean the flush valve: If the flush valve appears dirty or covered in mineral deposits, use a brush or sponge to gently scrub away the buildup. This will help improve the valve’s performance and prevent future clogs.
- Test the flush: After clearing any clogs or debris and cleaning the flush valve, flush the toilet to see if the issue has been resolved. If the water flows smoothly and the toilet flushes properly, then you have successfully cleared the clog or debris from the flush valve.
Use a Toilet Auger to Clear Any Obstructions in the Drain
When it comes to clearing obstructions in the drain, using a toilet auger can be highly beneficial. The auger is designed to reach deep into the drain and break up any clogs or debris that may be causing the toilet to run.

It’s important to use the auger properly, following the manufacturer’s instructions, to ensure effective and safe clearing of the drain.
If the problem persists or if you’re unsure about using the auger, it may be best to call a professional plumber for assistance.
Benefits of Using Auger
Using a toilet auger swiftly clears any obstructions in the drain, ensuring effective flushing and preventing running water.
Here are four key benefits of using a toilet auger:

- Efficient and Effective: A toilet auger is designed to navigate the curves of your toilet’s drain pipe, allowing it to reach and remove any blockages. This ensures a thorough clearing of the drain, promoting efficient flushing.
- Cost-effective Solution: By using a toilet auger, you can avoid costly plumbing repairs or the need to call a professional plumber. This tool allows you to tackle the problem on your own, saving you time and money.
- Environmentally Friendly: Opting for a toilet auger instead of harsh chemical drain cleaners is an eco-friendly choice. It eliminates the need for harmful chemicals, making it a more sustainable option for maintaining your plumbing system.
- Long-lasting Solution: A toilet auger is a durable tool that can be used repeatedly, providing a long-lasting solution for clearing blockages. Investing in a high-quality auger ensures that you have a reliable tool to address future drain issues.
Using a toilet auger offers an efficient, cost-effective, environmentally friendly, and long-lasting solution for clearing obstructions in your toilet’s drain.
Proper Technique for Auger
To clear any obstructions in the drain, I use a toilet auger, ensuring efficient flushing and preventing running water.
The toilet auger is a tool specifically designed to remove clogs from the drainpipe of a toilet.
The technique for using a toilet auger is straightforward. First, extend the auger cable by turning the handle clockwise. Then, carefully insert the auger into the toilet bowl, ensuring it goes into the drain opening.

Once inserted, rotate the handle clockwise while applying gentle pressure, allowing the auger to break up and dislodge the obstruction. If the clog is particularly stubborn, you may need to repeat the process multiple times.
After successfully clearing the obstruction, flush the toilet to ensure proper drainage.
Troubleshooting toilet auger issues may involve checking for cable damage, ensuring proper cable extension, and using the appropriate technique for different types of clogs.
When to Call Professional
Do I need to hire a professional plumber to clear any obstructions in the drain using a toilet auger?

While it’s possible to use a toilet auger yourself to clear out blockages in the drain, there are certain situations where it’s best to call a professional.
Here are four common toilet flushing problems and when to DIY or call a plumber:
- Clogs that can’t be cleared: If you’ve tried using a toilet auger and the clog persists, it’s time to call a plumber. They have the tools and expertise to handle more stubborn obstructions.
- Multiple clogged fixtures: If you’re experiencing clogs in multiple fixtures throughout your home, it could be a sign of a larger plumbing issue. A professional plumber can identify and resolve the underlying problem.
- Frequent clogs: If you find yourself dealing with frequent toilet clogs, it may be a sign of an underlying plumbing problem. A plumber can assess the situation and provide a long-term solution.
- Sewer line issues: If you suspect that the issue lies in your sewer line, it’s important to call a plumber. They can inspect and repair any damage to ensure proper drainage.
Reassemble the Toilet Tank and Turn the Water Supply Back on
I reassemble the toilet tank and turn the water supply back on. Once you have identified and fixed the issue causing your running toilet, it’s time to put everything back together and restore the water supply. Follow these reassemble instructions to ensure a proper and functional toilet:
- Start by placing the rubber gasket onto the fill valve opening at the bottom of the tank. Make sure it is centered and secure.
- Carefully lower the tank back onto the bowl, aligning the mounting bolts with the corresponding holes.
- Tighten the nuts onto the mounting bolts, alternating between sides to ensure even pressure. Be careful not to overtighten, as this can cause damage.
- Reattach the water supply line to the fill valve, tightening it securely by hand.
- Finally, turn on the water supply by opening the shut-off valve fully.
By following these steps, you should have successfully reassembled your toilet and restored the water supply. If you encounter any issues during the reassembly process, refer to the troubleshooting tips below:

| Problem | Solution |
|---|---|
| Leaking tank | Check the rubber gasket and ensure it is properly positioned. |
| Loose mounting bolts | Tighten the nuts securely, but avoid overtightening. |
| Water supply issues | Verify that the shut-off valve is fully open and not blocked. |
Test the Toilet to Ensure It Flushes Properly Without Running Water
Now that the toilet tank has been reassembled and the water supply is back on, it’s important to test the toilet to ensure it flushes properly without running water.
One point to consider is the silent flush mechanism, which allows for a quiet and efficient flush.
Additionally, you may want to explore water-saving flush options that can help conserve water and reduce your environmental impact.
Silent Flush Mechanism
After installing a silent flush mechanism, I can test the toilet to ensure it flushes properly without the need for running water. This innovative technology not only saves water but also provides a quieter and more efficient flushing experience.
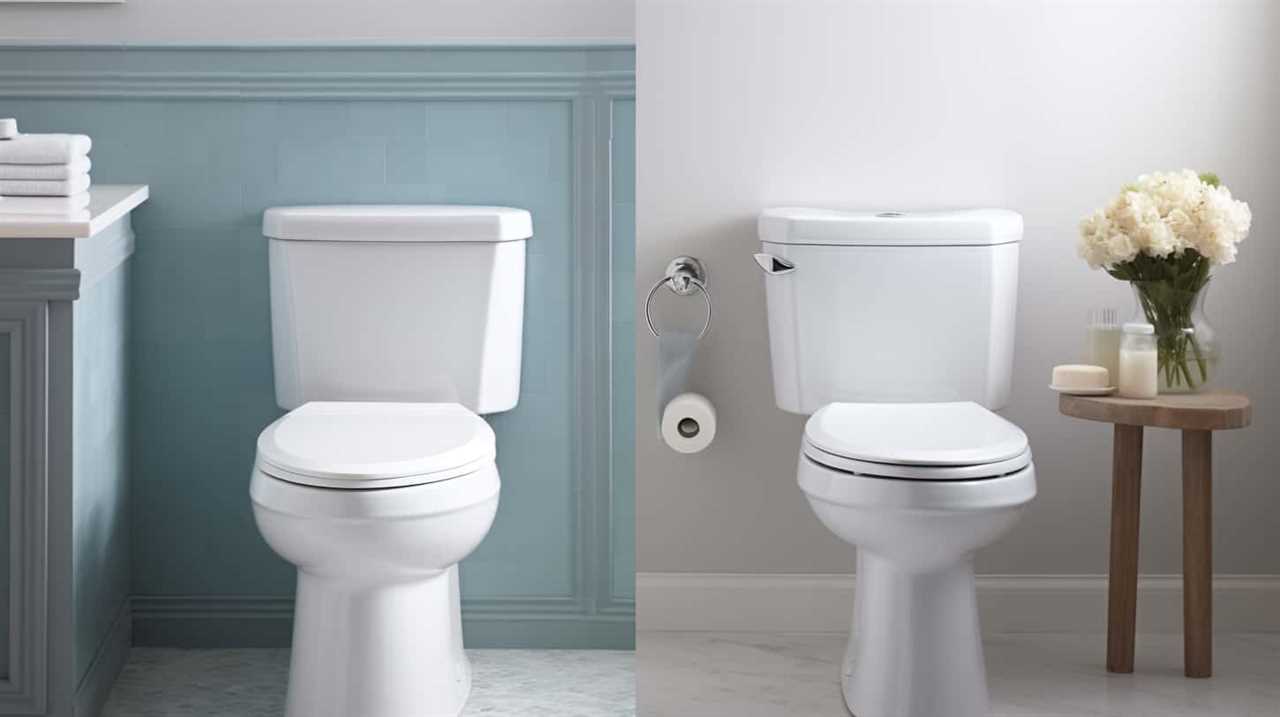
Here’s how to test the silent flush mechanism:
- Fill a bucket with water and pour it directly into the toilet bowl.
- Observe if the toilet flushes with enough force to clear the bowl completely.
- Check for any leaks or unusual sounds during the flushing process.
- Repeat the test a few times to ensure consistent performance.
By testing the silent flush mechanism, you can confirm that your water-efficient toilet is functioning optimally. This ensures maximum water savings without compromising flushing power.
Remember to regularly maintain and clean your silent flush mechanism for long-lasting efficiency.
Water-Saving Flush Options?
To ensure water-saving flush options are effective, one can test the toilet to ensure it flushes properly without the need for running water. One option is to install a dual flush toilet, which offers two flush buttons: one for liquid waste and another for solid waste. This allows users to select the appropriate water volume for each type of waste, resulting in significant water savings.

Another option is to choose water-efficient toilet models, which are designed to use less water per flush. These models often incorporate advanced flushing technologies, such as pressure-assisted or gravity-assisted flushing, to maximize flushing efficiency while minimizing water usage.
Testing the toilet without running water can be done by placing a few pieces of toilet paper in the bowl and flushing. If the toilet effectively flushes the paper without the need for additional water, it’s a successful water-saving flush option.
Frequently Asked Questions
How Do I Locate the Toilet’s Water Supply Valve?
To locate the toilet’s water supply valve, you’ll need to do some troubleshooting.
First, check behind the toilet bowl near the floor for a small valve or knob. This is usually the shut-off valve that controls the water supply to the toilet.

If you can’t find it there, look in the wall behind the toilet or in a nearby utility closet.
What Should I Do if I Find Any Blockages in the Toilet Tank?
If I find any blockages in the toilet tank, the first thing I’d do is turn off the water supply valve.
Then, I’d remove the lid of the tank and visually inspect for any obvious obstructions.
If I see any, I’d use a plunger to try and dislodge the blockage.

If that doesn’t work, I might need to use a toilet auger to clear the blockage.
Once the blockage is resolved, I can turn the water supply valve back on and flush the toilet to ensure everything is working properly.
How Can I Clean or Replace the Flapper if Necessary?
Cleaning or replacing the flapper is essential for a properly functioning toilet. To ensure optimal performance, it’s crucial to maintain the flapper regularly.
Cleaning the flapper involves removing it from the flush valve and wiping away any debris or buildup.

If the flapper is damaged or worn out, replacing it’s necessary. This involves purchasing a new flapper and following the manufacturer’s instructions for installation.
Properly cleaning or replacing the flapper will help prevent water leaks and ensure a smooth flush.
What Should I Do if I Find Any Clogs or Debris in the Flush Valve?
If I find any clogs or debris in the flush valve, the first step is to turn off the water supply to the toilet.
I’d then use a plunger to try and clear the clog by creating suction. If that doesn’t work, I could use a toilet auger to physically remove the blockage.

It’s important to be cautious while doing this to avoid damaging the toilet or causing further issues.
How Do I Use a Toilet Auger to Clear Obstructions in the Drain?
To clear obstructions in the drain, I’d use a toilet auger.
A toilet auger is a handy tool that can effectively remove clogs and debris from the toilet. Its benefits include its flexibility and reach, allowing it to navigate through the twists and turns of the drain.
If a toilet auger isn’t available, there are alternatives such as using a plunger or a chemical drain cleaner, although these may not be as effective in some cases.

Conclusion
In conclusion, by following these simple steps, you can easily fix a running toilet and save water.
Juxtaposing the technical instructions with a concise and informative style keeps the audience engaged.
Don’t let a running toilet drain your resources, take action and resolve the issue today.


