Are you tired of dealing with a wobbly toilet? It’s time to take matters into your own hands and install a new toilet flange.
This small but crucial component is what keeps your toilet securely attached to the floor. In this step-by-step guide, we’ll walk you through the process of replacing your old flange with a new one.
With the right tools and materials, you’ll have a sturdy and reliable toilet in no time. Say goodbye to toilet troubles and hello to a rock-solid throne!
Key Takeaways
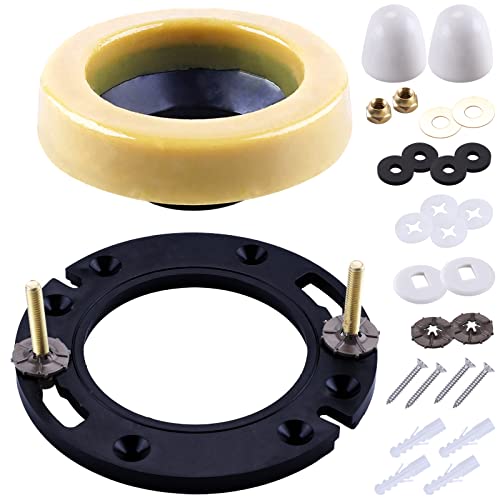
- The necessary tools and materials for installing a new toilet flange include a new flange, wax ring, screws or bolts, screwdriver or wrench, and a level.
- When removing the old toilet flange, it is important to follow proper removal procedures and use tools such as a wrench, pliers, and putty knife. Safety precautions should also be taken, such as wearing gloves and eye protection.
- Troubleshooting during flange installation may involve checking for cracks or damage on the flange, ensuring proper alignment with the drainpipe, and considering alternative options such as a wax ring or rubber gasket. A repair kit can be used if the flange is damaged but salvageable.
- The tools needed for flange removal include an adjustable wrench, screwdriver, hacksaw, putty knife, and PVC primer and cement for securing the new flange. Safety precautions should be taken, such as shutting off the water supply, draining the toilet tank and bowl, and wearing protective gear.
MENNTY Toilet Flange with Wax Ring for Toilets Replacement Kit Includes Bolts PVC Toilet Flange Repair Kit for 3" or 4" Pipes, Fit Toilet Install & Repair
Fits 3-inch or 4-inch Waste Lines: Toilet flange with wax ring for any new installation or REPAIR on…
As an affiliate, we earn on qualifying purchases.
As an affiliate, we earn on qualifying purchases.
Necessary Tools and Materials
You’ll need a few tools and materials to install a new toilet flange.
First and foremost, you will require a new toilet flange, which is typically made of PVC or ABS plastic.
Additionally, you’ll need a wax ring, which creates a watertight seal between the toilet and the flange.
To secure the flange to the floor, you’ll need screws or bolts, depending on the type of flange you have.
A screwdriver or wrench will be necessary to tighten the screws or bolts.
Finally, it’s essential to have a level to ensure that the flange is installed correctly and will provide a stable base for the toilet.
With these tools and materials, you’ll be well-equipped to tackle the installation process.
Now, let’s move on to removing the old toilet flange.
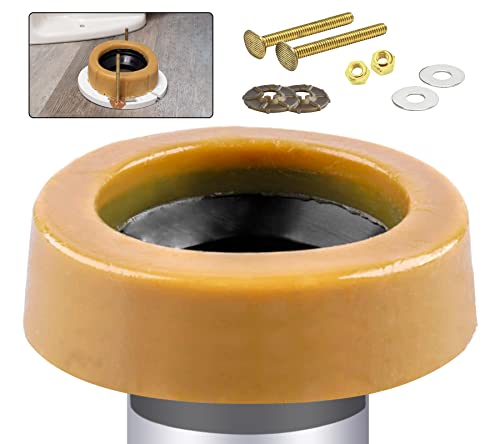
Extra Thick Toilet Wax Ring Kit with Flange and Bolts for Floor Outlet Toilets New Install or Re-seat, Fits 3-inch or 4-inch Waste Lines
Signs of a Bad Toilet Wax Ring?: If you can smell a sewer-like smell coming from your toilet,…
As an affiliate, we earn on qualifying purchases.
As an affiliate, we earn on qualifying purchases.
Removing the Old Toilet Flange
When it comes to removing the old toilet flange, there are several key points to consider.
First and foremost, it is crucial to follow the proper flange removal procedure to avoid any damage to the surrounding plumbing.
To successfully remove the flange, you will need a few essential tools, including a wrench, pliers, and a putty knife.
Lastly, it is important to take safety precautions during the removal process, such as wearing gloves and eye protection, to protect yourself from any potential hazards.
Proper Flange Removal
To remove the old toilet flange, start by loosening the screws securing it to the floor. Use a screwdriver to turn the screws counterclockwise until they are loose enough to remove. Once the screws are removed, lift the flange off the floor. Be careful not to damage the surrounding area.
Here are some tips to troubleshoot flange installation and explore toilet flange alternatives:
- Check for any cracks or damage on the flange before removing it.
- Ensure that the flange is properly aligned with the drainpipe.
- Use a wax ring or a rubber gasket as an alternative to the traditional flange.
- Consider using a repair kit if the flange is damaged but still salvageable.
Now that you know how to remove the old flange, let’s move on to the tools needed for this task.
Tools Needed for Removal
Now that we have discussed the removal process, let’s talk about the tools you’ll need for this task. When it comes to toilet flange replacement, having the right tools is essential for a successful repair. Below is a list of the necessary tools you’ll need:
| Tools | Description |
|---|---|
| Adjustable wrench | For loosening and tightening bolts |
| Screwdriver | To remove screws and pry off old flange |
| Hacksaw | For cutting off damaged flange |
| Putty knife | To scrape off old wax ring |
| PVC primer and cement | For securing the new flange |
These tools will help you remove the old flange and prepare for the installation of a new one. Remember, it is important to choose the right flange repair options based on the condition of your existing flange to ensure a proper and long-lasting fix.
Safety Precautions During Removal
It’s important to take safety precautions while removing the old flange. Here are four key steps to follow for preventing water damage and protecting the toilet during the removal process:
-
Shut off the water supply: Before starting, turn off the water supply valve located behind the toilet. This will prevent any accidental leaks or water damage.
-
Drain the toilet tank and bowl: Flush the toilet to empty the tank and bowl. Use a sponge or a vacuum to remove any remaining water to avoid spills during the removal.
-
Wear protective gear: To protect yourself from any potential harm, wear gloves and safety goggles. This will ensure your safety while handling the old flange and any sharp tools.
-
Use caution when removing the flange: Carefully loosen the bolts securing the flange to the floor. Avoid using excessive force to prevent any damage to the toilet or surrounding area.

Oatey Fix-It Stainless Steel Flange Repair Ring, Adjustable Toilet Flange Repair Kit for Broken or Cracked Mounting Flanges, Secure Seal
REPAIRS BROKEN OR DAMAGED FLANGES: Easily fixes broken, cracked, or worn-out toilet mounting flanges without full replacement, restoring…
As an affiliate, we earn on qualifying purchases.
As an affiliate, we earn on qualifying purchases.
Preparing the Subfloor
Inspect your subfloor for any signs of damage or rot before proceeding with the installation of the new toilet flange. It’s crucial to ensure that the subfloor is in good condition to provide a stable and secure base for the flange. Start by removing the old flange and thoroughly clean the area. Once clean, protect the subfloor from moisture and potential leaks by applying a waterproofing membrane. This will prevent any water damage and extend the lifespan of your subfloor. If you notice any damage or rot, it’s important to address it before installing the new flange. You can repair the subfloor by replacing the damaged sections with new plywood or using a wood filler to fill in any smaller areas of damage. Make sure the subfloor is level and secure before proceeding with the installation.
| Subfloor Protection | Subfloor Repair |
|---|---|
| Apply waterproofing membrane | Replace damaged sections with new plywood |
| Prevents moisture and leaks | Use wood filler for smaller areas of damage |
| Extends subfloor lifespan | Ensure subfloor is level and secure |

Fluidmaster Universal Install/Uninstall Toilet Repair Tool
Fluidmaster’s universal install and uninstall toilet tool makes any toilet repair job simple
As an affiliate, we earn on qualifying purchases.
As an affiliate, we earn on qualifying purchases.
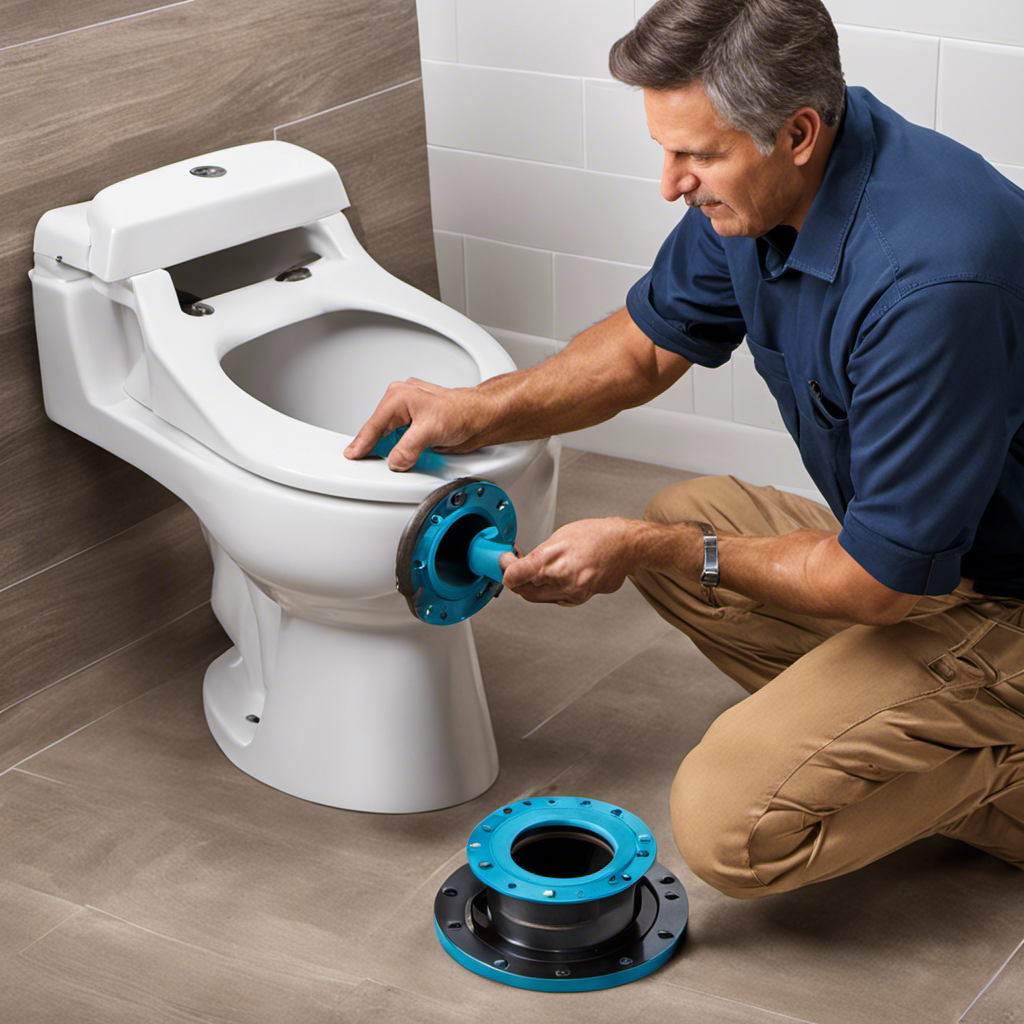
Installing the New Toilet Flange
When installing a new toilet flange, it’s crucial to ensure proper flange alignment for a secure and leak-free connection. This involves aligning the flange with the drain pipe and making sure it sits flush with the floor surface.
To further ensure stability and prevent any movement, it’s important to securely tighten the flange bolts using the appropriate torque specifications recommended by the manufacturer.
Proper Flange Alignment
To properly align the flange, make sure you position it directly on top of the waste pipe. This step is crucial in ensuring a secure and leak-free installation.
Here are some flange installation tips and common flange alignment mistakes to avoid:
-
Measure twice, cut once: Take accurate measurements of the waste pipe and flange to ensure a proper fit.
-
Check for level and center: Use a level to ensure the flange is positioned straight and centered on the waste pipe.
-
Avoid rocking: Make sure the flange sits flat on the floor without any rocking or wobbling. Use shims if necessary to achieve a stable base.
-
Tighten evenly: When securing the flange bolts, tighten them evenly in a cross pattern to distribute the pressure evenly and prevent leaks.
By following these flange installation tips and avoiding common alignment mistakes, you can ensure a secure and reliable toilet flange installation.
Now, let’s move on to securing the flange bolts.
Securing Flange Bolts
Now that you have properly aligned the flange, it is time to secure the flange bolts. These bolts are essential for holding the toilet securely in place.
To secure the flange bolts, start by inserting them into the holes of the flange. Make sure they are aligned with the holes on the toilet base. Once inserted, place a washer over each bolt, followed by a nut.
Using a wrench, tighten the nuts evenly on both sides, alternating between each nut. This will help ensure that the toilet seat is level and secure. Be careful not to overtighten, as this can damage the toilet or the flange.
After tightening the flange bolts, give the toilet seat a gentle shake to check for any movement. If the seat feels secure, you have successfully secured the flange bolts. If there is any movement, simply tighten the nuts a little more until the toilet seat is firmly in place.
Securing the Toilet Flange to the Subfloor
First, make sure you’ve positioned the toilet flange correctly before securing it to the subfloor. The subfloor preparation is crucial for a successful flange installation.
Here are four steps to securely attach the toilet flange to the subfloor:
-
Align the flange: Place the flange over the waste pipe and ensure it is centered. Use a level to check for proper alignment.
-
Mark the screw holes: Once the flange is aligned, mark the screw holes on the subfloor using a pencil or marker. Make sure to mark all the holes to ensure stability.
-
Drill pilot holes: Use a drill with an appropriate sized drill bit to create pilot holes at the marked locations. This will prevent the subfloor from splitting when inserting the screws.
-
Secure the flange: With the pilot holes drilled, attach the flange to the subfloor using screws. Make sure the flange is firmly secured to avoid any movement or leaks.
Reinstalling the Toilet
After securing the toilet flange to the subfloor, it’s time to reinstall the toilet.
Make sure the wax ring is in place on the flange before proceeding.
Begin by carefully lifting the toilet bowl and aligning it with the flange.
Gently lower the bowl onto the flange, making sure it is centered and level.
Apply downward pressure to compress the wax ring and create a watertight seal.
Once the bowl is in place, reattach the mounting bolts and tighten them securely.
Next, reconnect the water supply line to the fill valve, ensuring it is tight to prevent leaks.
Finally, carefully reposition the tank onto the bowl and secure it with the provided bolts or nuts.
Double-check all connections and give the toilet a test flush to ensure everything is working properly.
Testing for Leaks and Proper Functioning
Once the toilet is securely in place, it’s important to test for leaks and ensure that it is functioning properly. Follow these steps to properly test your toilet flange:
-
Check for leaks: Flush the toilet multiple times and inspect the base for any signs of water leakage. If you notice any water pooling around the toilet or a damp floor, it may indicate a problem with the flange seal.
-
Tighten the bolts: Make sure the bolts securing the toilet to the flange are tightened properly. Use a wrench to ensure they are snug but not overly tightened, as this can damage the toilet or flange.
-
Inspect the wax ring: Lift the toilet slightly to inspect the wax ring. It should be evenly compressed and form a tight seal between the toilet and the flange. If the wax ring appears damaged or misaligned, it may need to be replaced.
-
Test the flushing mechanism: Flush the toilet and observe if it flushes properly and refills without any issues. If the water does not flush properly or if it continues to run after flushing, there may be a problem with the flange or the toilet’s internal components.
Regular toilet flange maintenance and troubleshooting flange issues are essential to ensure proper functioning and prevent leaks. By following these steps, you can identify and address any potential problems with your toilet flange, ensuring a reliable and leak-free toilet.
Conclusion
In conclusion, you’ve successfully installed a new toilet flange using the necessary tools and materials.
By removing the old flange, preparing the subfloor, and installing the new flange, you’ve ensured a secure and stable base for your toilet.
By securing the flange to the subfloor and reinstalling the toilet, you’ve completed the installation process.
Finally, by testing for leaks and proper functioning, you’ve ensured the efficiency of your new toilet flange.
Congratulations on a job well done!