Fed up with the relentless noise of a flushing toilet? Fear not, we’re here to help.
In this article, we’ll show you what to do if your toilet keeps running. We’ll walk you through step by step, from checking the flapper valve to adjusting the water level in the tank.
With our expert advice and simple tips, you’ll be able to fix your toilet and regain control of your bathroom in no time.
Key Takeaways
- Checking and adjusting components such as the flapper valve, water level in the tank, fill valve, chain or lift wire, float ball or cup, overflow tube, and flush handle or button can help fix a running toilet.
- Cleaning and replacing components like the flapper valve, overflow tube, flush handle or button, and flush valve seal can also resolve the issue of a running toilet.
- Specific steps for actions like adjusting the float ball or cup, replacing the chain or lift wire, fill valve, and flush valve seal can guide the troubleshooting process.
- It is important to maintain a properly functioning flush valve seal and water level to avoid leaks and imbalances, as a running toilet can waste a significant amount of water. Seeking professional assistance may be necessary for complex problems.

Korky Ultra Standard 2-Inch Universal Toilet Flapper – Long Lasting Rubber – Easy to Install – Made in USA, 100BP
Made in United States
As an affiliate, we earn on qualifying purchases.
As an affiliate, we earn on qualifying purchases.
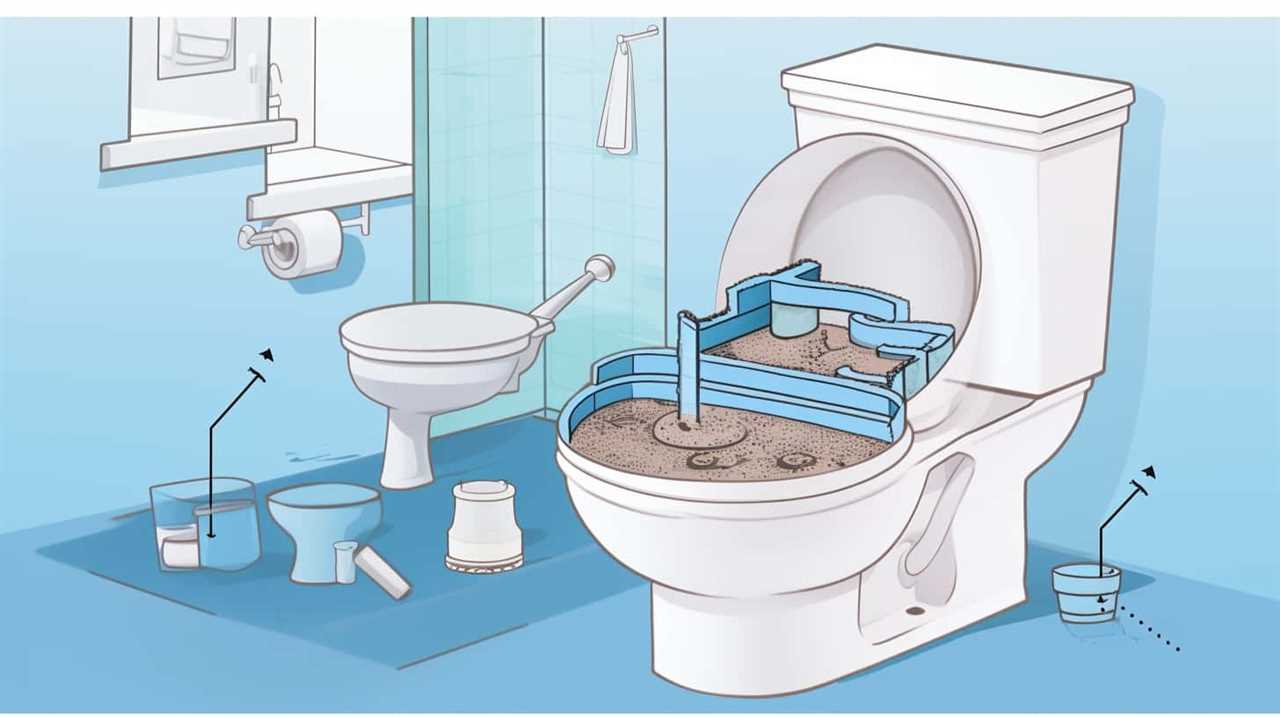
Check the Flapper Valve
First, we should regularly check the flapper valve to ensure proper functioning. The flapper valve is a crucial component of the toilet tank that controls the water flow during a flush. Over time, debris and mineral deposits can build up on the flapper valve, causing it to malfunction.

To clean the flapper valve, start by turning off the water supply to the toilet. Then, remove the tank lid and locate the flapper valve. Inspect it for any signs of damage or dirt. If cleaning is necessary, gently wipe the flapper valve with a soft cloth or sponge. If the flapper valve is damaged, it may need to be replaced.
Troubleshooting the flapper valve involves checking for proper alignment, adjusting the chain length, and ensuring a tight seal.

Fluidmaster Universal Install/Uninstall Toilet Repair Tool
Fluidmaster’s universal install and uninstall toilet tool makes any toilet repair job simple
As an affiliate, we earn on qualifying purchases.
As an affiliate, we earn on qualifying purchases.
Adjust the Water Level in the Tank
Let’s talk about how to adjust the water level in the tank to fix a running toilet.
Adjusting the water level can help resolve the issue and prevent water wastage.

We’ll cover the causes of a running toilet and provide troubleshooting tips to help you solve the problem efficiently.
Tank Water Level Adjustment
To adjust the water level in the tank, we will need to locate the water level adjustment mechanism. This mechanism is typically a float or a fill valve that controls the water level in the tank. By adjusting this mechanism, we can ensure that the water level is at the correct height for optimal toilet functionality.
To help you understand the process better, here is a table that outlines the steps for adjusting the water level in the tank:
| Step | Instructions |
|---|---|
| 1 | Shut off the water supply to the toilet. |
| 2 | Flush the toilet and let the tank empty completely. |
| 3 | Locate the water level adjustment mechanism. |
| 4 | Adjust the mechanism to raise or lower the water level in the tank. |
| 5 | Turn the water supply back on and check the water level. |
Causes of Running Toilet
To troubleshoot the issue of a running toilet, we’ll now explore the potential causes of this problem, specifically focusing on how adjusting the water level in the tank can help resolve it.

One of the main causes of water leakage in a toilet is an imbalanced water level in the tank. If the water level is set too high, it can overflow into the overflow tube, causing continuous running.
On the other hand, if the water level is set too low, it can result in weak flushing and incomplete bowl refill, which can also lead to a running toilet.
By adjusting the water level in the tank to the recommended level indicated by the manufacturer, you can prevent water leakage and resolve the running toilet issue.
Troubleshooting toilet problems requires careful attention to detail and making the necessary adjustments for optimal performance.

Troubleshooting Running Toilets
To troubleshoot running toilets, we can start by adjusting the water level in the tank. This is a common issue that can be caused by a variety of factors, such as toilet leaks or low water pressure.
By adjusting the water level, we can ensure that the tank fills to the appropriate level and stops running. To do this, locate the water level adjustment screw or valve, which is usually found on top of the fill valve.
Turn the screw or valve clockwise to decrease the water level or counterclockwise to increase it. Make small adjustments and test the toilet to see if the running stops.
If the issue persists, it may be necessary to inspect the fill valve for any potential problems.


Fluidmaster 400H-002 Performax Universal Toilet Fill Valve High Performance Tank and Bowl Water Control, 1-Pack, Multicolor
Fix noisy, or slow filling fill valves with the quietest, most powerful toilet fill valve available
As an affiliate, we earn on qualifying purchases.
As an affiliate, we earn on qualifying purchases.
Inspect the Fill Valve
Now let’s take a closer look at the fill valve. Inspecting the fill valve is an important step in troubleshooting a running toilet.
There are three main points to consider when inspecting the fill valve: adjusting the water level, replacing faulty parts, and cleaning the valve.
Adjusting Water Level
One option is to inspect the fill valve and adjust the water level if your toilet keeps running. Here are some troubleshooting tips and maintenance tips to help you with this task:
- Check the water level: Ensure that the water level in the tank isn’t too high or too low. Adjust it to the recommended level.
- Inspect the fill valve: Look for any signs of damage or debris that may be causing the fill valve to malfunction. Clean or replace the fill valve if necessary.
- Adjust the float ball or cup: If the water level is too high, try adjusting the float ball or cup to a lower position.
- Check the water supply: Make sure the water supply to the toilet is fully open and there are no obstructions or leaks in the supply line.
- Test the flush valve: Ensure that the flush valve is closing properly after each flush. If it’s not, adjust or replace the flush valve as needed.
Replacing Faulty Parts
Let’s inspect the fill valve to see if any faulty parts need to be replaced.

When it comes to troubleshooting a running toilet, it’s important to identify and fix the root cause of the problem.
The fill valve is responsible for regulating the water level in the tank, so if it isn’t functioning properly, it can lead to a constantly running toilet.
Upgrading the mechanisms in the fill valve can help improve its performance and prevent future issues.
To determine if the fill valve is the culprit, start by turning off the water supply and removing the tank lid.

Check for any signs of damage or wear on the fill valve, such as cracks or leaks.
If necessary, replace the faulty parts to restore the proper functioning of the fill valve and stop the toilet from running continuously.
Cleaning the Valve
To properly inspect the fill valve and ensure its optimal performance, we’ll now discuss the process of cleaning the valve.
Cleaning the fill valve is a crucial step in troubleshooting a running toilet. Here are some important points to keep in mind when cleaning the valve:

- Turn off the water supply before starting the cleaning process to avoid any water leakage or accidents.
- Remove the valve cap to access the inner components and check for any debris or mineral buildup.
- Inspect the diaphragm and seal for any signs of wear or damage. Replace if necessary.
- Use a vinegar solution to soak the valve parts and dissolve any stubborn deposits.
- Gently scrub the valve components with a soft brush to remove any remaining residue.
When performing this cleaning technique, it’s essential to avoid common mistakes such as using harsh chemicals or scrubbing too aggressively, as this can damage the valve.

Fluidmaster 400AKRP10 Universal, All In One, Complete Toilet Tank Repair Kit For 2-Inch Flush Valve Toilets
RESTORES OVERALL TOILET PERFORMANCE: All in one toilet repair kit replaces inefficient fill and flush valves, leaky flappers,…
As an affiliate, we earn on qualifying purchases.
As an affiliate, we earn on qualifying purchases.
Clean or Replace the Flapper Valve
To resolve the issue of a running toilet, we can start by cleaning or replacing the flapper valve. The flapper valve is a crucial component of the toilet tank that controls the flow of water into the bowl. Over time, it can become dirty or worn out, leading to leaks and continuous running. Before replacing the flapper valve, it’s essential to troubleshoot the problem to determine if cleaning will suffice.
Here is a table comparing the benefits and considerations of cleaning versus replacing the flapper valve:
| Cleaning the Flapper Valve | Replacing the Flapper Valve |
|---|---|
| – Cost-effective | – Ensures complete seal |
| – Quick and easy | – Long-term solution |
| – Can resolve minor issues | – Suitable for worn valves |
If cleaning the flapper valve does not resolve the problem, replacing it is a more permanent solution. By following these steps, you can effectively address a running toilet and restore its proper functioning.

Test the Float Ball or Cup
Now let’s move on to testing the float ball or cup, which are essential components in the toilet tank that help control the water level.
The first step is to adjust the float ball to ensure it’s positioned correctly. If the float ball is damaged or ineffective, it may need to be replaced with a new one.
Additionally, it’s important to check the water level in the tank to ensure it’s not too high or too low, as this can also cause the toilet to keep running.
Adjusting Float Ball
Let’s start by testing the float ball or cup to see if it needs adjusting. This is an important step in float ball maintenance and troubleshooting toilet issues.
Here are five things to keep in mind when adjusting the float ball:
- Check the water level: Ensure that the water level in the tank is set correctly. It should be about one inch below the top of the overflow pipe.
- Adjust the float arm: Gently bend the float arm downwards to lower the water level or upwards to raise it.
- Verify smooth movement: Make sure the float ball moves freely without any obstructions or sticking.
- Clean the float ball: Remove any debris or buildup on the float ball, as this can affect its buoyancy.
- Test for leaks: After adjusting the float ball, check for any leaks around the valve or connections.
Replacing Float Cup
We will begin by testing the float ball or cup to determine if it needs to be replaced.
To troubleshoot the float cup, first, locate it inside the toilet tank. It’s usually attached to the fill valve and is responsible for regulating the water level.
Gently lift the float cup to see if it moves freely. If it’s stuck or doesn’t rise and fall easily, this may indicate a problem.

Next, check the float cup for any signs of damage or wear. If you notice cracks, leaks, or deterioration, it’s time to replace it.
Adjusting the float cup may help temporarily, but if the issue persists, replacement is the best solution.
Once you have tested and determined the float cup needs replacing, you can proceed to the next step of checking the water level in the tank.
Checking Water Level
To continue troubleshooting the toilet’s running issue, we need to test the water level by examining the float ball or cup. Adjusting the water level correctly is crucial for the toilet to function properly. Here are some steps to help you check the water level:

- Start by removing the tank lid and locating the float ball or cup.
- Gently lift the float ball or cup and observe the water level. It should be approximately an inch below the top of the overflow tube.
- If the water level is too high, adjust the float by bending the rod or adjusting the screw on the fill valve.
- If the water level is too low, you may need to increase the water pressure or check for any leaks in the fill valve or flapper.
Replace the Fill Valve
If your toilet keeps running, one possible solution is to replace the fill valve. The fill valve is responsible for controlling the water level in the tank and refilling it after each flush.
Over time, the valve may become worn or malfunction, leading to a continuous flow of water. Before replacing the fill valve, it’s important to troubleshoot common issues and ensure that cleaning the valve doesn’t solve the problem.
If you’ve already attempted cleaning and the running toilet issue persists, replacing the fill valve is the next step. This task requires some basic plumbing knowledge and tools, but it can be done by following a few simple steps.
Check the Chain or Lift Wire
Let’s now talk about checking the chain or lift wire when dealing with a running toilet.

First, you may need to adjust the chain length to ensure it isn’t too loose or too tight. This can help prevent the chain from getting caught or tangled, causing the toilet to continuously run.
If adjusting the chain doesn’t solve the issue, it may be necessary to replace the lift wire, which connects the chain to the flush handle.
Chain Length Adjustment
To adjust the chain length, we need to start by locating the chain or lift wire. Once you have found it, follow these adjustment methods and troubleshooting tips:
- Ensure that the chain or lift wire isn’t tangled or caught on anything.
- If the chain is too long, you can shorten it by removing a few links with pliers.
- On the other hand, if the chain is too short, you can lengthen it by adding a chain extender or a small piece of wire.
- Make sure that there’s enough slack in the chain or lift wire to allow the flapper to fully close after flushing.
- Test the flush by gently pulling the chain or lift wire to see if it allows the flapper to open and close smoothly.
Replace Lift Wire
To replace the lift wire, we need to inspect the chain or lift wire for any signs of damage or wear. Troubleshooting common issues with the lift wire is essential to ensure the proper functioning of the toilet. Here are the steps to replace the lift wire:

- Turn off the water supply: Locate the shut-off valve behind the toilet and turn it clockwise to stop the water flow.
- Remove the tank lid: Lift the lid and set it aside in a safe place.
- Inspect the chain or lift wire: Look for any frayed or broken sections. If you notice any damage, it is necessary to replace the lift wire.
Markdown Table:
| Steps to Replace Lift Wire |
|---|
| 1. Turn off water supply |
| 2. Remove tank lid |
| 3. Inspect chain or lift wire |
Adjust the Float Ball or Cup
To adjust the float ball or cup, we need to first locate the water valve underneath the toilet tank. Here are some steps to help you adjust the float ball or cup effectively:
- Turn off the water supply by rotating the valve clockwise.
- Flush the toilet to drain the tank.
- Adjust the float ball or cup by bending the arm or adjusting the screw, so it sits lower in the tank.
- Turn the water supply back on and check if the water stops running.
- If the issue persists, you may need to adjust the fill valve or troubleshoot for any toilet leaks.
Replace the Chain or Lift Wire
We can fix a running toilet by replacing the chain or lift wire. Sometimes, the chain or lift wire connecting the flush handle to the flapper valve can become worn or tangled, preventing the valve from closing properly. This can result in water continuously flowing into the toilet bowl.
To resolve this issue, follow these steps:

- Turn off the water supply to the toilet.
- Remove the tank lid and locate the chain or lift wire connected to the flush handle.
- Disconnect the chain or lift wire from the flush handle and the flapper valve.
- Replace the old chain or lift wire with a new one of the appropriate length.
- Reconnect the chain or lift wire to the flush handle and the flapper valve.
- Turn on the water supply and test the toilet to ensure it no longer runs.
Inspect the Overflow Tube
One possible sentence for the subtopic ‘Inspect the Overflow Tube’ could be: ‘First, let’s examine the overflow tube for any signs of damage or blockage.’
Inspecting the overflow tube is an essential step in troubleshooting water overflow in a running toilet. Here are some key points to keep in mind:
- Check for cracks or leaks in the tube.
- Ensure that the tube is properly connected to the fill valve.
- Clear any debris or mineral buildup that may be obstructing the tube.
- Verify that the water level in the tank is below the top of the tube.
- Make sure the float valve is functioning correctly.
Clean or Replace the Overflow Tube
After inspecting the overflow tube for any signs of damage or blockage, it’s time for us to address the next step: cleaning or replacing the overflow tube.
If you have identified a problem with the overflow tube, there are a few options to consider. First, you can try cleaning the tube to remove any debris or buildup that may be causing the issue. Using a mixture of vinegar and water, scrub the inside of the tube with a brush to remove any residue.

If cleaning doesn’t solve the problem, it may be necessary to replace the overflow tube altogether. This can be done by purchasing a new tube from a hardware store and following the manufacturer’s instructions for installation.
Now that we’ve covered cleaning or replacing the overflow tube, let’s move on to the next step: checking the flush handle or button.
Check the Flush Handle or Button
To begin troubleshooting a running toilet, first, check the flush handle or button. This is an essential step in identifying and resolving any flushing issues. Here are some key points to consider when inspecting the flush mechanism:
- Ensure the flush handle or button is properly connected and not loose.
- Check for any obstructions or debris around the handle or button that may be preventing it from functioning correctly.
- Test the flush handle or button to see if it springs back into place after flushing.
- If the handle or button feels sticky or difficult to press, it may need to be cleaned or lubricated.
- If necessary, replace the flush handle or button with a new one to resolve any persistent issues.
Adjust or Replace the Flush Handle or Button
Now that we’ve checked the flush handle or button, how can we adjust or replace it if necessary?

If you’re experiencing a flushing issue with your toilet, it’s possible that the flush handle or button may be the culprit. To troubleshoot this problem, start by adjusting the handle or button. Locate the adjusting nut on the inside of the tank and tighten it until the handle or button feels secure.
If the handle or button is still not functioning properly, it may be necessary to replace it. To replace the flush handle or button, remove the old one by unscrewing or unclipping it from the inside of the tank. Then, install the new handle or button by following the manufacturer’s instructions.
This should resolve the issue and restore proper flushing functionality to your toilet.
Test the Flush Valve Seal
To troubleshoot a running toilet, we need to evaluate the integrity of the flush valve seal. The flush valve seal is responsible for preventing water from continuously flowing into the toilet bowl after flushing. Here are some troubleshooting tips to test the flush valve seal:

- Inspect the seal for any signs of wear or damage.
- Gently press down on the seal to ensure it’s properly seated.
- Clean any debris or mineral deposits that may be affecting the seal’s performance.
- Apply a thin layer of silicone lubricant to the seal to improve its sealing ability.
- If the seal is severely damaged or worn out, it may need to be replaced.
Testing the flush valve seal is an important step in resolving common toilet problems such as a running toilet. By following these troubleshooting tips, you can ensure that the seal is functioning properly and maintain the efficiency of your toilet.
Replace the Flush Valve Seal
We can replace the flush valve seal to resolve a running toilet. The flush valve seal is an essential component that helps to create a watertight seal between the tank and the bowl. Over time, this seal can deteriorate or become damaged, leading to leaks and a constantly running toilet. By replacing the flush valve seal, you can effectively stop the water from continuously flowing into the bowl and save water in the process.
To replace the flush valve seal, follow these steps:
- Turn off the water supply to the toilet.
- Drain the tank by flushing it and holding down the handle.
- Remove the old flush valve seal by detaching it from the flush valve assembly.
| Step | Action |
|---|---|
| 1 | Turn off water supply |
| 2 | Drain the tank |
| 3 | Remove old flush valve seal |
Once you have replaced the flush valve seal, turn on the water supply and check for any leaks. If the problem persists or you encounter any difficulties during the process, it may be necessary to seek professional assistance or consider a complete toilet flapper replacement. Troubleshooting toilet leaks can be a complex task, but with the right knowledge and tools, you can successfully fix a running toilet.
Frequently Asked Questions
How Do I Adjust the Water Level in the Tank?
To adjust the water level in the tank, first locate the fill valve. Then, use a screwdriver to turn the adjusting screw clockwise to lower the water level or counterclockwise to raise it.
What Do I Do if the Toilet Is Still Running After I’ve Checked the Flapper Valve?
If the toilet is still running after checking the flapper valve, we need to troubleshoot further. First, ensure the water level is adjusted properly. If that doesn’t work, it may be time to call a professional for toilet repair.
How Often Should I Clean or Replace the Flapper Valve?
To fix a running toilet and troubleshoot the issue, we need to determine how often to clean or replace the flapper valve. This is crucial for maintaining a properly functioning toilet.
What Is the Purpose of the Overflow Tube and How Do I Clean or Replace It?
To clean or replace the overflow tube, first identify the issue causing the toilet to keep running. Then, using a wrench, detach the tube and clean it thoroughly. If necessary, replace it with a new one.

How Do I Test and Replace the Flush Valve Seal?
To test and replace the flush valve seal, follow these troubleshooting steps. First, turn off the water supply. Then, flush the toilet and check for leaks. If there’s a leak, replace the seal.
Conclusion
In conclusion, maintaining a properly functioning toilet is essential for a smooth-running household. By regularly checking and addressing common issues such as the flapper valve, water level, fill valve, float ball, flush handle, and flush valve seal, you can prevent the inconvenience of a continuously running toilet.
Don’t let a small problem turn into a big headache – take the time to perform these simple maintenance tasks and enjoy a worry-free bathroom experience.