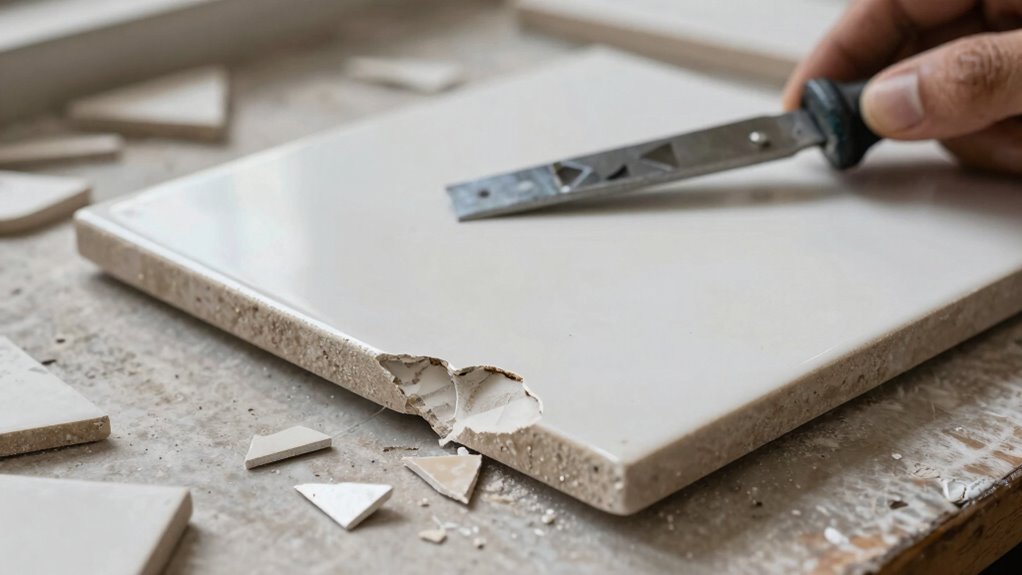
To avoid chips on visible edges when cutting porcelain tiles, use high-quality tools like a wet saw with a diamond blade. Score the tile evenly before cutting to create clean edges, and maintain steady pressure throughout. Make certain your workspace is stable and free from debris, and remember to finish edges with a diamond grinding pad. By following these practices, you can achieve smooth cuts. There’s much more to explore about effective techniques and tips for perfect tiles!
Key Takeaways
- Use a wet saw with a diamond blade to reduce friction and minimize chipping during cuts.
- Score tiles before cutting to create a clean edge and ensure smoother breaks.
- Apply steady, controlled pressure when cutting to prevent excessive force that can cause chips.
- Smooth rough edges with a diamond grinding pad for a polished finish post-cutting.
- Choose specific blades designed for porcelain to maintain cutting quality and avoid damage.
porcelain tile wet saw with diamond blade
As an affiliate, we earn on qualifying purchases.
As an affiliate, we earn on qualifying purchases.
Avoiding Chips: Essential Tools for Cutting Porcelain Tiles

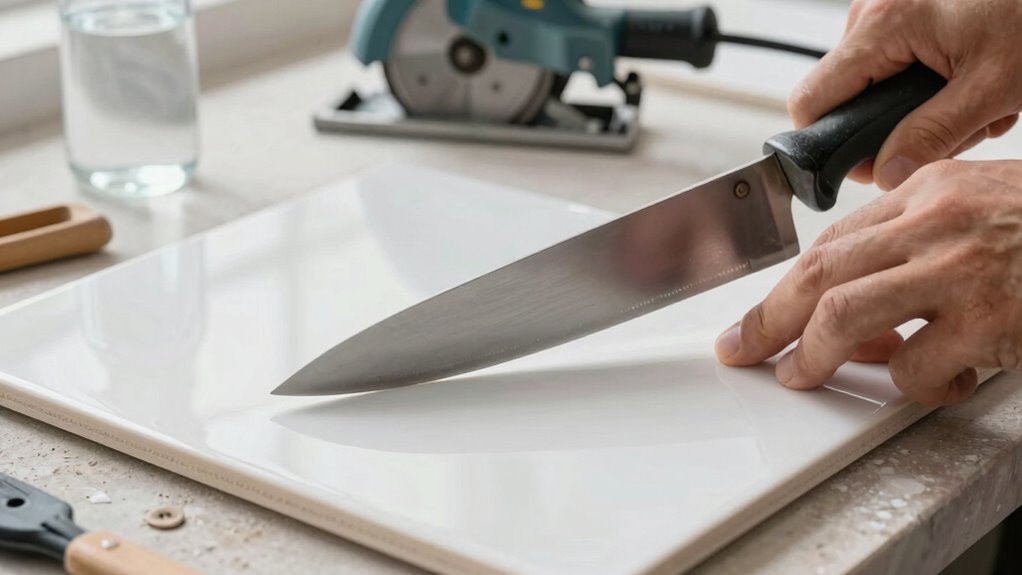
When you’re cutting porcelain tiles, avoiding chips is vital for achieving a clean finish. To do this, you’ll need the right tools and cutting techniques. A high-quality tile cutter with a diamond blade is indispensable; it helps you make smooth, precise cuts without damaging the edges. Score the tile gently before applying pressure to snap it cleanly.
Using a wet saw can also minimize chipping, as the water cools the blade and reduces friction. Additionally, consider using a tile nipper for intricate shapes. Regular tile maintenance, including sealing edges post-installation, can help protect against future chipping. By mastering these techniques and tools, you’ll guarantee your porcelain tiles look great and last longer.
Setting Up Your Workspace for Success

After mastering the right tools for cutting porcelain tiles, setting up your workspace is the next important step for success. Proper workspace organization can make all the difference. Start by designating a clear area for tile placement, ensuring it’s free from distractions. Lay out your tools in an orderly fashion to enhance efficiency and minimize movement. Remember that a clean workspace can also improve your overall filtration/suction basics during the cutting process. Additionally, consider incorporating HEPA filters to reduce dust particles in the air, which can enhance visibility and safety.
| Tool | Purpose | Location |
|---|---|---|
| Tile Cutter | Cutting tiles | Left side |
| Straight Edge | Guiding cuts | Center |
| Safety Gear | Protecting yourself | Right side |
| Measuring Tape | Accurate measurements | Nearby |
| Clean Cloth | Wiping down tiles and tools | Accessible |
With everything in its place, you’re set to cut tiles smoothly and effectively.
Minimize Chips With These Techniques

To minimize chips when cutting porcelain tile, you need to use the right tools for the job. Scoring the tile before making your cut can also help create a cleaner edge. By following these techniques, you’ll achieve a more polished finish.
Use Proper Tools
Using the right tools is essential for cutting porcelain tile effectively, as it can markedly reduce the risk of chips. Different tile types require specific cutting methods, so having the right equipment is vital. Here are some tools you should consider:
- Wet saw: Ideal for straight cuts, minimizes heat and chips.
- Tile cutter: Great for smaller jobs, easy to use for basic cuts.
- Diamond blade: Guarantees clean edges and reduces chipping.
- Nippers: Perfect for intricate cuts around corners or curves.
- Safety gear: Always wear goggles and gloves to protect yourself.
Investing in these tools not only enhances your cutting accuracy but also prolongs the life of your porcelain tiles.
Score Before Cutting
While you might be enthusiastic to plunge into cutting your porcelain tile, scoring the surface first can considerably minimize chips and cracks. Using effective score techniques prepares the tile, ensuring a cleaner break. Start by marking your cut with a pencil, then use a scoring tool like a manual tile cutter or a scoring wheel. Apply steady pressure as you glide the tool along the marked line, creating a shallow groove. This groove acts as a guide, allowing for a more controlled break. After scoring, you can snap the tile along the line or use a wet saw for precise cuts. By incorporating these simple scoring techniques with the right scoring tools, you’ll achieve smoother edges and enhance the overall look of your project.
Step-by-Step Guide to Cutting Porcelain Tiles

When you’re ready to cut porcelain tiles, having the right tools is vital. You’ll want to know the best cutting techniques to guarantee clean, precise edges. Let’s walk through the essential steps to make your project a success.
Essential Tools Required
To achieve clean and precise cuts on porcelain tiles, you’ll need a few essential tools. Guaranteeing cutting safety is paramount, especially with various tile types. Here’s what you should gather before you start:
- Tile cutter: A manual or electric cutter for straight cuts.
- Wet saw: Ideal for larger tiles, it helps prevent chips and can enhance cutting accuracy.
- Diamond blade: Essential for smooth, clean edges.
- Safety goggles: Protect your eyes from flying debris.
- Dust mask: Keep dust and particles out of your lungs.
Using a proper technique will further minimize the risk of chipping those visible edges! Having these tools on hand will not only enhance your cutting accuracy but also guarantee you stay safe while working. With the right equipment, you’ll minimize the risk of chipping those visible edges! Additionally, using a wet saw can greatly reduce the chances of damaging the tile during the cutting process.
Cutting Techniques Explained
Before you start cutting porcelain tiles, it’s essential to understand the techniques that will guarantee clean, accurate results. First, measure and mark your tile based on your design. Choose a suitable cutting tool, like a tile cutter or wet saw, depending on the tile thickness. For straight cuts, score the tile with a consistent pressure, then snap it along the score line. If you need to make curved cuts, a wet saw with a diamond blade works best.
After cutting, pay attention to edge treatment. Use a tile grinder or diamond file to smooth any rough edges, ensuring a polished finish. This process not only enhances the appearance but also prevents chips on visible edges.
Dealing With Difficult Cuts and Shapes

While tackling porcelain tile cutting, you might encounter tricky shapes and intricate designs that pose unique challenges. When faced with complex geometries, it’s vital to approach the task with the right techniques and tools. Here are some tips to help you navigate those difficult cuts:
- Use a wet saw for cleaner cuts on intricate designs.
- Score and snap the tile for straight lines, but be cautious with curves.
- Invest in a tile grinder for fine details and adjustments.
- Utilize templates to guarantee accuracy when cutting complex shapes.
- Practice on scrap tiles to gain confidence before making final cuts.
Additionally, understanding care and maintenance is essential to preserve the quality of your tile cuts. With these strategies, you’ll handle those difficult cuts like a pro!
Best Practices for Finishing and Sealing Cut Edges
Once you’ve made your cuts, finishing and sealing the edges is essential for achieving a polished look and ensuring durability. Start with edge finishing by using a diamond grinding pad to smooth out any rough spots. This step prevents chips and creates a sleek surface. After that, choose a sealing method that suits your tile type. A high-quality penetrating sealer works well for porcelain, protecting it from stains and moisture. Apply the sealer with a brush or roller, making sure to cover the edges evenly. Let it dry completely before using the tiles. By following these practices, you’ll enhance both the appearance and longevity of your porcelain tiles, making them a standout feature in your space. Additionally, maintaining optimal indoor air quality by reducing microplastics in dust can further protect your home environment while enjoying your newly installed tiles.
What Not to Do When Cutting Porcelain Tiles
After finishing and sealing the edges of your porcelain tiles, it’s important to know what mistakes to avoid during the cutting process. Here are some key points to keep in mind:
- Don’t ignore tile thickness: Use the right blade for the thickness.
- Avoid inconsistent cutting speed: This can lead to chips and cracks.
- Choose the wrong blade type: Make sure it’s suitable for porcelain to prevent damage.
- Neglect your work surface: A stable, flat surface is essential for accuracy.
- Apply too much pressure: Let the tool do the work; excessive force can cause breakage.
Always remember to follow safety precautions and maintain your tools to guarantee a smooth cutting experience while considering tile orientation. Additionally, proper tool maintenance is crucial for achieving precise cuts and prolonging tool lifespan.
Frequently Asked Questions
Can I Use Regular Tile Cutters for Porcelain Tiles?
You can use regular tile cutters for porcelain tiles, but they might not be the best choice. Porcelain tile durability requires a specialized cutter for clean, precise cuts. Consider investing in a wet saw or a high-quality manual cutter designed specifically for porcelain. These tile cutter types guarantee you achieve better results and minimize the risk of chipping, especially on visible edges. So, choose wisely for your project’s success!
What Is the Best Way to Transport Cut Tiles?
Transporting cut tiles can feel like carrying precious gems! To guarantee they arrive unscathed, use tile protection methods like foam padding or bubble wrap. Secure the tiles upright in a sturdy box to prevent shifting. Employ safe handling techniques by always lifting from the bottom and avoiding direct pressure on the edges. By taking these steps, you’ll keep your tiles chip-free and ready for installation, just like a pro!
How Do I Identify High-Quality Porcelain Tiles?
To identify high-quality porcelain tiles, check the glaze thickness; thicker glazes usually indicate better durability and resistance to wear. Look at the edges, too—tiles with strong edge durability are less likely to chip or break. Also, inspect for consistency in color and pattern, as this reflects manufacturing quality. Finally, consider the tile’s water absorption rate; lower rates suggest better quality. You’ll want tiles that’ll last and maintain their appearance over time.
Is It Necessary to Seal Porcelain Tiles After Cutting?
It isn’t necessary to seal porcelain tiles after cutting, but it can offer some tile sealing benefits. Sealing helps protect against stains and moisture, especially if you’ve used cutting techniques that might leave edges vulnerable. If your tiles are going in high-traffic areas or wet environments, consider sealing them for added durability. Ultimately, it’s about the specific location and your preferences for maintenance and long-term care.
Can I Cut Porcelain Tiles Outdoors?
Yes, you can cut porcelain tiles outdoors! Imagine the sun shining as you work, with outdoor tile cutting tools laid out neatly. Just make sure you’ve got the right porcelain tile tools, like a wet saw or a tile cutter, to achieve clean cuts. Be mindful of the wind and dust, as these can affect your precision. So, grab your gear, and enjoy the fresh air while you create your stunning tile project!
Conclusion
Cutting porcelain tiles doesn’t have to feel like maneuvering through a minefield. By using the right tools, setting up your workspace, and following the techniques outlined, you’ll guarantee your tiles shine without any unsightly chips. Think of each cut as a brushstroke on a canvas; with care and precision, you’ll create a masterpiece. So, take your time, enjoy the process, and you’ll have beautiful, flawless edges that elevate your space. Happy cutting!