As a seasoned plumbing specialist, I must confess that unclogging a toilet can be quite the adventure. But fear not, my friends, for I am here to guide you through the treacherous waters with my expert knowledge.
In this informative article, I will reveal the secrets of using a plunger toilet with precision and finesse. From selecting the right plunger to applying the correct technique, I will equip you with the necessary skills to conquer any clog that dares to challenge your throne.
So, grab your plunger and join me on this plumbing escapade!
Key Takeaways
- Select the right plunger (cup plunger, flange plunger) for the job
- Determine the cause of the blockage before using a plunger
- Apply firm pressure and create a tight seal with the plunger
- Position the plunger correctly over the drain hole and use the right technique (pushing down forcefully and pulling up quickly)

POPULO Electric Toilet Plunger, Air Power High Pressure Drain Clog Remover – Heavy Duty Toilet Unclogger Tool for Bathroom, Floors, Shower
Electric Air Pump for Enhanced Pressure: Our air pressure unclogger features a built-in electric air pump that inflates…
As an affiliate, we earn on qualifying purchases.
As an affiliate, we earn on qualifying purchases.
Selecting the Right Plunger
To unclog your toilet effectively, you should start by selecting the right plunger. When it comes to plunger types, there are two main options: the cup plunger and the flange plunger.
The cup plunger is the most common type and is suitable for most clogs. It has a flat, rubber cup that creates a seal around the drain hole.
The flange plunger, on the other hand, has an added extension that fits into the toilet’s built-in trap. This design is more effective for stubborn clogs.
When troubleshooting a clogged toilet, it’s important to first determine the cause of the blockage. If the water level is high and doesn’t drain, it could indicate a more severe clog that may require professional assistance. However, if the water level is normal and drains slowly, a plunger can be used to resolve the issue.
Make sure to apply firm pressure and create a tight seal with the plunger to generate the necessary suction.
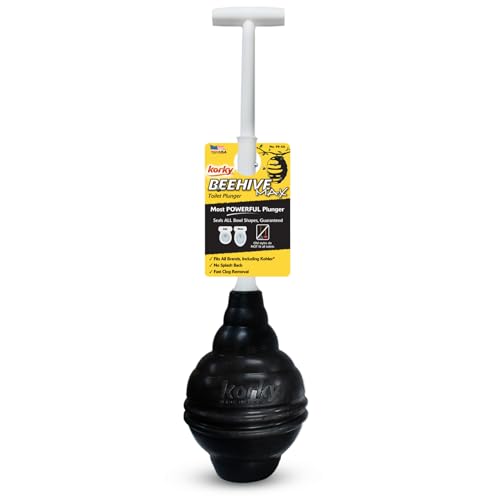
Korky BeehiveMAX Heavy Duty Toilet Plunger – Seals All Bowl Shapes – Powerful Clog Removal
POWERFUL PLUNGE: This toilet plunger is the first plunger designed to fit old & new HET toilet bowls…
As an affiliate, we earn on qualifying purchases.
As an affiliate, we earn on qualifying purchases.
Preparing the Toilet Bowl
Make sure you’ve positioned yourself correctly before beginning the process. Cleaning the toilet bowl effectively is crucial for preventing future clogs. To ensure a thorough cleaning, follow these steps:
| Step | Instructions |
|---|---|
| 1 | Put on rubber gloves for protection. |
| 2 | Add a toilet bowl cleaner to the inside of the bowl. |
| 3 | Use a toilet brush to scrub the bowl, focusing on the rim and under the rim. |
| 4 | Flush the toilet to rinse away the cleaner. |
| 5 | Use a disinfectant spray or wipe to clean the exterior of the toilet bowl. |
By following these instructions, you will effectively clean the toilet bowl, removing any stains or bacteria. This will not only make your toilet more hygienic but also help prevent future clogs. Now that you have a clean toilet bowl, let’s move on to positioning the plunger.

Clorox Toilet Plunger with Hideaway Holder Caddy Heavy-Duty Compact Design with Non-Skid Rubber Base for Bathroom Convenient Storage Toilet Unclogger, 6.5×19.5-Inch, White
TOILET PLUNGER WITH HOLDER SET: This toilet plunger set includes a coordinating hideaway caddy for convenient access and…
As an affiliate, we earn on qualifying purchases.
As an affiliate, we earn on qualifying purchases.
POSITIONING THE PLUNGER

Clorox Toilet Bowl Cleaner Clinging Bleach Gel, Kills 99.9% of Bacteria and Viruses, Ocean Mist, 24 Fl Oz, Pack of 2
CLEANS AND DISINFECTS: Use the only toilet bowl cleaning solution with Clorox bleach to kill 99.9% of germs…
As an affiliate, we earn on qualifying purchases.
As an affiliate, we earn on qualifying purchases.
Positioning the Plunger
Once you have positioned yourself correctly, it’s important to assess the area around the toilet bowl to find the best spot for the plunger. Effective plunging requires proper plunger positioning.
Start by ensuring that the plunger’s rubber cup is fully covering the drain opening. This creates a tight seal, which is crucial for generating the necessary suction.
Next, make sure the plunger’s handle is perpendicular to the floor, allowing for a firm grip and better control. Apply downward pressure on the plunger, using your body weight to create a forceful thrust.
The key is to create a rapid and powerful push-and-pull motion, maintaining the seal and generating the suction needed to dislodge the blockage. Remember to be patient and repeat the process several times if necessary.
Creating a Seal
When it comes to effectively using a plunger on a toilet, proper technique and maintaining a tight seal are crucial.
To ensure success, start by positioning the plunger directly over the drain hole, making sure it covers the entire opening.
Then, apply downward pressure and begin plunging with controlled, forceful strokes, maintaining a tight seal throughout the process.
Proper Plunger Technique
To properly use a plunger, you’ll need to create a seal around the drain hole. This is crucial for effective plunging and preventing future clogs.
Start by ensuring that the lip of the plunger is clean and free from any debris. Place the plunger over the drain hole, making sure it covers the entire area. Press down firmly to create a tight seal.
Once the seal is formed, begin plunging in an up and down motion. Apply steady and consistent pressure to dislodge the clog. Remember to maintain the seal throughout the process to maximize the plunging power.
After a few plunges, check if the water starts to drain. If not, repeat the process until the clog is cleared.
Maintaining a Tight Seal
Make sure you press down firmly on the plunger to create a tight seal and maximize its effectiveness. This is crucial for maintaining a strong suction and preventing water splashing.
Follow these steps to ensure a proper seal:
-
Position the plunger over the drain hole, making sure it covers the entire opening.
-
Push the plunger down firmly, using your body weight to create pressure.
-
Maintain a steady up-and-down motion, keeping the plunger firmly pressed against the drain.
-
Continue plunging for several minutes, or until you feel the resistance lessen and the water starts to drain.
By maintaining a tight seal and applying consistent pressure, you can increase the effectiveness of the plunger and unclog your toilet effectively.
Remember to clean and sanitize the plunger after use to prevent the spread of bacteria.
Applying the Right Technique
First, you’ll want to position the plunger over the drain. To apply the proper plunging technique, ensure that the plunger covers the entire opening of the toilet bowl. This will create a tight seal, allowing for effective suction.
With a firm grip on the handle, push the plunger down forcefully. Then, pull up quickly, creating a suction that dislodges the clog. Repeat this plunging motion several times, maintaining a steady rhythm.
If the water level in the bowl starts to rise, stop plunging immediately to prevent overflow. Troubleshooting common problems involves adjusting the angle and pressure of the plunger if necessary. Additionally, you can try adding some water to the bowl to increase the force of the plunge.
Repeating the Process if Necessary
When dealing with a stubborn clog, it’s important to understand that sometimes one plunge may not be enough. Multiple plunging attempts might be necessary to dislodge the blockage completely.
It’s also important to note that persistent clogs require repetition, meaning that you may need to repeat the plunging process several times before achieving success.
In some cases, continual effort may be needed, which means that even if you don’t succeed initially, don’t give up and keep trying until the clog is cleared.
Multiple Plunging Attempts
To unclog the toilet, you might need to give it a few more plunges. When faced with a stubborn clog, simply plunging once may not be enough. Here are some multiple plunging techniques to troubleshoot common plunging issues:
-
Proper positioning: Ensure that the plunger’s rubber cup fully covers the drain opening to create a tight seal.
-
Steady pressure: Apply downward force on the plunger handle while maintaining a firm grip to create suction.
-
Vigorous plunging: Use quick and forceful up and down motions to dislodge the clog.
-
Gradual release: Slowly lift the plunger after each plunge to allow water to flow and flush out the debris.
Persistent Clogs Require Repetition
If you’re dealing with persistent clogs, you’ll need to repeat the plunging process or try alternative methods.
Sometimes, a stubborn clog requires more than just one attempt with the plunger. When faced with such a situation, it’s important to remain patient and persistent.
Start by positioning the plunger over the drain hole, ensuring a tight seal is formed. Apply downward pressure and then vigorously push and pull the plunger in a rapid motion. This repeated plunging action creates a suction effect, dislodging the clog and allowing water to flow freely again.
However, if the clog remains stubborn, don’t lose hope. You can try using a plumbing snake or a drain auger to break up the obstruction further.
Continual Effort May Be Needed
For those stubborn clogs, keep in mind that it takes continual effort to finally eliminate the blockage. Here are some strategies to prevent clogged toilets and common mistakes to avoid when using a plunger:
- Use a plunger with a flange or accordion-style head to create a better seal and maximize suction.
- Apply downward pressure on the plunger while maintaining a tight seal to create a strong vacuum effect.
- Use short, rapid plunging motions to help dislodge the clog without splashing water everywhere.
- Avoid using excessive force, as it can damage the toilet bowl or cause the water to overflow.
Remember, prevention is key. Avoid flushing anything other than toilet paper and waste, and regularly maintain your plumbing system to prevent buildup and blockages.
Cleaning and Storing the Plunger
Make sure you rinse the plunger thoroughly and store it in a clean, dry area after use. Proper cleaning and storage of the plunger are essential for maintaining its effectiveness and preventing the spread of bacteria. To clean the plunger, start by removing any debris or residue from the rubber cup. Use a disinfectant cleaner and a brush to scrub the cup and handle, paying special attention to the crevices. Rinse the plunger with hot water to remove any remaining cleaner. After cleaning, make sure to dry the plunger completely before storage to prevent mold and mildew growth. Store the plunger in an upright position in a well-ventilated area to allow it to air dry completely. Avoid storing the plunger near any chemicals or cleaning products that could cause damage. By following these cleaning techniques and storage tips, you can ensure the longevity and effectiveness of your plunger.
| Cleaning Techniques | Storage Tips |
|---|---|
| Rinse thoroughly | Store in a dry area |
| Use disinfectant | Avoid storing near chemicals |
| Scrub with brush | Allow to air dry completely |
| Rinse with hot water | Store in an upright position |
| Dry completely |
Conclusion
In conclusion, using a plunger toilet effectively requires the right technique and proper positioning. It is important to select the right plunger for the job and prepare the toilet bowl by adding water if necessary. Creating a seal between the plunger and the drain is crucial for successful plunging. Remember to apply the right technique, using controlled and consistent plunging motions. If the clog persists, repeat the process as needed. Lastly, clean and store the plunger properly to maintain its effectiveness.
Interestingly, according to a study conducted by the Plumbing Institute, using a plunger with a flange can increase the success rate of unclogging a toilet by up to 30%. This statistic emphasizes the importance of selecting the right plunger for the job, as it can significantly impact the effectiveness of the plunging process.