
FAQ - Advanced Bathroom Queries
How to Replace Toilet Handle
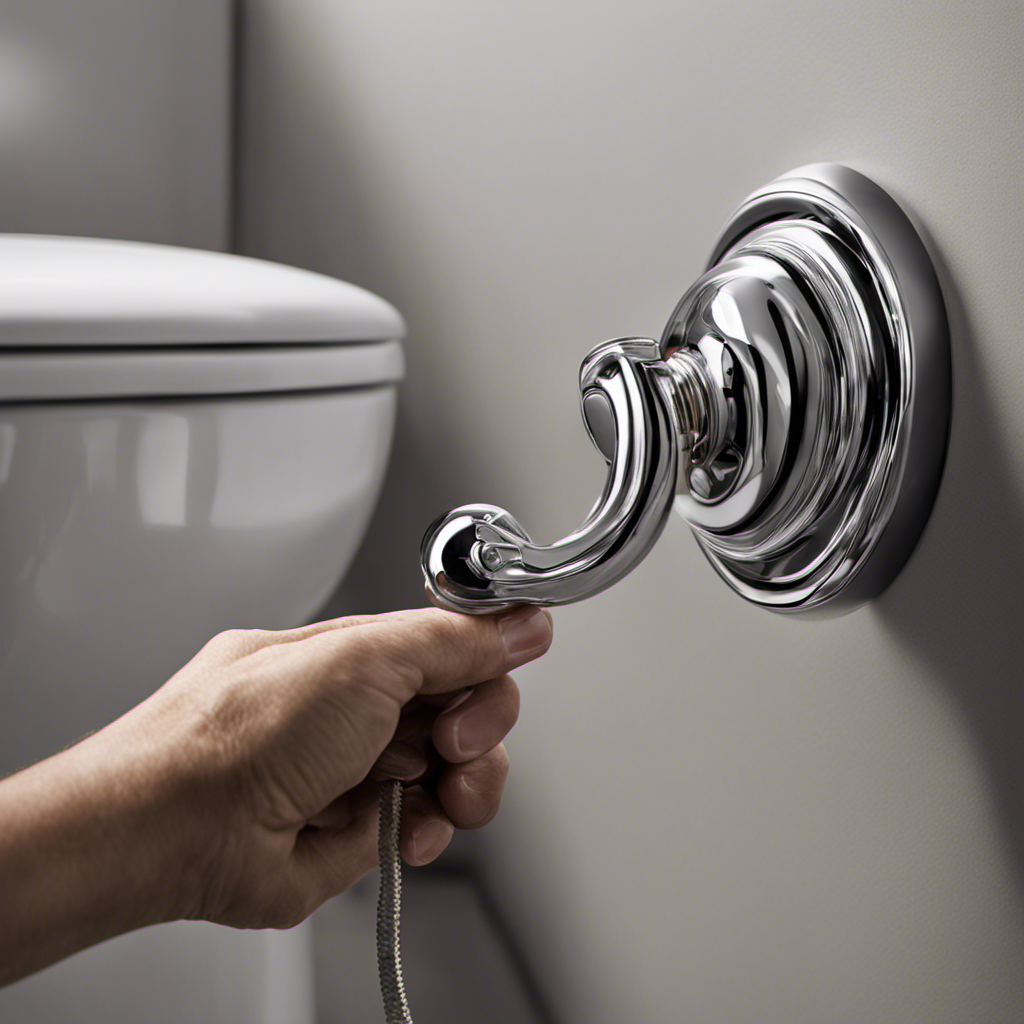
I’ve been there – standing in front of a broken toilet handle, feeling frustrated and unsure of what to do next.
But fear not, because in this article, I’ll guide you through the step-by-step process of replacing a toilet handle.
With just a few tools and materials, you’ll be able to tackle this DIY project with confidence.
So let’s roll up our sleeves and get ready to fix that pesky toilet handle once and for all!
Key Takeaways
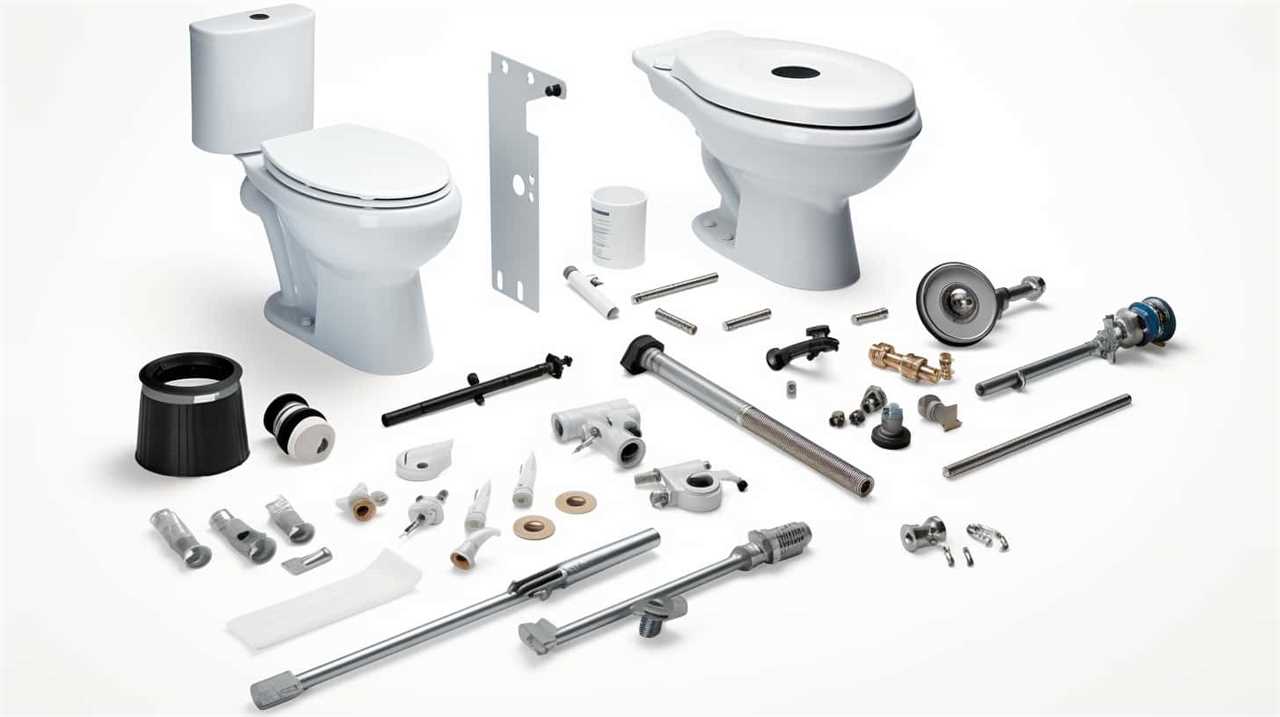
- Gather necessary tools and materials: pair of pliers, screwdriver, adjustable wrench, replacement handle, and other relevant items
- Shut off the water supply by turning the valve clockwise and ensuring it is fully closed
- Remove the old toilet handle by loosening and removing the mounting nut and pulling it out of the toilet tank
- Install the new toilet handle by aligning it parallel to the toilet tank, tightening the securing nut, and adjusting the handle tension if needed

Tools and Materials Needed
To replace the toilet handle, you’ll need a pair of pliers, a new handle, and a screwdriver.
First, turn off the water supply to the toilet by shutting off the valve located behind the toilet. Flush the toilet to drain any remaining water in the tank.
Next, locate the mounting nut on the inside of the tank, which holds the handle in place. Use the pliers to loosen and remove the mounting nut. Once the nut is removed, you can take out the old handle.
Now, take the new handle and insert it through the hole in the tank. Secure it with the mounting nut and tighten it using the pliers.
Lastly, turn on the water supply and test the new handle to ensure it is functioning properly.
Step 1: Shut Off the Water Supply
First, you’ll need to locate the shut-off valve for the water supply. This is an essential step in fixing a broken toilet handle. The shut-off valve is usually located on the wall behind the toilet or under the toilet tank. It is a small lever that you need to turn clockwise to shut off the water supply.
Once you have located the shut-off valve, use your hand or a wrench to turn it. Make sure the valve is fully closed to prevent any water from flowing into the toilet tank. This will ensure that you can safely proceed with the repair without any water leakage.
Once the water supply is shut off, you can move on to the next step in repairing the toilet handle.
Step 2: Remove the Old Toilet Handle
Now that you’ve shut off the water supply, it’s time to take out the old handle. To begin the handle replacement process, follow these step-by-step instructions:
-
Locate the mounting nut on the inside of the toilet tank. This nut holds the handle in place.
-
Using a pair of pliers, grip the mounting nut and turn it counterclockwise to loosen it. Keep turning until the nut is completely removed.
-
Once the nut is off, you can now pull the old handle out of the toilet tank. Gently wiggle it back and forth if it feels stuck.
-
Take a moment to inspect the handle’s condition. If it’s damaged or broken, it’s a good idea to replace it entirely.
Now that the old handle is out, you’re ready to move on to the next step of handle installation.
Step 3: Install the New Toilet Handle
To properly install a new toilet handle, it is crucial to ensure proper handle alignment and tighten the securing nut.
First, align the handle so that it is parallel to the toilet tank. This will ensure smooth and efficient operation.
Then, use a wrench to tighten the securing nut, making sure it is securely fastened to prevent any wobbling or loosening over time.
Proper Handle Alignment
Make sure you align the toilet handle properly before securing it in place. This step is crucial to ensure that the handle functions correctly and the toilet flushes smoothly. To align the handle, follow these steps:
-
Start by loosening the nut or screw that holds the handle in place. Use a wrench or screwdriver, depending on the type of fastener used.
-
Once the handle is loose, hold it in the desired position for flushing. Make sure it aligns with the flush valve or flapper inside the tank.
-
Adjust the handle tension if necessary. Some handles have a tension adjustment screw that can be tightened or loosened to customize the feel of the flush.
-
Finally, tighten the nut or screw to secure the handle in place. Be careful not to overtighten, as it may cause the handle to stick or break.
Tightening the Securing Nut
Once you’ve loosened the nut, make sure to tighten it securely to ensure the handle stays in place. Here are the steps to properly tighten the securing nut during handle installation or handle replacement:
- Use a wrench or pliers to grip the nut firmly.
- Rotate the nut clockwise to tighten it onto the threaded rod.
- Apply enough pressure to securely fasten the nut, but be cautious not to overtighten as it may damage the toilet tank.
- Test the handle by gently pulling or pushing it to ensure it is securely attached and does not wobble.
By following these steps, you can ensure that the handle is properly tightened, preventing any future issues with its stability.
Remember to always double-check for any leaks or loose connections before completing the handle installation or replacement process.
Step 4: Test the New Toilet Handle
After installing the new toilet handle, give it a test to ensure it is working properly.
To do this, flush the toilet and observe the handle’s functionality. Start by pressing down on the handle to initiate the flush.
If the handle feels loose or wobbly, it may not be properly installed. In this case, you will need to adjust the handle tension. Locate the securing nut on the inside of the toilet tank and use a wrench to tighten it. Be careful not to overtighten, as this can cause damage.
Once the handle feels secure, flush the toilet again to confirm that it is functioning smoothly.
If any issues persist, refer to the next section on troubleshooting common handle problems.
Troubleshooting Common Issues
When it comes to troubleshooting common issues with a toilet, there are a few key points to keep in mind.
The toilet not flushing properly, the handle feeling loose, and the handle not staying down are some common issues.
These issues can be frustrating, but with a step-by-step approach, they can usually be resolved quickly and easily.
In this discussion, I will guide you through the troubleshooting process for each of these problems, providing helpful tips and solutions along the way.
Toilet Not Flushing Properly
If your toilet’s not flushing properly, the first thing you should check is the water level in the tank. Ensure that the water is at the appropriate level, which is typically marked on the inside of the tank. If the water level is too low, it may not provide enough force to effectively flush waste.
If the water level is fine, the issue may lie with the toilet handle. To troubleshoot this problem, follow these steps:
- Remove the tank lid and locate the toilet handle.
- Inspect the handle for any visible damage or wear.
- If the handle is damaged, you may need to replace it with a new one.
- To replace the handle, start by turning off the water supply to the toilet, usually located behind the toilet near the floor. Then, detach the old handle and install the new one according to the manufacturer’s instructions.
Handle Feels Loose
To fix a loose handle, you should tighten the screws holding it in place. If the handle continues to feel loose even after tightening the screws, it may be time to consider replacing the handle altogether. Here is a step-by-step guide on how to replace a loose toilet handle:
-
Turn off the water supply: Locate the shut-off valve behind the toilet and turn it clockwise to shut off the water supply.
-
Remove the old handle: Unscrew the mounting nut on the inside of the toilet tank and carefully remove the old handle.
-
Purchase a replacement handle: Measure the length of your old handle and purchase a replacement handle of the same size.
-
Install the new handle: Insert the new handle through the hole in the toilet tank and secure it with the mounting nut.
-
Turn on the water supply: Turn the shut-off valve counterclockwise to restore the water supply.
Handle Won’t Stay Down
If the handle won’t stay down, you may need to adjust the chain length connecting it to the flapper. Here’s a step-by-step guide on fixing a stuck toilet handle:
-
Remove the toilet tank lid and locate the flapper valve at the bottom of the tank.
-
Identify the chain connected to the toilet handle and flapper.
-
Adjust the chain length by either tightening or loosening it. The chain should have a slight slack to allow the flapper to fully close.
-
Test the toilet handle by pushing it down and releasing. It should stay down and flush the toilet properly.
Maintenance Tips for Your Toilet Handle
Here’s a tip to keep your toilet handle in good condition. Proper handle installation is essential for the smooth operation of your toilet. Follow these steps for a successful toilet handle replacement:
- Gather the necessary tools: screwdriver, adjustable wrench, and a new toilet handle kit.
- Shut off the water supply to the toilet by turning the valve clockwise.
- Remove the lid from the toilet tank and locate the handle assembly.
- Unscrew the nut securing the handle inside the tank using an adjustable wrench.
- Disconnect the chain or lever from the flapper or flush valve.
- Install the new handle by inserting the threaded end into the hole and securing it with the nut.
- Reconnect the chain or lever to the flapper or flush valve.
- Turn on the water supply and test the new handle for proper functionality.
By following these steps, you can ensure a smooth and efficient toilet handle replacement. Remember to always refer to the manufacturer’s instructions for specific details.
| Step | Procedure |
|---|---|
| 1 | Gather tools |
| 2 | Shut off water supply |
| 3 | Remove lid |
| 4 | Unscrew nut |
| 5 | Disconnect chain or lever |
| 6 | Install new handle |
| 7 | Reconnect chain or lever |
| 8 | Turn on water supply |
| 9 | Test functionality |
Frequently Asked Questions
How Much Does a New Toilet Handle Typically Cost?
A new toilet handle typically costs around $10 to $20. To replace a toilet handle, first, turn off the water supply, then remove the old handle, and finally, install the new handle. Affordable toilet handles can be found at hardware stores or online.
Can I Use Any Type of Toilet Handle to Replace the Old One?
Certainly! When it comes to toilet handle installation, it’s essential to choose the right type. Not all handles are universal, so troubleshooting toilet handle replacement requires finding one that matches your toilet model.
Is It Necessary to Shut off the Water Supply Before Replacing the Toilet Handle?
Yes, it is necessary to shut off the water supply before replacing the toilet handle. This prevents any water from flowing while you work, reducing the risk of leaks or other issues.
What Should I Do if the New Toilet Handle Doesn’t Fit Properly?
If the new toilet handle doesn’t fit properly, don’t panic. First, check if it’s compatible with your toilet model. If not, try adjusting the mounting nut or consider purchasing a universal handle. If all else fails, consult a professional plumber for alternative solutions.
How Often Should I Replace the Toilet Handle for Optimal Performance?
Toilet handle maintenance is important for optimal performance. Signs of a worn toilet handle include difficulty flushing or a loose handle. Regularly inspect and replace the handle as needed to ensure proper functioning.
Conclusion
In conclusion, replacing a toilet handle is as easy as a gentle twist and a quick swap. Just like a conductor guiding an orchestra, the new handle will lead the way to a perfectly functioning toilet.
With the right tools and a little know-how, you can bid farewell to the old handle and welcome the new one with open arms. Remember to test its performance, troubleshoot any issues, and keep up with regular maintenance to ensure a seamless flushing experience.
Your toilet will thank you!

Mateo’s flair for writing is matched only by his keen eye for design. As an interior designer turned writer, Mateo brings a unique perspective. He blends aesthetics with functionality in every piece he pens, providing readers with beautifully crafted content that’s also supremely useful.
Mateo loves exploring the latest bathroom tech trends and is our expert on smart toilets. When he’s not writing or designing, Mateo can be found sketching ideas for his next big project at local coffee shops.

- Plunger alternatives
- Tips for preventing toilet clogs
- "Chemical drain cleaners vs. homemade solutions"
- "Benefits of using natural drain cleaners"
- Vinegar and baking soda reaction
- DIY drain cleaner alternatives
Have you ever had to deal with the distasteful chore of clearing a toilet clogged with vomit? We know it’s a tough and stomach-turning task. However, don’t worry, because we’re here to walk you through each step of the process.
In this article, we’ll provide you with effective techniques and homemade remedies to clear the clog and restore your toilet to its normal functioning state. So let’s roll up our sleeves and get to work!
Key Takeaways
- Put on protective gear such as gloves, goggles, and a face mask to prevent direct contact with vomit and potential pathogens.
- Assess the severity of the clog to determine the required tools, such as a plunger or a toilet auger/snake.
- Dispose of gloves properly after use to avoid cross-contamination and maintain good hygiene practices throughout the unclogging process.
- Understand the underlying causes of the clog, such as excessive toilet paper usage or flushing non-flushable items, to prevent future clogs.
Gather the Necessary Tools
To tackle the task of unclogging a toilet with vomit, we need to gather the necessary tools.
The first step is assessing the severity of the clog. Is it a minor blockage or a more stubborn one? This will determine the tools we require.

For minor clogs, a plunger may suffice. However, for more severe clogs, a toilet auger or snake might be necessary. These tools are specifically designed to break through tough clogs and clear the pipe.
Additionally, it’s crucial to put on protective gear before proceeding. This includes wearing gloves, goggles, and possibly a face mask to prevent any contact with the vomit and potential pathogens.
Now that we’ve our tools ready, it’s time to put on protective gloves and get to work.
Put on Protective Gloves
We should gear up by putting on our protective gloves before we begin unclogging the toilet with vomit. Protective gear is essential in this task to ensure our safety and prevent any potential contamination or transmission of harmful bacteria.
When dealing with vomit, it’s important to protect our hands from direct contact with the substance, which may contain germs and pathogens. By wearing protective gloves, we create a barrier between our skin and the vomit, reducing the risk of infection or illness.
Additionally, gloves provide a better grip and allow us to handle unclogging tools more effectively. As we proceed with the unclogging techniques, it’s crucial to maintain good hygiene practices and dispose of the gloves properly after use to avoid any cross-contamination.
Assess the Severity of the Clog
When faced with a clogged toilet filled with vomit, it’s essential to assess the severity of the clog before attempting to unclog it. This step is crucial as it helps determine the appropriate course of action.
Assessing the severity involves understanding the underlying causes of the clog, the tools available for unclogging, and the safety precautions necessary to protect oneself from potential hazards. By evaluating these points, we can proceed with confidence and effectively address the issue at hand.

Clog Causes and Solutions
Assessing the severity of a clog involves determining the underlying causes and identifying potential solutions. When it comes to clog prevention, understanding the common toilet clog causes is crucial. Some of the frequent culprits include excessive toilet paper usage, flushing non-flushable items, and mineral buildup in the pipes.
Excessive toilet paper usage can be prevented by using less paper or opting for thinner, more easily dissolvable options. Flushing non-flushable items, such as sanitary products or wipes, should be avoided altogether. These items can cause blockages and require professional assistance to remove.
Mineral buildup in the pipes can be prevented by using water softeners or descaling agents periodically. By understanding these common causes, you can take proactive steps to prevent clogs and maintain the proper functioning of your toilet.
Tools for Unclogging
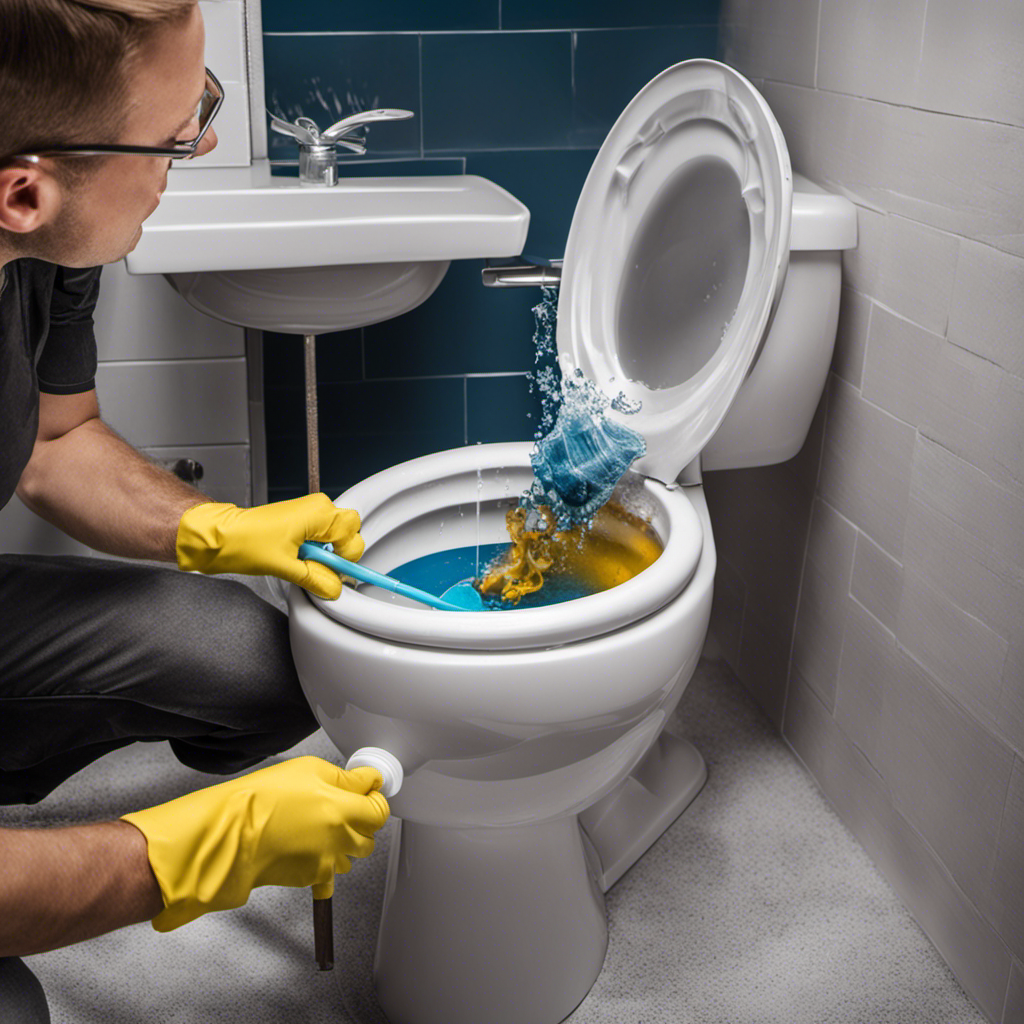
To determine the severity of a clog, we can utilize various tools for unclogging toilets. One of the most commonly used tools is a plunger. This simple device creates suction, which helps dislodge the clog by pushing and pulling the water in the toilet bowl. When using a plunger, it’s important to ensure a tight seal between the plunger and the drain opening to maximize its effectiveness.
Another tool that can be used is a toilet auger, also known as a plumbing snake. This long, flexible tool is inserted into the toilet drain and can help break up and remove stubborn clogs. Toilet augers are especially useful for clogs that are deeper in the pipe or for clogs caused by solid objects.
If traditional tools don’t work, there are alternative unclogging methods that can be tried. One method is using a mixture of baking soda and vinegar. This combination can create a chemical reaction that can help break down the clog. Another alternative is using hot water and dish soap, which can help lubricate the clog and make it easier to flush.
In order to prevent toilet clogs in the first place, it’s important to be mindful of what’s being flushed down the toilet. Avoid flushing items like wipes, paper towels, or feminine hygiene products, as these can easily cause clogs. Regular maintenance, such as using a toilet bowl cleaner and regularly checking for any signs of clogs, can also help prevent future issues.
Safety Precautions to Consider
To ensure our safety and effectively assess the severity of the clog, we need to take certain precautions. One important consideration is the proper ventilation of the area. It’s crucial to have good airflow to prevent the inhalation of harmful gases and odors while dealing with the clog. Open windows and use fans if necessary to maintain a well-ventilated space.
Additionally, it’s essential to handle and dispose of waste materials safely. Use gloves and other protective gear to minimize contact with the vomit and any other potentially hazardous substances. Once the clog is resolved, carefully remove any waste materials and place them in a sealed bag for disposal. Be sure to follow local regulations and guidelines for waste disposal to prevent any environmental or health risks.
Use a Plunger to Unclog the Toilet
We can effectively unclog a toilet by utilizing the power of a plunger. Plungers are simple yet effective tools that create suction to dislodge clogs.
Here are some discussion ideas to help you understand the topic better:
- Plunger alternatives:
- Toilet auger: A flexible rod with a corkscrew tip that can reach deeper clogs.
- Drain snake: A longer tool with a coiled wire that can remove stubborn blockages.
- Tips for preventing toilet clogs:
- Avoid flushing non-flushable items like wipes, sanitary products, or excessive toilet paper.
- Consider using a toilet paper specifically designed for easy disintegration.
- Regularly clean your toilet to prevent debris buildup.
By using a plunger or its alternatives, you can effectively unclog your toilet and avoid the unpleasant situation of a backed-up toilet.

Now, let’s move on to the next section and learn how to apply gentle pressure and repetitive motions to unclog the toilet completely.
Apply Gentle Pressure and Repetitive Motions
How can we effectively apply gentle pressure and repetitive motions to unclog a toilet? When faced with a clogged toilet, there are alternative unclogging methods that can be used, such as applying gentle pressure and repetitive motions. This technique can help dislodge the clog and restore proper flushing.
To effectively apply gentle pressure and repetitive motions, follow these steps:
- Step 1: Position the plunger over the drain hole, ensuring a tight seal.
- Step 2: Apply downward pressure with both hands, using your body weight to create a strong force.
- Step 3: Push down firmly, then pull up rapidly, repeating the motion several times.
- Step 4: Continue this process until the water begins to drain freely.
Safety precautions when unclogging a toilet include wearing gloves, using a disinfectant after the process, and avoiding the use of harsh chemicals.
Use a Toilet Auger for Stubborn Clogs
When facing stubborn clogs in a toilet, sometimes a plunger isn’t enough. This is where a toilet auger comes in.
A toilet auger is a specialized tool designed to break up and remove tough clogs that a plunger can’t handle.
Effective Toilet Auger
To tackle stubborn clogs, our go-to solution is using a toilet auger to effectively unclog the toilet. A toilet auger is a tool specifically designed to clear clogs in the toilet drain. However, if you don’t have a toilet auger on hand or prefer not to use one, there are alternative methods to unclog your toilet without tools.
Here are two options to consider:
- Hot water and dish soap method:
- Pour a pot of hot (not boiling) water into the toilet bowl.
- Add a generous amount of dish soap.
- Let the mixture sit for a few minutes.
- Use a plunger to create suction and push the clog through.
- Baking soda and vinegar method:
- Pour 1 cup of baking soda into the toilet bowl.
- Add 2 cups of vinegar.
- Let the mixture sit for about 30 minutes.
- Use a plunger to create suction and dislodge the clog.
Alternative Clog Removal?
To deal with stubborn clogs, our go-to method is using a toilet auger, a specialized tool designed for unclogging toilet drains.
However, if you prefer to explore alternative clog removal methods before resorting to using an auger, there are a few options to consider.
One alternative is using natural drain cleaners, which can help break down clogs without the need for harsh chemicals. These cleaners often contain enzymes or bacteria that digest organic matter, helping to clear the blockage.
Another option is using a plunger to create suction and dislodge the clog. This method works best for softer clogs that can be easily pushed through the drain. Remember to use a plunger specifically designed for toilets to ensure a proper seal and maximize effectiveness.

While these alternatives may work for milder clogs, a toilet auger remains the most effective and reliable option for stubborn clogs.
Insert the Auger Into the Toilet Drain
When facing a clogged toilet filled with vomit, it’s important to handle the situation with care and precision. While using a toilet auger is the most effective method, there are alternative ways to unclog the toilet without tools.
Here are two sub-lists to help you navigate through this unpleasant task:
- Toilet Auger Alternatives:
- Hot water and dish soap: Pour a generous amount of dish soap into the toilet bowl, followed by hot water. Let it sit for a few minutes before attempting to flush.
- Baking soda and vinegar: Sprinkle baking soda into the toilet bowl, then pour vinegar over it. This combination will create a fizzy reaction that may help dislodge the clog.
- Unclogging Without Tools:
- Plunger technique: Use a plunger to create suction and force the clog to dislodge. Make sure to cover the entire drain opening with the plunger and plunge vigorously.
- Wire coat hanger: Straighten a wire coat hanger and use it to push through the clog, breaking it up and allowing it to pass through the drain.
Remember to exercise caution and wear protective gloves while attempting any of these methods.

Rotate and Push the Auger to Break up the Clog
We rotate and push the auger to break up the clog in the toilet drain. This step is crucial in unclogging the toilet and restoring its proper function.
By rotating the auger, we create a twisting motion that helps loosen and break apart the clog.
As we push the auger further into the drain, it applies pressure on the clog, further breaking it up.
The auger’s flexible and coiled design allows it to maneuver through the curves and bends of the toilet drain, ensuring that the clog is thoroughly disrupted.
It’s important to note that while using an auger can be effective in unclogging a toilet, it’s also essential to practice clog prevention measures.
Regular maintenance, such as using a plunger or enlisting the help of professional plumbing services, can help prevent clogs from occurring in the first place.
Flush the Toilet to Check if the Clog Is Cleared
Now that we’ve rotated and pushed the auger to break up the clog, the next step is to flush the toilet and check if the clog is cleared.
We can do this by simply pressing the flush lever and observing if the water drains properly.
If the clog is still present and the water doesn’t drain, we need to move on to the next steps to effectively unclog the toilet.
Clog Still Present
To determine if the clog has been cleared, flushing the toilet is necessary. After attempting to unclog the toilet using the previous methods, it’s crucial to check if the clog is still present. Here are the steps to follow:
- Flush the toilet and observe the water level:
- If the water level rises close to the rim or overflows, the clog is still there.
- If the water level goes down and drains normally, the clog may have been cleared.
Once you have determined that the clog is still present, it’s essential to take immediate action to prevent further issues:
- Continue unclogging methods:
- Try using a plunger again, ensuring a proper seal around the drain.
- If that fails, consider using a plumbing snake to break up and remove the clog.
Remember to wear protective gloves and follow proper sanitation procedures to avoid any contamination. In case of toilet overflow or cleaning vomit stains, it’s advisable to consult a professional plumber for assistance.

Next Steps if Clog Remains
If the clog remains, we need to flush the toilet to determine if it has been cleared.
However, before attempting this step, it’s important to note some alternative unclogging methods and safety precautions. If traditional plunging hasn’t worked, you can try using a toilet auger or a drain snake to break up the clog. These tools are designed to reach deeper into the pipe and dislodge stubborn blockages.
When using an auger or drain snake, remember to follow the manufacturer’s instructions and wear protective gloves to avoid any contact with waste materials.
If the clog persists despite these efforts, it may be time to call a professional plumber who can utilize specialized equipment to efficiently clear the blockage.
Repeat the Plunging or Augering Process if Needed
We should continue the process of plunging or augering again if necessary. Sometimes, a single attempt may not be enough to completely unclog the toilet. Here are a few steps to follow when repeating the plunging process:
- Ensure that the plunger is properly sealed around the drain. This will create the necessary suction to dislodge the clog.
- Use firm, consistent pressure when plunging. Push down forcefully and pull up quickly, maintaining a steady rhythm. This will help to create a strong suction effect.
If plunging doesn’t work, consider using an auger. This tool can reach deeper into the toilet drain and break up the clog.
- Insert the auger carefully into the drain and turn the handle clockwise. This motion will help the auger to grab onto the clog and break it apart.
- Continue to rotate the auger until you feel the resistance lessen. Then, carefully remove the auger and flush the toilet to check if the clog has been cleared.
If after repeating the plunging or augering process, the toilet remains clogged, it may be time to call a professional plumber. They have the necessary expertise and equipment to handle more stubborn clogs and ensure the toilet is fully unclogged without causing any further damage.
Use a Homemade Drain Cleaner as an Alternative
For our next step, let’s explore an alternative solution by using our own homemade drain cleaner. When it comes to unclogging a toilet, many people turn to chemical drain cleaners for a quick fix. However, these products often contain harmful chemicals that can be detrimental to both our health and the environment. On the other hand, homemade drain cleaners offer a natural and eco-friendly solution. Let’s compare the benefits of using natural drain cleaners over chemical ones:
| Chemical Drain Cleaners | Homemade Solutions |
|---|---|
| Contain harmful chemicals | Use natural ingredients |
| May cause health issues | Safe for you and the environment |
| Can damage pipes and plumbing systems | Gentle on pipes and fixtures |
| Expensive | Cost-effective and readily available |
Mix Vinegar and Baking Soda in a Bowl
To continue our discussion on unclogging a toilet with vomit, let’s now explore how to mix vinegar and baking soda in a bowl. When vinegar and baking soda are combined, they create a chemical reaction that can help break down clogs and clear the toilet drain.
- Vinegar and baking soda reaction:
- Explain the chemical reaction that occurs when vinegar and baking soda are mixed together.
- Discuss how this reaction produces carbon dioxide gas, which can help dislodge clogs in the toilet drain.
- DIY drain cleaner alternatives:
- Explore other homemade drain cleaner options that can be used as alternatives to vinegar and baking soda.
- Provide detailed instructions on how to make and use these DIY drain cleaners.
By understanding the vinegar and baking soda reaction and exploring DIY drain cleaner alternatives, you can effectively tackle toilet clogs caused by vomit.
Now, let’s move on to the next section and learn how to pour the mixture into the toilet bowl.
Pour the Mixture Into the Toilet Bowl
Now that we’ve successfully mixed vinegar and baking soda in a bowl, it’s time to pour the mixture into the toilet bowl.
Before we move forward, let’s discuss a few alternative methods for unclogging toilets and some safety precautions to keep in mind during the process.
Alternative Unclogging Methods
One effective method for unclogging a toilet with vomit is by pouring a mixture into the toilet bowl. This alternative unclogging method can be used in conjunction with or as an alternative to using a plunger. Here are two sub-lists that will help you understand and implement this method:
- Unclogging hacks:
- Mix equal parts of baking soda and vinegar in a bowl.
- Start by pouring hot water into the toilet bowl to soften the vomit and make it easier to remove.
- Carefully pour the baking soda and vinegar mixture into the toilet bowl.
- Let the mixture sit for a few minutes to allow it to break down the clog.
- Use a toilet brush to agitate the mixture and help dislodge the clog.
- Flush the toilet to see if the clog has been cleared.
- Natural clog remedies:
- Another option is to use a mixture of dish soap and hot water.
- Add a few tablespoons of dish soap to a bucket of hot water.
- Pour the mixture into the toilet bowl and let it sit for a few minutes.
- Use a toilet brush to agitate the mixture and break up the clog.
- Flush the toilet to see if the clog has been cleared.
Implementing these alternative unclogging methods can help you clear a toilet clogged with vomit without the use of harsh chemicals. However, it’s important to take necessary safety precautions when unclogging to avoid any potential hazards.
Safety Precautions When Unclogging
To ensure safety when unclogging the toilet by pouring the mixture into the toilet bowl, we must take certain precautions. It is important to remember that unclogging a toilet can be a messy and potentially hazardous task, so it is vital to prioritize safety at all times.
When using a snake for unclogging, it is crucial to wear protective gloves to prevent any direct contact with the clog or any harmful bacteria. Additionally, ensure that the snake is inserted carefully and slowly into the drain to avoid damaging the pipes.
If you choose to use chemical drain cleaners, there are a few precautions to keep in mind. Firstly, always read and follow the instructions provided by the manufacturer. These cleaners can be caustic and harmful if mishandled. It is imperative to wear protective eyewear, gloves, and clothing to minimize any potential skin or eye irritation. Furthermore, ensure proper ventilation in the bathroom to avoid inhaling any fumes.
By following these precautions, you can safely unclog your toilet and avoid any unnecessary accidents or injuries. Remember, safety should always be the top priority when dealing with potentially hazardous situations.
| Precautions for Using a Snake | Precautions for Using Chemical Drain Cleaners |
|---|---|
| Wear protective gloves | Read and follow instructions |
| Insert the snake carefully | Wear protective eyewear, gloves, and clothing |
| Avoid damaging the pipes | Ensure proper ventilation |
Wait for a Few Minutes Before Flushing the Toilet
We should give it a few minutes before flushing the toilet. This step is crucial in preventing further clogging and ensuring a successful unclogging process. Here’s why:
- Allowing time for natural toilet unclogging methods to work: Waiting for a few minutes allows natural unclogging methods to take effect. Methods such as pouring hot water or using a mixture of baking soda and vinegar need time to break down the clog and clear the pipe.
- Preventing overflow: Giving the toilet a few minutes before flushing allows any excess water or waste to settle down. This reduces the risk of overflow when you finally flush, preventing a messy situation.
Conclusion
In conclusion, unclogging a toilet with vomit can be a challenging and unpleasant task. However, by following the steps outlined in this article, using a plunger or a homemade drain cleaner, you can effectively resolve the issue.
Remember to wear protective gloves and take caution while applying pressure and using repetitive motions.
By doing so, you can restore your toilet’s functionality and maintain a clean and hygienic bathroom environment.

With an impeccable eye for detail and a passion for bathroom-related, Ava leads our editorial team gracefully and precisely.
Under her guidance, Best Modern Toilet has flourished as the go-to resource for modern bathroom enthusiasts. In her free time, you might find Ava exploring antique shops and looking for vintage bathroom fixtures to add to her collection.
We have the inside information on transforming your toilet into a champion of water conservation. With a handful of easy steps, we will guide you on how to minimize water consumption while maintaining effective flush strength.
Gather your materials, remove the tank lid, and identify the water fill valve.
Then, it’s all about adjusting the water level, installing a float cup or ball, and adding a toilet fill cycle diverter.
Don’t forget the toilet flush handle adapter and a water-saving flapper.
Test it out and make those water savings soar!
Key Takeaways
- Adjusting the water level in the toilet tank can help conserve water and prevent excessive flushing.
- Installing a float cup or float ball can effectively control the water level in the tank for water-saving benefits.
- Installing a toilet flush handle adapter and a water-saving flapper can further contribute to water conservation.
- Regularly testing, adjusting, and troubleshooting the toilet water saver components is important to ensure optimal water usage and efficiency.
Gather Necessary Materials
To start making a toilet water saver, we’ll need to gather up all of the necessary materials.
The goal of this project is to create a device that can help conserve water and provide eco-friendly alternatives to traditional toilet flushing methods.
The first material we’ll need is a plastic bottle, preferably one with a capacity of 1-2 liters. This will act as the reservoir for the water.
Next, we’ll require a rubber band or a piece of string to secure the bottle to the toilet’s flush lever.
Additionally, we’ll need a pair of scissors to cut the necessary holes in the bottle.
Finally, we’ll need a marker or a pen to mark the areas where we need to make the cuts.
Gathering these materials is the first step towards creating an effective toilet water saver that promotes water conservation and environmental sustainability.
Remove the Toilet Tank Lid
We can begin by removing the toilet tank lid. To make the process easier, follow these steps:
- Locate the toilet tank lid, which is usually made of porcelain or plastic and sits on top of the toilet bowl.
- Gently lift the lid straight up, being cautious not to drop or damage it.
- Set the lid aside in a safe place where it won’t get in the way.
Removing the toilet tank lid allows us to access the inner mechanisms of the toilet. This is necessary to identify the water supply, which is usually a valve located on the wall behind the toilet. Additionally, we can adjust the float arm, which controls the water level inside the tank. By making the necessary adjustments, we can ensure that our toilet functions efficiently and conserves water.
Now, let’s move on to the next step and identify the water fill valve.
Identify the Water Fill Valve
To identify the water fill valve, start by locating the valve on the wall behind the toilet. The water fill valve is responsible for regulating the water flow into the toilet tank. By understanding how to identify the water fill valve, you can effectively manage and adjust the water pressure in your toilet.
It’s crucial to identify the water fill valve accurately to make any necessary adjustments for water conservation purposes. To identify the water fill valve, look for a small, cylindrical device connected to a water supply line. This valve is typically made of plastic or metal and has a lever or knob that can be turned to adjust the water flow.
Once you have located the water fill valve, you can proceed with making the necessary modifications to conserve water.
Adjust the Water Level in the Tank
Let’s talk about how to adjust the water level in the tank of your toilet to optimize water usage and reduce waste.
By ensuring the water level is set at the optimal height, you can prevent excessive water from being flushed down the drain with each use.

This simple adjustment can make a significant difference in conserving water and promoting sustainability.
Optimal Water Level
To adjust the water level in the tank and maximize water efficiency, we can easily lower or raise it using the float valve. By setting the optimal water level, we can ensure that our toilet operates at the correct pressure, minimizing water waste.
Here are three key points to consider when adjusting the water level:
- Optimal Water Pressure:
- Adjusting the water level ensures that the pressure in the tank is neither too high nor too low.
- Correct water pressure prevents excessive flushing and reduces the risk of leaks or damage.
- Water Saving Techniques:
- Lowering the water level reduces the amount of water used during each flush.
- This simple adjustment can significantly contribute to water conservation efforts.
- Maintaining Efficiency:
- Regularly monitoring and adjusting the water level in the tank helps maintain the toilet’s efficiency and effectiveness.
- It ensures that the toilet only uses the necessary amount of water for each flush.
Reducing Water Waste
Adjusting the water level in the tank is an effective way to reduce water waste and promote sustainable practices. By lowering the water level, you can minimize unnecessary water usage without compromising the toilet’s functionality.
To adjust the water level, locate the fill valve and turn the adjustment screw or rod counterclockwise to decrease the water level. It’s important to find the optimal balance between conserving water and ensuring a proper flush.
Keep in mind that an excessively low water level may result in incomplete flushing, leading to multiple flushes and ultimately defeating the purpose of water conservation.
Install a Float Cup or Float Ball
When it comes to installing a float cup or float ball in your toilet, there are a few important points to consider.
Firstly, you need to understand the difference between a float cup and a float ball. While a float cup is a newer design that’s more compact and efficient, a float ball is the traditional choice.

Additionally, both options offer water-saving benefits by effectively controlling the water level in the tank, ensuring that it doesn’t exceed the necessary amount for each flush.
Float Cup Vs. Float Ball
We installed a float cup in our toilet as a water-saving measure. Here are some benefits of using a float cup instead of a float ball:
- Improved water efficiency: Float cups are designed to be more sensitive to water levels than float balls, allowing for more precise control of water flow and reducing the risk of overfilling the tank.
- Reduced water waste: Float cups are less prone to leaks and water loss compared to float balls, ensuring that water isn’t wasted unnecessarily.
- Less maintenance: Float cups require less maintenance than float balls as they’re less likely to get stuck or become misaligned, resulting in fewer repairs and replacements.
By choosing a float cup over a float ball, you can enjoy the benefits of improved water efficiency, reduced water waste, and lower maintenance requirements.
This makes a float cup an excellent choice for those seeking to maximize their water-saving efforts.
Water-Saving Benefits
To maximize water-saving efforts, installing either a float cup or a float ball offers significant benefits. These water-saving products work by controlling the water level in the toilet tank, preventing excessive water usage during each flush. By adjusting the float cup or float ball, you can ensure that the tank only fills to the required level for effective flushing, reducing water wastage. These techniques are essential for conserving water, especially in regions facing water scarcity or high water bills.
Both the float cup and float ball are simple yet effective solutions that can be easily installed in most toilet tanks. They’re designed to activate the fill valve when the water level drops, ensuring a consistent water level without any overflow. This not only saves water but also helps in reducing water bills and conserving resources.
Install a Dual Flush Converter
To install a dual flush converter, gather the necessary tools and materials. You’ll need a dual flush converter kit, which typically includes a dual flush valve, a dual flush button or handle, and a flush valve seal. Additionally, you’ll need a wrench, pliers, and a bucket.
Follow these steps to install the dual flush converter:
- Turn off the water supply to the toilet and flush to empty the tank.
- Remove the toilet tank lid and disconnect the flush valve chain from the handle or lever.
- Remove the existing flush valve by unscrewing it from the bottom of the tank.
- Install the new dual flush valve, making sure it’s securely tightened.
- Attach the dual flush button or handle to the tank lid.
- Adjust the water levels by following the instructions provided with the dual flush converter kit.
- Turn on the water supply and test the dual flush system.
Install a Toilet Dam or Displacement Bag
After installing a dual flush converter, an alternative option to further save water in your toilet is by installing a toilet dam or displacement bag.
These devices work by reducing the amount of water used for each flush. A toilet dam is a flexible rubber device that’s placed inside the toilet tank. It creates a barrier that reduces the volume of water that fills the tank, thus lowering the amount of water used per flush.
On the other hand, a displacement bag is a bag filled with water or another heavy material that’s placed inside the toilet tank. It takes up space, displacing water and reducing the amount of water needed for each flush.
Both options can help save water and reduce toilet water pressure, preventing toilet water overflow.

Install a Toilet Flapper With Adjustable Settings
We can install a toilet flapper with adjustable settings to further optimize water usage in our toilets. Here are three key benefits of using a toilet flapper with adjustable settings:
- Water Conservation: With adjustable flapper settings, we can control the amount of water released during each flush, reducing water wastage. By setting the flapper to a lower flow rate, we can conserve water without compromising on the toilet’s performance.
- Customization: Adjustable flapper settings allow us to fine-tune the flush to suit our specific needs. We can adjust the flapper to provide a more powerful flush when needed or a gentler flush for liquid waste, ensuring efficient water usage.
- Easy Installation: Installing a toilet flapper with adjustable settings is a straightforward process. With a few simple steps, we can replace the existing flapper and start benefiting from its adjustable features.
Install a Toilet Fill Cycle Diverter
Let’s talk about the benefits of installing a toilet fill cycle diverter and the easy steps to do it.
A toilet fill cycle diverter helps save water by redirecting the refill water that would normally go to the toilet tank into a different use, such as filling a bucket for cleaning or watering plants.
Installing a toilet fill cycle diverter is a simple process that can be done by following a few straightforward steps.
Benefits of Water-Saving
One of the key benefits of water-saving is that it reduces our environmental impact. By implementing water-saving practices, we can conserve this precious resource and contribute to a more sustainable future.
Here are three important reasons why water-saving is beneficial:
- Conservation of water resources: Water is a finite resource, and by reducing our water consumption, we can help ensure its availability for future generations.
- Lower utility bills: Using less water means lower water bills. By implementing water-saving techniques, such as installing a toilet fill cycle diverter, you can save money on your monthly water expenses.
- Environmental protection: Water-saving practices help protect ecosystems by minimizing the extraction of water from rivers, lakes, and underground sources. This, in turn, supports the health and biodiversity of aquatic habitats.
Easy Installation Steps
To continue conserving water and reducing our environmental impact, let’s now explore the easy installation steps for a toilet fill cycle diverter.
Installing a toilet fill cycle diverter is a simple and effective way to optimize water pressure and reduce water usage.
First, shut off the water supply to the toilet by turning the valve clockwise.
Next, flush the toilet to drain the water from the tank.
Disconnect the water supply line from the bottom of the tank and attach the fill cycle diverter in its place.
Ensure a tight connection to prevent any leaks.
Once installed, turn on the water supply and check for any leaks.
Troubleshooting common issues may involve adjusting the diverter’s position or tightening connections.
With the toilet fill cycle diverter successfully installed, we can now move on to the next step: installing a toilet flush handle adapter.
Install a Toilet Flush Handle Adapter
To install a toilet flush handle adapter, we’ll need to gather the necessary tools and follow a few simple steps. Here’s how to do it:

- Start by turning off the water supply to the toilet. This can usually be done by turning the valve located behind the toilet clockwise.
- Next, remove the lid of the toilet tank and locate the flush handle. Inspect the handle for any signs of wear or damage. If you notice any issues with the handle, such as sticking, loose connections, or a broken lever, it may be time for some toilet flush handle maintenance.
- Troubleshooting common toilet handle issues can involve tightening loose connections, lubricating moving parts, or replacing worn-out components.
- Once you have addressed any maintenance needs, it’s time to install the flush handle adapter. This adapter will allow you to connect a new handle to the existing flushing mechanism.
- Follow the manufacturer’s instructions to attach the adapter securely. Make sure all connections are tight and secure.
- Finally, turn the water supply back on and test the flush handle. It should now operate smoothly and effectively.
Install a Toilet Flapper With a Water-Saving Design
To save water in your toilet, we can install a toilet flapper with a water-saving design. This is one of the most effective water-saving techniques for toilets. The flapper is the component that controls the flow of water from the tank to the bowl during a flush. By installing a flapper with a water-saving design, you can reduce the amount of water used per flush. These flappers are designed to allow less water to pass through, resulting in water savings without compromising the flushing performance.
To adjust the flapper, simply follow the manufacturer’s instructions. This may involve adjusting the chain length or the float level. It’s important to find the right balance between water conservation and effective flushing. Once the flapper is installed and adjusted, you can move on to testing and adjusting the toilet water saver to ensure optimal water usage.
Test and Adjust the Toilet Water Saver
How do we ensure optimal water usage after installing and adjusting the toilet water saver?
Testing the effectiveness and adjusting the settings of the toilet water saver are crucial steps in achieving water savings. Here are three important considerations for this process:

- Conduct a water level test:
- Fill the toilet tank to its normal level and mark the water line.
- Flush the toilet and observe if the water level drops below the marked line.
- If it does, adjust the water saver settings accordingly.
- Check for leaks:
- After adjusting the water saver, inspect the toilet for any leaks.
- A simple way to do this is by adding a few drops of food coloring to the tank and waiting for a few minutes.
- If the color appears in the bowl without flushing, there may be a leak that needs to be addressed.
- Fine-tune the settings:
- Depending on the results of the water level test and leak check, you may need to further adjust the water saver settings.
- This could involve increasing or decreasing the amount of water saved with each flush until optimal water usage is achieved.
Conclusion
By implementing a toilet water saver, we not only conserve water, but also symbolize our commitment to preserving our planet.
With just a few simple adjustments and installations, we can significantly reduce our water usage without sacrificing performance.
Let our toilets become a symbol of our dedication to environmental stewardship, as we take small yet impactful steps towards a sustainable future.
With an impeccable eye for detail and a passion for bathroom-related, Ava leads our editorial team gracefully and precisely.
Under her guidance, Best Modern Toilet has flourished as the go-to resource for modern bathroom enthusiasts. In her free time, you might find Ava exploring antique shops and looking for vintage bathroom fixtures to add to her collection.
Ever been stuck with too much hair dye and not sure how to get rid of it? No worries, we have the solution for you.
In this article, we’ll share our top tips and methods for getting rid of that stubborn hair dye. From pre-treatment methods to natural cleansers and professional stain removers, you’ll learn everything you need to know to achieve mastery in removing excess hair dye.
So, let’s dive in and say goodbye to those unwanted dye marks!
Key Takeaways
- Pre-treatment and protection methods, such as using barrier cream or petroleum jelly, conducting a strand test, and protecting surfaces, are important before dyeing hair to prevent staining.
- Soap and water method can be effective for removing hair dye stains by using a wet washcloth or sponge with mild soap to gently rub the stained area and rinsing thoroughly.
- Natural cleansers like lemon juice, vinegar, and baking soda can break down hair dye color molecules and lift stains, but it’s important to consider their safety and potential drying effects on hair.
- Alternatives to baking soda for exfoliation include sugar, oatmeal, and honey and sugar mixture, which provide gentle yet effective ways to remove excess hair dye.
Pre-Treatment Methods
To prepare for removing excess hair dye, we can employ various pre-treatment methods. These methods are essential in preventing hair dye stains and minimizing color transfer.
One effective pre-treatment method is applying a barrier cream or petroleum jelly around the hairline and on the ears to create a protective barrier against the dye. This prevents the dye from coming into contact with the skin, reducing the chances of staining.
Another useful technique is using a pre-color shampoo or clarifying shampoo to remove any product buildup or residue on the hair. This allows the hair dye to penetrate evenly and minimizes the risk of color transfer.
Additionally, it’s advisable to do a strand test before dyeing the entire hair to ensure that the desired color is achieved without any unwanted side effects.
Using Soap and Water
Now, let’s move on to how we can use soap and water to remove excess hair dye.

Using soap and water is a simple and effective method for preventing staining caused by hair dye. When it comes to removing excess dye, it’s important to act quickly to avoid any permanent staining.
Start by wetting a washcloth or sponge with warm water. Then, apply a small amount of mild soap to the cloth and gently rub the stained area. Be sure to avoid scrubbing too harshly, as this can cause additional damage to your hair.
Rinse the area thoroughly with warm water and pat dry with a clean towel. Remember to moisturize your hair afterwards to counteract any drying effects caused by the soap and water.
Lemon Juice as a Natural Cleanser
Lemon juice is known for its effectiveness in removing excess hair dye, thanks to its acidic properties that help break down the color molecules.

However, it’s important to note that lemon juice may not work for everyone and could potentially dry out the hair.
If you’re looking for alternative natural cleansers, you might consider using vinegar or baking soda, which can also help fade hair dye.
Lemon Juice Effectiveness
We frequently find that using lemon juice as a natural cleanser effectively helps to remove excess hair dye. Lemon juice is known for its acidic properties, which can break down the dye molecules and fade the color. However, it is important to consider the safety of using lemon juice on your hair. While it is generally safe, it can cause dryness and damage if used excessively or on already damaged hair. It is recommended to dilute the lemon juice with water and perform a patch test before applying it to your hair.
To further highlight the effectiveness of lemon juice as a natural cleanser, here is a table comparing it to other alternatives:
| Cleanser | Effectiveness |
|---|---|
| Lemon Juice | High |
| Baking Soda | Moderate |
| Vinegar | Low |
| Coconut Oil | Low |
| Olive Oil | Low |
As we explore alternative natural cleansers, it is important to find options that are gentle, effective, and suitable for your hair type and condition.
Alternative Natural Cleansers?
What other natural cleansers can effectively remove excess hair dye?
When it comes to removing excess hair dye, there are several alternative natural cleansers you can try. These DIY remedies are effective and gentle on your hair. One natural ingredient that’s known for its cleansing properties is lemon juice. Here are three reasons why lemon juice can be an effective natural cleanser for removing excess hair dye:
- Natural bleaching properties: Lemon juice contains citric acid, which acts as a natural bleaching agent. It can help lighten the color of the hair dye and fade the excess color.
- Acidic nature: The acidic nature of lemon juice helps to break down the dye molecules, making it easier to remove from the hair strands.
- Moisturizing effect: Lemon juice also has moisturizing properties that can help counteract the drying effects of hair dye.
To use lemon juice as a natural cleanser, simply mix it with water and apply it to your hair. Leave it on for a few minutes before rinsing thoroughly. Remember to follow up with a moisturizing conditioner to keep your hair hydrated.
Vinegar for Removing Hair Dye Stains
One effective method for removing hair dye stains is by using vinegar. Vinegar is a popular natural remedy for various cleaning purposes, including removing stains. Its acidic properties help break down the dye molecules and lift them from the surface of the skin or other materials. To use vinegar for removing hair dye stains, simply mix equal parts vinegar and water and apply it to the stained area. Let it sit for a few minutes before gently scrubbing with a cloth or sponge. Rinse thoroughly with water afterward. Here’s a table that summarizes the steps for using vinegar as a home remedy for hair dye stains:
| Steps for Using Vinegar |
|---|
| Mix equal parts vinegar and water |
| Apply the mixture to the stained area |
| Let it sit for a few minutes |
| Gently scrub and rinse thoroughly with water |
Baking Soda Paste for Gentle Exfoliation
Exfoliation is a key step in getting rid of excess hair dye, as it helps to remove dead skin cells and promote cell turnover.
Baking soda paste is a popular choice for gentle exfoliation, as it’s effective in removing stains and residue without being too harsh on the skin.
However, if baking soda isn’t readily available, there are alternative ingredients such as sugar or oatmeal that can be used for the same purpose.
Benefits of Exfoliation
To experience the benefits of gentle exfoliation using a baking soda paste, we can use an easy and effective method.
Here are three reasons why incorporating exfoliation into your skincare routine can be beneficial:
- Removes dead skin cells: Exfoliating helps to slough off dead skin cells, revealing a smoother and brighter complexion. This can improve the overall texture of your skin and promote a youthful appearance.
- Unclogs pores: Exfoliation helps to remove dirt, oil, and other impurities that can clog your pores and lead to breakouts. By regularly exfoliating, you can keep your pores clear and minimize the occurrence of acne.
- Enhances product absorption: By getting rid of the layer of dead skin cells, exfoliation allows other skincare products to penetrate deeper into the skin. This maximizes their effectiveness and ensures that you get the most out of your skincare routine.
Incorporating gentle exfoliation with a baking soda paste can be a simple yet effective way to reap these benefits and achieve healthy, glowing skin.
Alternatives to Baking Soda
For a gentle exfoliation alternative to baking soda paste, we can try using a mixture of honey and sugar. This combination of natural ingredients provides a gentle yet effective way to remove excess hair dye.
Simply mix equal parts honey and sugar to create a paste-like consistency. Gently massage the mixture onto the areas where you want to remove the hair dye, using circular motions. The sugar acts as a natural exfoliant, helping to slough off dead skin cells and remove the dye, while the honey moisturizes and nourishes the skin. Rinse off with warm water and pat dry.
This alternative isn’t only effective but also safe for the skin, making it a great option for those looking for natural alternatives to hair dye removal methods.
Now, let’s move on to toothpaste for targeted stain removal.
Toothpaste for Targeted Stain Removal
To effectively remove targeted hair dye stains, we’ve found that using toothpaste is a simple and efficient solution. When compared to baking soda, toothpaste offers several advantages.
Firstly, toothpaste is readily available in most households, making it a convenient option.
Secondly, toothpaste contains mild abrasives that can gently scrub away the dye without causing damage to the skin or hair.
Lastly, toothpaste has a pleasant minty scent that helps to mask the strong odor of hair dye.
While lemon juice is often recommended for stain removal, it’s important to note that its effectiveness may vary depending on the type and intensity of the dye.

Transitioning into the next section, petroleum jelly can be used as a protective barrier to prevent hair dye from staining the skin.
Petroleum Jelly as a Protective Barrier
When it comes to protecting our skin from hair dye stains, petroleum jelly can be a lifesaver. By applying a thin layer of petroleum jelly around the hairline and on the ears, we can create a protective barrier that prevents the dye from staining our skin.
This simple step can save us from the hassle of trying to remove stubborn dye stains later on.
Using Petroleum Jelly
After applying hair dye, we can protect our skin from staining by using petroleum jelly as a barrier. Petroleum jelly, also known as Vaseline, is a versatile product with various alternative uses. In the context of hair dye, it can be a valuable tool to prevent unwanted color on our skin. Here are three reasons why using petroleum jelly as a protective barrier is a smart choice:
- Easy application: Simply apply a thin layer of petroleum jelly along the hairline, ears, and any other areas prone to staining. This creates a protective barrier that prevents the dye from coming into contact with the skin.
- Skin protection: Petroleum jelly acts as a shield, minimizing the risk of dye absorption by the skin. It forms a barrier that can be easily wiped off after the dyeing process, leaving behind clean and stain-free skin.
- Moisturizing benefits: In addition to its protective properties, petroleum jelly also moisturizes the skin, preventing dryness and irritation that can be caused by the chemicals in hair dye.
While petroleum jelly is generally safe to use, it’s important to note that it may cause allergic reactions or clog pores for some individuals. Therefore, it’s always recommended to perform a patch test before applying it to larger areas of the skin.
Hair Dye Protection Tips
We always apply a generous amount of petroleum jelly as a protective barrier before dyeing our hair to prevent any unwanted color staining on our skin. This simple step can make a big difference in preventing hair dye stains and keeping our skin looking clean and stain-free.
Petroleum jelly creates a barrier that prevents the dye from coming into direct contact with our skin, acting as a shield against any potential staining. Additionally, petroleum jelly can also help to prolong the color of our hair dye. By applying it along the hairline and on the ears, we can prevent the dye from seeping onto these areas and fading the color prematurely.
It’s a small precaution that can go a long way in maintaining vibrant and long-lasting hair color.

Makeup Remover for Stubborn Dye Marks
One option is to try using an affordable makeup remover to effectively remove stubborn dye marks. Makeup removers are designed to break down and dissolve makeup, making them a useful tool for removing hair dye stains.
Here are three makeup remover alternatives that can help you get rid of dye marks:
- Micellar water: This gentle yet effective cleanser contains tiny micelles that attract and lift away dirt, oil, and dye residue from the skin or fabric.
- Oil-based makeup remover: Oil-based removers are great for breaking down stubborn dye stains. Simply apply a small amount to a cotton pad and gently rub the affected area until the stain starts to fade.
- Makeup remover wipes: These convenient wipes are saturated with a makeup removing solution. They’re perfect for on-the-go stain removal.
Remember to always test the remover on a small, inconspicuous area before applying it to the entire stain.
Alcohol-Based Hand Sanitizer for Quick Removal
To continue with the discussion on removing stubborn hair dye marks, another option to consider is using alcohol-based hand sanitizer for quick removal.
When it comes to alternative methods, alcohol-based hand sanitizer can be a useful tool in getting rid of excess hair dye on the skin. The alcohol content in the sanitizer helps to break down the dye molecules and lift them off the skin’s surface.
It’s important to note, however, that there are potential risks associated with using alcohol-based hand sanitizer. The high alcohol content can be drying to the skin and may cause irritation or redness. It’s advisable to do a patch test on a small area of skin before using it extensively.
Now, let’s move on to discussing baby oil for gentle and effective cleaning.
Baby Oil for Gentle and Effective Cleaning
A popular method for removing excess hair dye is using baby oil. Baby oil is gentle and effective, making it a great option for those who want to avoid harsh chemicals or irritants. Here are three reasons why baby oil is a beneficial choice for cleaning up hair dye mishaps:
- Gentle on the skin: Baby oil is formulated to be safe for babies, meaning it’s gentle and non-irritating. This makes it ideal for use on the sensitive skin of your scalp and face.
- Moisturizing properties: Baby oil helps to moisturize and nourish the skin, preventing dryness and irritation that can occur with other cleaning methods. It leaves your skin feeling soft and supple.
- Easy to find and affordable: Baby oil is widely available in drugstores and supermarkets, making it a convenient choice for quick clean-ups. It’s also a cost-effective option compared to other hair dye removal products.
While baby oil is a popular choice, there are also alternatives such as coconut oil or olive oil that can be used for gentle and effective cleaning. However, the benefits of using baby oil make it a top choice for many.
Professional Hair Dye Stain Removers
Now let’s shift our focus to professional hair dye stain removers, which offer a more specialized solution for removing stubborn hair dye stains. These products are specifically designed to tackle tough stains and provide effective results. Professional hair dye stain removers use powerful ingredients that break down the dye molecules, making it easier to remove them from the skin, clothing, or surfaces. They are formulated to be gentle on the skin while effectively removing the dye stains.
To help you understand the benefits of professional hair dye stain removers, here is a comparison table showcasing some popular products:
| Product | Key Features | Price Range |
|---|---|---|
| Product A | Removes stains quickly | $15-$20 |
| Product B | Suitable for sensitive skin | $10-$15 |
| Product C | Works on various surfaces | $20-$25 |
| Product D | Prevents future hair dye stains | $25-$30 |
Conclusion
In conclusion, there are various pre-treatment methods and household products that can effectively remove excess hair dye. From using soap and water to lemon juice, vinegar, baking soda paste, makeup remover, alcohol-based hand sanitizer, and baby oil, there are plenty of options available.

Additionally, professional hair dye stain removers can also be used for stubborn stains. By following these simple steps, you can easily get rid of any unwanted hair dye marks and stains.
With an impeccable eye for detail and a passion for bathroom-related, Ava leads our editorial team gracefully and precisely.
Under her guidance, Best Modern Toilet has flourished as the go-to resource for modern bathroom enthusiasts. In her free time, you might find Ava exploring antique shops and looking for vintage bathroom fixtures to add to her collection.


How Do You Unclog a Toilet With Vomit

How Do You Make a Toilet Water Saver

How Do You Get Rid of Excess Hair Dye

How Do You Unblock an Overflow Toilet

How Do You Flush a Touchless Toilet

Which Countries Use Bidets the Most

What Happens if You Pour a Bucket of Water in the Toilet

Push Button Flush Valve Replacement

Can Cold Weather Affect a Toilet

Best One-Piece Toilets: Top Picks for a Sleek and Efficient Bathroom [2024]

-
 FAQ - Advanced Bathroom Queries3 months ago
What Happens if You Sit on the Toilet Too Long
-
 FAQ - Advanced Bathroom Queries3 months ago
Why Is My Toilet so Loud When Refilling
-

 Toilet Brands3 months ago
Countries Where You Can’t Flush Toilet Paper
-
 Guides3 months ago
Troubleshooting Dropping Water Level in Toilet Bowl: Causes and Solutions
-
 Guides3 months ago
Choosing the Right Toilet Flange: A Comprehensive Guide
-
 Guides3 months ago
Toilet Water Supply Line Sizes: Finding the Right Fit
-
 FAQ - Advanced Bathroom Queries2 months ago
What Happens When You Put Baking Soda in Your Toilet
-
 Guides2 months ago
How to Remove Crystallized Urine From Toilet Bowl