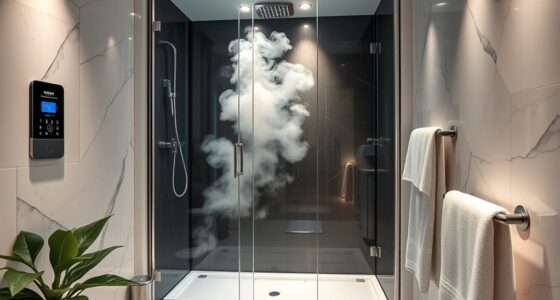

To install a shower pan, start by gathering tools like a level, screwdriver, and waterproof membrane, and prepare the area by cleaning and leveling the subfloor. Measure and cut the pan for a precise fit, then install the drain assembly securely. Seal the pan with a waterproof membrane, position it carefully, and fasten it with appropriate hardware. Connect the drain to plumbing, ensure there’s no leaks, and finish with wall and floor surrounds. Following these steps guarantees a durable, waterproof shower base if you keep going.
Key Takeaways
- Prepare the area by cleaning, leveling the subfloor, and gathering necessary tools and materials.
- Measure and cut the shower pan to fit, ensuring proper alignment with the drain and walls.
- Install the drain assembly securely, sealing it with appropriate gasket and sealant.
- Secure the shower pan with fasteners, then seal all seams and edges with waterproof membrane.
- Test for leaks by filling with water, check drainage, and make final adjustments before finishing surrounding walls and flooring.
Gather Necessary Tools and Materials
Before you begin installing the shower pan, it is essential to gather all the necessary tools and materials. Start with a tools overview: a tape measure, level, screwdriver, utility knife, and caulk gun. You’ll also need safety gear like gloves and goggles. For material selection, choose a quality shower pan compatible with your space and plumbing setup. Consider the substrate type and drainage system when selecting your pan. Make sure to pick waterproof, durable materials such as acrylic, fiberglass, or stone resin. Having everything ready beforehand prevents delays and guarantees a smooth installation process. Double-check your list to include any additional items specific to your project, like mortar or flashing tape, so you’re fully prepared before you move to the next step. Proper planning and understanding of airless paint sprayer options can also facilitate future maintenance and upgrades. Additionally, understanding Mazda tuning options can help optimize your vehicle’s performance, similar to how selecting the right tools ensures a successful shower pan installation. Being knowledgeable about grocery savings strategies can help you allocate resources effectively during your project or home improvement endeavors. Recognizing the importance of sound therapy science can also inspire a more mindful and stress-reducing approach to your workspace setup.
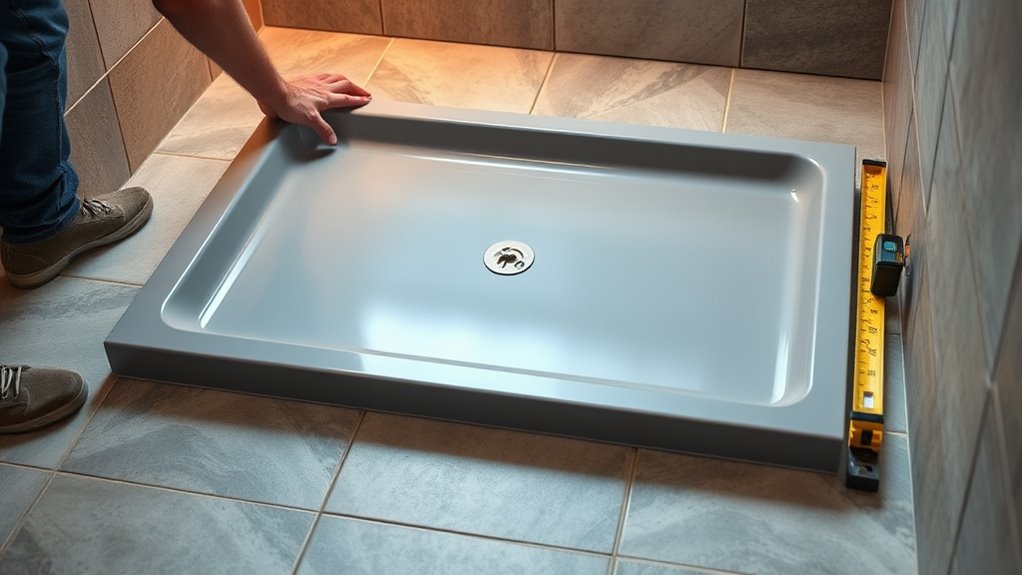
Prepare the Shower Base Area
Preparing the shower base area sets the foundation for a successful installation. Start by clearing the preparation area, removing any debris, dirt, or old materials that could interfere with the new shower base. Make sure the surface is clean, flat, and level, as this will help the shower base sit securely. If the subfloor has any damage or uneven spots, repair or level them before proceeding. Check that the area is dry and free of moisture to prevent mold or adhesion issues. Measure the space carefully to confirm it matches the dimensions of your shower base. Properly preparing the shower base area ensures a smooth installation process and a stable, leak-proof shower. Taking these steps now saves you time and effort later. Additionally, ensuring the contrast ratio of your underlying surface is appropriate can improve the visual detection of any imperfections during leveling. It is also important to verify that the subfloor material is suitable for supporting the shower base, enhancing long-term stability. For optimal results, consider proper surface preparation techniques to ensure adhesion and durability. Incorporating pre-installation inspections can help identify potential issues before installation begins, reducing the risk of future problems.
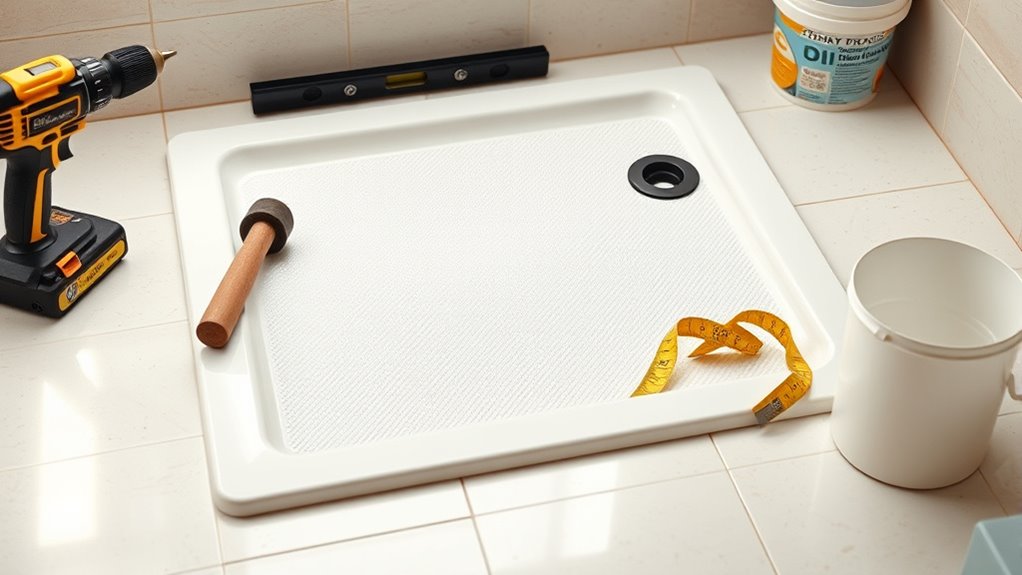
Measure and Cut the Shower Pan to Fit
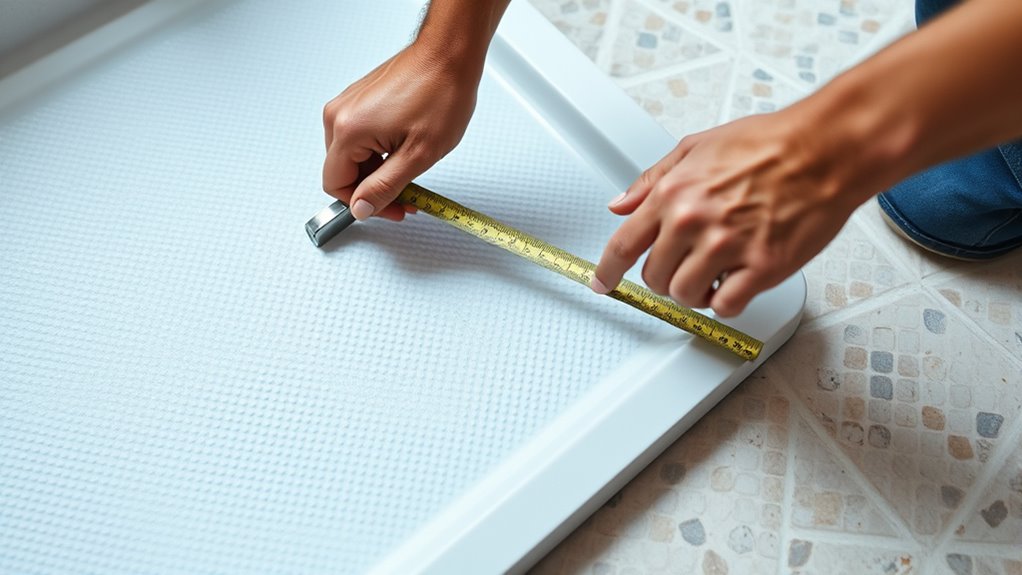
To guarantee a proper fit, carefully measure the dimensions of your shower area and the existing opening. Mark these measurements on the shower pan, ensuring you account for any slight variations in the space. Use a straightedge or a level to draw precise cut lines, aligning with your tile layout plan to ensure a seamless look once installed. Cut the pan carefully with a utility knife or saw, following your markings. Once fitted, double-check the pan’s placement to make sure it aligns with the drain and walls. This step guarantees the pan fits snugly, reducing gaps. Remember, a well-measured and cut shower pan simplifies grout application later, preventing gaps and leaks, and helps create a professional finish for your shower installation. Additionally, ensuring the correct installation procedures are followed can help prolong the lifespan of your shower pan and prevent future issues.
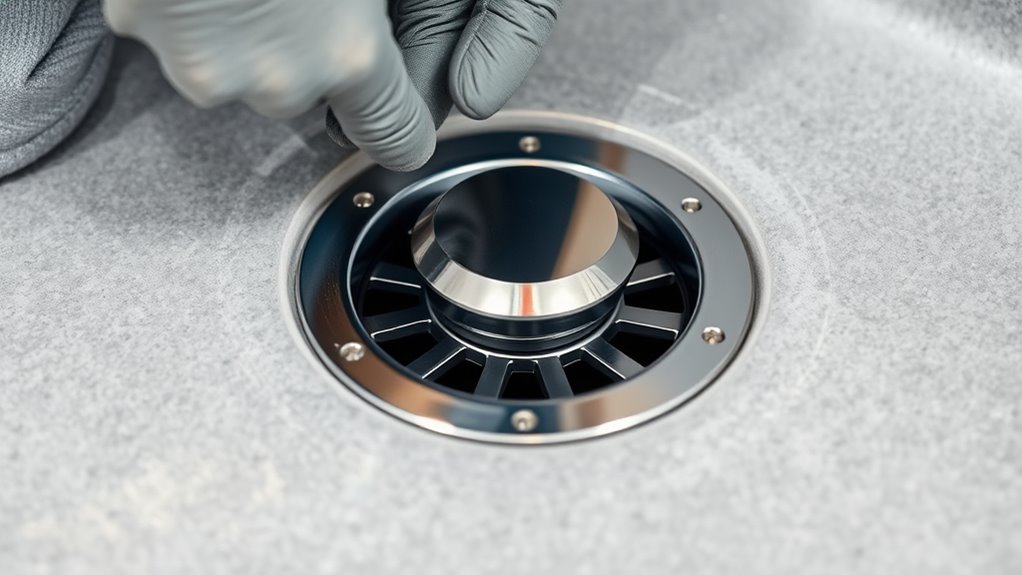
Install the Drain Assembly
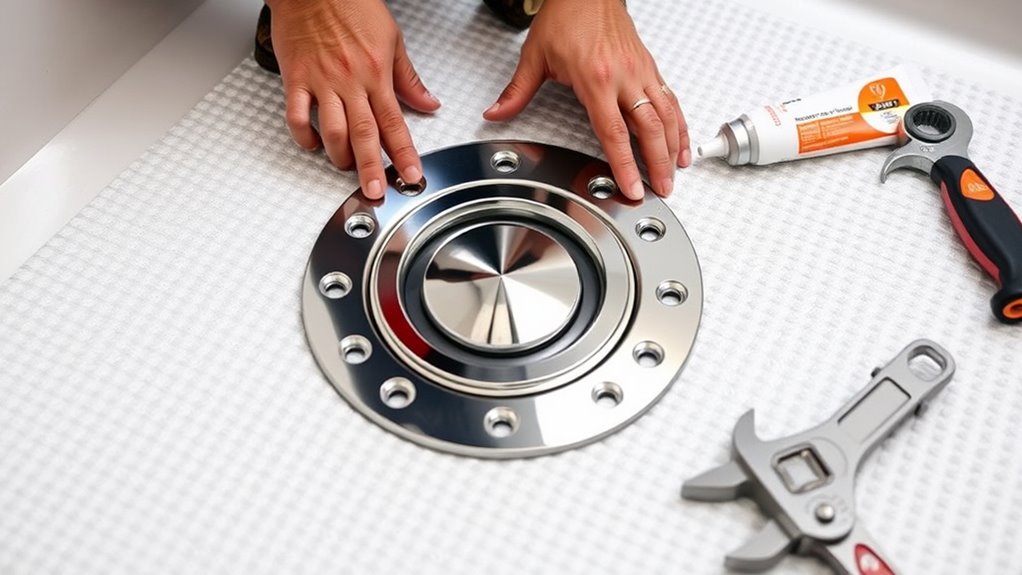
Installing the drain assembly is a critical step to guarantee your shower pan functions properly and doesn’t leak. First, position the drain assembly into the drain hole of the shower pan, making sure the rubber gasket creates a waterproof seal between the drain and the pan. Tighten the locknut securely from underneath, but avoid overtightening, which could crack the pan or damage the gasket. Double-check that the drain is flush and properly aligned with the drainpipe. Ensuring a tight waterproof seal prevents water from leaking around the drain, which could cause damage or mold. Proper installation of the drain assembly is essential for a durable, leak-free shower. Additionally, verify that your installation process complies with building codes and regulations to ensure safety and durability. Confirming the correct installation techniques helps prevent future issues and extends the lifespan of your shower. Using the right tools and materials can further ensure a secure and long-lasting installation. Paying attention to proper sealing methods can also help maintain a waterproof connection over time.
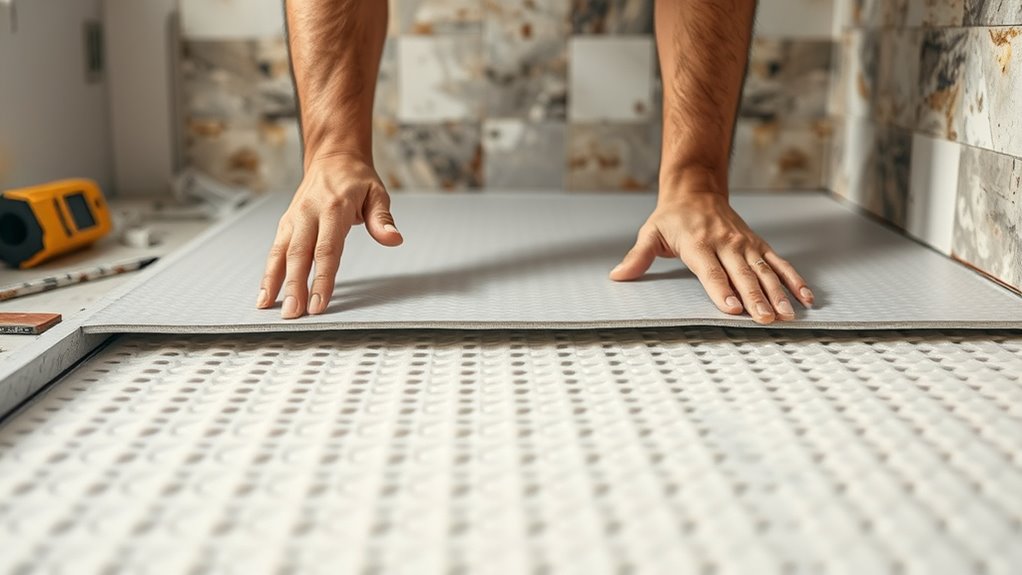
Seal the Shower Pan With Waterproof Membrane
Why is sealing the shower pan with a waterproof membrane such a essential step? It prevents water from seeping through the pan’s surface and causing damage beneath. Using a high-quality waterproof membrane ensures a durable, watertight barrier that protects your subfloor and surrounding structures. When applying the membrane, focus on proper sealing techniques—cover all seams, corners, and edges thoroughly. Start by cutting the membrane to fit, then carefully adhere it, smoothing out air bubbles and wrinkles. Pay special attention to overlaps and joints, ensuring they are well sealed to avoid leaks. Proper sealing with a waterproof membrane also involves correct application techniques, which are vital for ensuring a secure and long-lasting seal. Additionally, understanding the types of waterproof membranes can provide inspiration for soundtrack design, even in functional tasks like waterproofing. Knowing how to select the appropriate waterproof membrane for your specific shower pan is crucial for effective sealing. This step is critical for a long-lasting shower installation, reducing the risk of water damage and mold growth over time. Proper sealing with a waterproof membrane guarantees your shower pan remains watertight and secure.
Position and Secure the Shower Pan
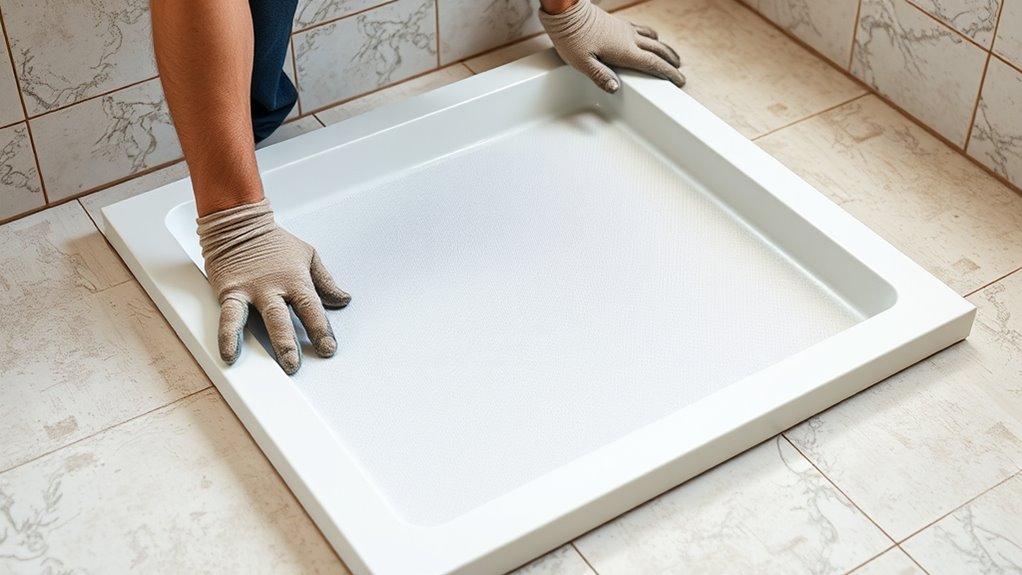
You need to place the shower pan correctly to guarantee proper drainage and stability. Use a level to check its alignment and make adjustments as needed. Once positioned, secure it firmly with the appropriate fasteners to keep it in place. Additionally, ensure the area is free of debris and moisture-resistant materials are used for a durable installation space optimization.
Proper Placement Techniques
To guarantee your shower pan functions properly and prevents leaks, it’s essential to position it correctly before securing it in place. Start by ensuring the subfloor is level, which is critical for effective floor leveling and drainage. Carefully align the pan within the designated area, making sure it sits flush against the walls. Use waterproofing techniques, like sealing the edges with appropriate membrane or sealant, to prevent water seepage. Secure the pan according to manufacturer instructions, maintaining consistent contact with the subfloor. Additionally, paying attention to the installation guidelines provided by the manufacturer can help ensure a proper fit and long-lasting performance. Properly maintaining the seal around the edges is also crucial to prevent future leaks and water damage. Remember that soundproofing can also be incorporated to reduce noise transmission from the shower area.
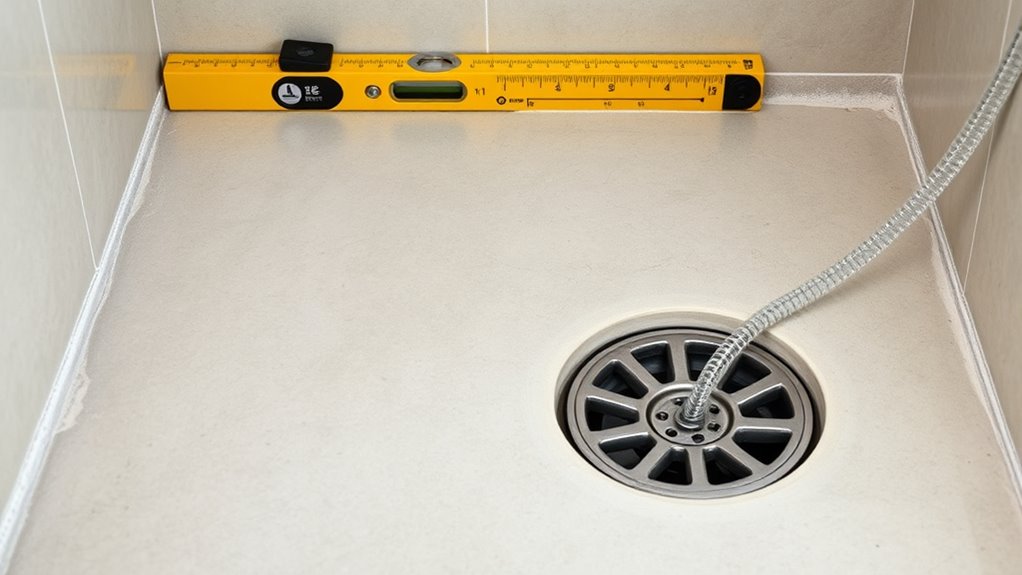
Using Level for Alignment
Using a level is essential to guarantee your shower pan is properly aligned before securing it. Place the level across the edges of the pan, checking both side-to-side and front-to-back. Adjust the pan as needed until the bubble sits centered, ensuring a slight slope toward the drain for proper drainage. Proper alignment is crucial for tile installation, as uneven surfaces can cause tile cracking or grout application issues later. Confirm the pan remains level during minor adjustments, then mark the position. Once aligned, you can securely fasten the pan. Ensuring a level surface helps prevent water pooling and guarantees a smooth, professional finish. Take your time to double-check the alignment—this step is vital for a durable, leak-free shower.
Securing With Fasteners
After confirming your shower pan is properly aligned with a level, the next step is to secure it firmly in place. Using the appropriate fastener types is essential for a secure installation. Choose between screws, anchors, or bolts based on your subfloor and pan material. When installing, use proper techniques such as drilling pilot holes and applying sealant to prevent leaks. Make certain fasteners are tight but not over-tightened, which could crack the pan or damage the subfloor. Proper fastening prevents shifting and guarantees stability. Remember to double-check the alignment after securing, as adjustments may be necessary. This step lays the foundation for a leak-proof, durable shower. Proper installation techniques are key to a successful, long-lasting shower pan setup.
Connect the Drain to the Plumbing System
Have you ever wondered how to guarantee a secure connection between your shower drain and the plumbing system? Start by attaching the drain flange to the shower pan, ensuring the pipe connection aligns properly. Use a high-quality drain sealant or plumber’s putty around the drain to prevent leaks. When connecting the drain pipe, insert it firmly into the drain outlet, tightening the lock nut underneath to secure the connection. Make sure the pipe is flush and properly seated to avoid future issues. Check that the drain is level and stable before moving on. Proper drain sealing is vital for preventing water leaks and ensuring a smooth drainage flow. Take your time, and double-check all connections before proceeding to testing.
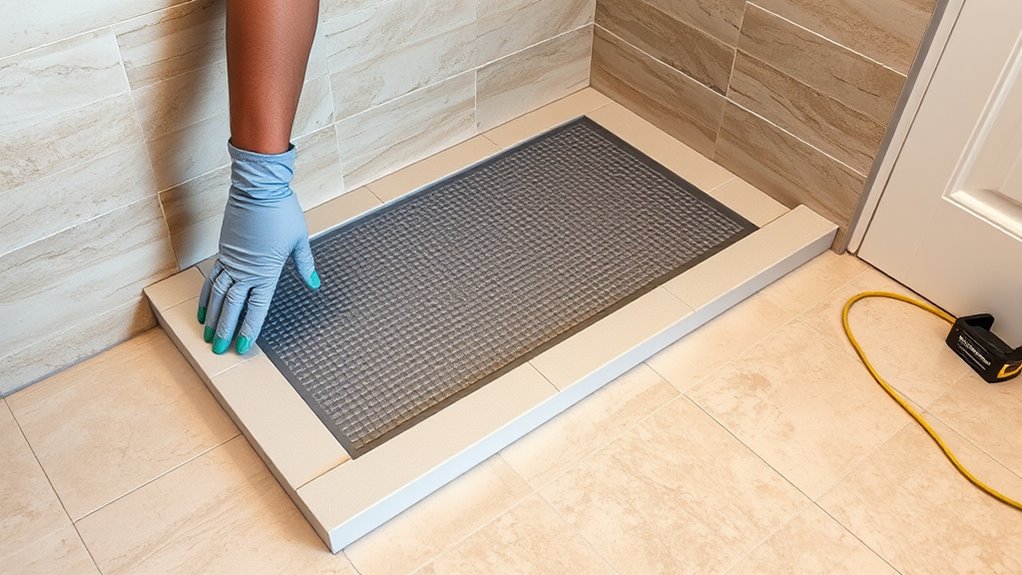
Test for Leaks and Proper Drainage
Before finishing your installation, verifying the drain for leaks and proper drainage is vital. Perform leak testing by filling the shower pan with water up to the curb and observing for any signs of leaks around the drain or edges. Drainage verification involves checking that water flows smoothly toward the drain without pooling or slow drainage.
To guarantee everything functions correctly, consider these steps:
- Inspect for visible leaks during leak testing.
- Observe water flow to confirm proper drainage.
- Use a level to verify the pan’s slope directs water toward the drain.
Taking these steps helps catch issues early, saving you time and effort later. Proper leak testing and drainage verification are essential to a successful shower pan installation.
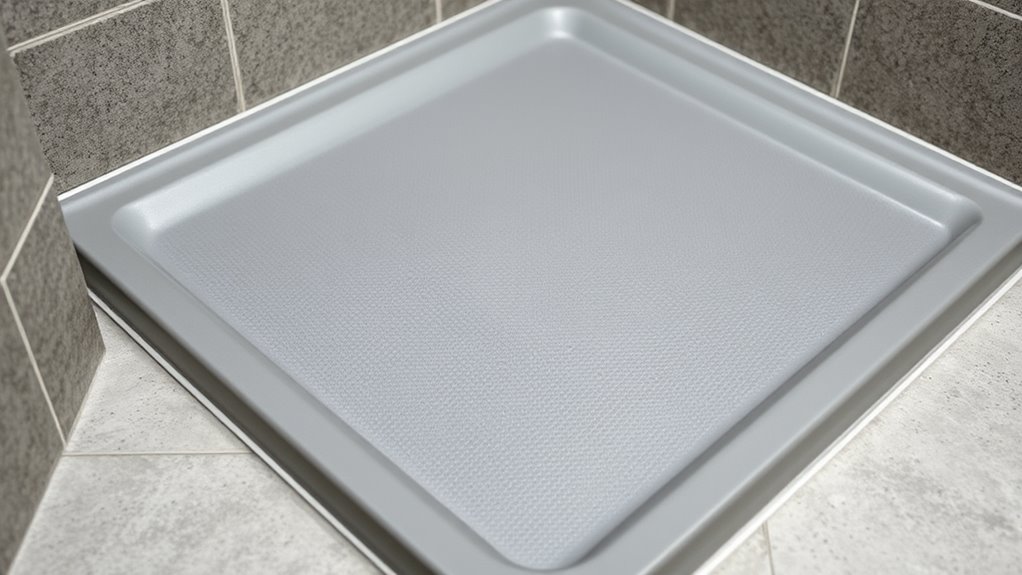
Finish Surrounding Walls and Flooring
Once the shower pan is securely in place and tested, you can begin finishing the surrounding walls and flooring. First, prepare your wall surfaces for tile installation or other wall finishing options. Make certain the walls are clean, dry, and free of debris. Next, choose your tile and layout to achieve a professional look. Use spacers to maintain even grout lines. For flooring, select waterproof materials suited for wet areas. Here’s a quick overview:
| Step | Details |
|---|---|
| Surface Preparation | Clean and smooth wall and floor surfaces |
| Waterproofing | Apply a waterproof membrane or sealant |
| Tile Selection | Pick durable, moisture-resistant tiles |
| Layout Planning | Plan tile placement before installation |
| Grouting | Fill gaps with suitable grout for durability |
This approach guarantees a polished, long-lasting finish.
Frequently Asked Questions
How Do I Choose the Right Shower Pan Size?
When choosing the right shower pan size, you need to contemplate shower pan dimensions and how they fit your space. Measure your shower area carefully, accounting for walls and door clearance. Use size selection tips like opting for a pan that provides enough room for comfortable movement without overwhelming the space. Remember, selecting the proper size ensures a seamless fit, prevents leaks, and enhances your bathroom’s overall look and functionality.
What Are Common Mistakes During Installation?
When installing a shower pan, watch out for common mistakes like choosing incorrect shower pan materials or neglecting waterproofing techniques. You might forget to properly seal seams or use incompatible materials, leading to leaks. Make certain you follow manufacturer instructions carefully and prioritize waterproofing techniques to prevent water damage. Double-check the slope and drainage to avoid standing water. Taking these precautions helps you avoid costly repairs and guarantees a durable, leak-proof shower.
Can I Install a Shower Pan Myself Without Professional Help?
You can definitely handle a DIY plumbing project like installing a shower pan during your home renovation if you’re comfortable with basic tools and follow instructions carefully. Doing it yourself saves money and gives you a sense of accomplishment. Just make sure to research thoroughly, prepare properly, and take your time. If you’re unsure about any step, consulting a professional can help prevent costly mistakes and guarantee your shower functions perfectly.
How Long Does It Take to Install a Shower Pan?
Installing a shower pan typically takes about one to two days, depending on your experience and the shower pan materials you choose. You’ll need to apply proper waterproofing techniques to guarantee a leak-proof seal. If you’re comfortable with DIY projects, you can complete it within this timeframe, but it’s important to follow all waterproofing steps carefully to avoid future issues. Rushing the process may compromise the installation’s durability.
What Maintenance Is Required After Installation?
Think of your shower as a delicate dance, where routine maintenance keeps it in harmony. You should regularly check the drain for clogs and clean it to prevent buildup. Applying sealant periodically ensures a waterproof barrier, like a shield protecting your sanctuary. These simple acts maintain your shower’s integrity, preserving its smooth flow and preventing leaks. With consistent care, your shower remains a invigorating retreat, resilient against daily wear.
Conclusion
Now that you’ve installed your shower pan, you’ve laid the foundation for a revitalizing new space. Like a sturdy ship’s hull, your work ensures a leak-proof voyage ahead. With patience and precision, you’ve turned a messy project into a smooth ride. Enjoy your new shower, knowing you’ve built a reliable oasis that’ll stand the test of time. Just remember, every great journey begins with a solid base—your shower pan is now ready to make waves!

With an impeccable eye for detail and a passion for bathroom-related, Ava leads our editorial team gracefully and precisely.
Under her guidance, Best Modern Toilet has flourished as the go-to resource for modern bathroom enthusiasts. In her free time, you might find Ava exploring antique shops and looking for vintage bathroom fixtures to add to her collection.