
Do you cringe every time you see that unsightly chip in your bathtub? Don’t worry, because fixing it is easier than you think! In this step-by-step guide, we will show you how to assess the damage, gather the necessary tools and materials, and clean and prepare the chip for repair.
By following our simple instructions, you’ll be able to restore your bathtub to its former glory in no time. So, let’s get started and say goodbye to that annoying chip once and for all!
Key Takeaways
- Assess the size, depth, and surrounding damage of the chip before determining if professional help is needed or if it can be fixed on your own.
- Gather the necessary tools and materials, including safety goggles, gloves, epoxy or a bathtub repair kit, sandpaper, and cleaning solution or mild detergent.
- Clean the chip thoroughly using suitable cleaning products like vinegar, baking soda, or lemon juice, or chemical cleaners like bleach or hydrogen peroxide.
- Apply epoxy filler to the chip by following the manufacturer’s instructions, using a putty knife to ensure even application, and allowing the filler to dry completely before sanding and finishing the repaired area.

Tub Repair Kit White, Bathtub Repair Kit for Enamel, Fiberglass, Acrylic
- Instantly Restores Glossy White Finish: Covers chips, cracks, and scratches seamlessly
- Strong, Durable Coverage: Resists scratches, rust, and high temperatures
- Waterproof, Stain-Resistant Finish: Prevents yellowing and stains over time
As an affiliate, we earn on qualifying purchases.
As an affiliate, we earn on qualifying purchases.
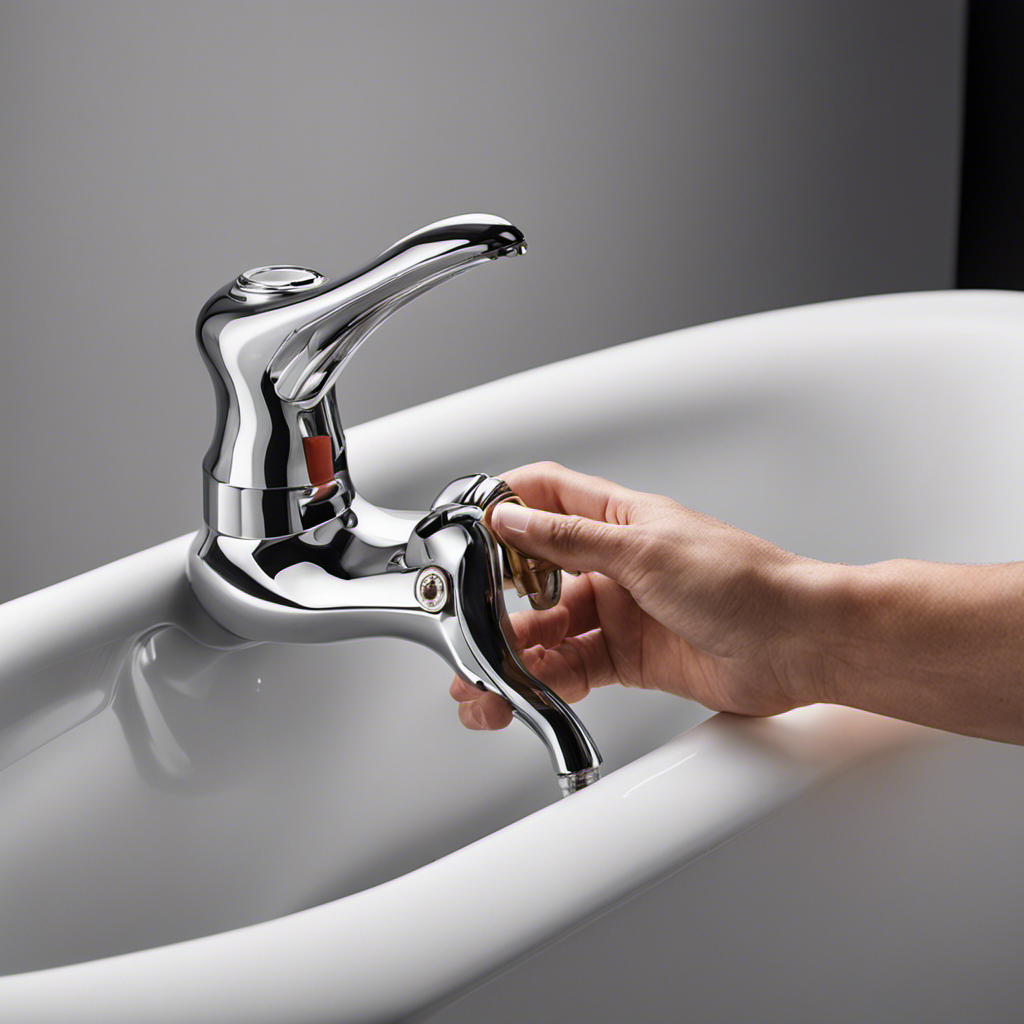
Assess the Damage
Now, you’ll want to take a closer look at the chip to assess how extensive the damage is. Assessing the damage is an important step in determining whether you can fix the chip yourself or if you need to seek professional help.
Start by examining the size and depth of the chip. Is it a small surface-level chip or does it go deeper into the bathtub material? Look for any cracks or surrounding damage that may indicate a larger issue.
If the chip is small and shallow, you may be able to fix it on your own. However, if the chip is large or deep, it is recommended to seek professional assistance to ensure the proper repair is done.
Now that you have assessed the damage, let’s move on to gathering the necessary tools and materials.
Gather the Necessary Tools and Materials
First, you’ll need to gather all the tools and materials required to repair the chip in your bathtub. Here’s a detailed list of what you’ll need:
- Safety goggles and gloves – to protect yourself during the repair process.
- Epoxy or bathtub repair kit – to fill and patch the chip.
- Sandpaper – to smooth the surface before applying the epoxy.
- Cleaning solution or mild detergent – to clean the area around the chip.
Once you have all the necessary tools and materials, you can proceed to preparing the surface. Start by cleaning the chip and its surrounding area using the cleaning solution or mild detergent. Make sure to remove any dirt, grime, or soap residue.
Next, use the sandpaper to lightly sand the chip, creating a rough surface for the epoxy to adhere to. Wipe away any dust or debris before moving on to the repair process.
Clean and Prepare the Chip
To properly clean and prepare the chip in your bathtub, it’s important to use suitable cleaning products and follow proper chip repair methods.
Start by selecting a mild cleaning agent that will effectively remove any dirt or grime from the chip area.
Once the chip is clean, it’s crucial to use the correct chip repair method to ensure a seamless and long-lasting repair.
Suitable Cleaning Products
Make sure you’re using the right cleaning products to remove any dirt or grime from the chipped area of your bathtub. When it comes to suitable cleaning products, you have two options: natural and chemical cleaners. Natural cleaners are made from ingredients like vinegar, baking soda, and lemon juice. They are gentle on the surface and do not contain harsh chemicals. On the other hand, chemical cleaners are specifically designed to tackle tough stains and grime. They often contain bleach or other strong chemicals. Here’s a comparison of natural and chemical cleaners:
| Natural Cleaners | Chemical Cleaners |
|---|---|
| Vinegar | Bleach |
| Baking soda | Hydrogen peroxide |
| Lemon juice | Ammonia |
| Dish soap | |
| Bathroom cleaner |
Choose the cleaning product that suits your preference and needs. Once you’ve cleaned the chipped area, you can move on to the proper chip repair methods.
Proper Chip Repair Methods
When repairing the chipped area of your bathtub, you’ll want to start by assessing the severity of the damage. Here are four chip repair techniques to consider:
-
Clean the chipped area: Begin by thoroughly cleaning the chip and the surrounding area using a mild detergent and a soft cloth. Ensure that the surface is free from any dirt, grime, or soap residue.
-
Sand the chip: Use fine-grit sandpaper to gently sand the edges of the chip. This will create a smooth surface for the epoxy filler to adhere to.
-
Apply epoxy filler: Take a small amount of epoxy filler and spread it evenly over the chipped area using a putty knife. Make sure to fill the chip completely and level it with the surrounding surface.
-
Smooth and blend: After the epoxy filler has dried, use fine-grit sandpaper to smooth out any rough edges. Blend the repaired area with the rest of the bathtub surface for a seamless finish.
By following these chip repair techniques and practicing proper bathtub chip prevention, you can ensure a clean and smooth surface in your bathtub.
Now, let’s move on to the next step – applying epoxy filler to the chip.
Apply Epoxy Filler to the Chip
When it comes to fixing a chip in your bathtub, using epoxy filler offers several benefits.
First, epoxy filler is a durable and long-lasting material that can withstand the daily wear and tear of a bathtub.
Additionally, epoxy filler is water-resistant, preventing any further damage or deterioration.
To ensure proper application, start by cleaning and preparing the chip, ensuring there is no loose debris or moisture.
Then, mix the epoxy filler according to the manufacturer’s instructions and apply it evenly over the chip, using a putty knife to smooth it out.
Allow it to dry completely before sanding and finishing the repaired area for a seamless finish.
Benefits of Epoxy Filler
Using epoxy filler is a great way to repair a chip in your bathtub. Here are four advantages of using epoxy filler for bathtub chip repair:
-
Durability: Epoxy filler is a durable material that can withstand the constant exposure to water and cleaning agents in your bathtub. It creates a strong bond with the surface, ensuring long-lasting results.
-
Seamless Repair: When applied correctly, epoxy filler seamlessly fills in the chip, leaving no visible traces of the repair. This ensures a smooth and aesthetically pleasing finish.
-
Waterproof: Epoxy filler is highly resistant to water, making it an ideal choice for bathtub chip repair. It creates a waterproof barrier that prevents further damage or deterioration caused by moisture.
-
Easy Application: Epoxy filler is easy to apply, even for DIY enthusiasts. With a few simple steps, you can repair the chip in your bathtub and restore its original appearance.
Proper Application Techniques
Now that you understand the benefits of using epoxy filler to fix a chip in your bathtub, let’s dive into the proper application techniques. Avoiding application mistakes and common pitfalls is crucial to achieving a successful repair.
-
Clean the damaged area thoroughly using a mild detergent and warm water. Rinse and dry completely.
-
Prepare the epoxy filler according to the manufacturer’s instructions. Mix the resin and hardener in the recommended proportions.
-
Apply the mixture to the chip using a putty knife, ensuring it fills the entire cavity.
-
Smooth the surface with the putty knife or a damp cloth to achieve an even finish.
-
Allow the filler to cure completely before using the bathtub, following the curing time specified by the manufacturer.
Smooth and Level the Filled Chip
To smooth and level the filled chip in your bathtub, gently sand the surface until it is flush with the surrounding area. Here’s a step-by-step guide to help you achieve a seamless repair:
-
Start by using fine-grit sandpaper (around 220-grit) to sand the filled chip. Make sure to sand in a circular motion to avoid creating noticeable lines.
-
Gradually increase the pressure as you sand, focusing on the edges of the chip to blend them with the surrounding surface.
-
After sanding, wipe away any dust or debris with a clean cloth or sponge.
-
To ensure a perfect color match, use color matching techniques. This involves comparing the color of your bathtub with the color of the filler. If needed, mix different shades to achieve an accurate match.
Allow the Filler to Cure
Once you’ve filled the chip, it’s important to give the filler enough time to cure before moving on to the next step. Curing time is essential for ensuring a strong and durable repair.
The duration of the curing process can vary depending on the type of filler you’re using, so it’s crucial to follow the manufacturer’s instructions. Generally, it takes around 24 to 48 hours for the filler to fully cure.
During this time, it’s essential to keep the area dry and avoid any contact or pressure on the repaired chip. Rushing the curing process can lead to potential risks, such as the filler not bonding properly or the repaired area becoming damaged.
Once the filler has cured, you can proceed to the next step of sanding and buffing the repaired area.
Sand and Buff the Repaired Area
Make sure you sand and buff the repaired area using a fine-grit sandpaper until it feels smooth to the touch.
Here’s a step-by-step guide on how to properly sand and buff the repaired area of your bathtub chip:
-
Start by cleaning the area around the repaired chip to remove any dust or debris.
-
Use a 220-grit sandpaper to gently sand the repaired area. Sand in a circular motion, applying light pressure.
-
Once the repaired area is smooth, switch to a 400-grit sandpaper and continue sanding in a circular motion. This will help refine the surface and remove any remaining imperfections.
-
After sanding, wipe away any dust with a clean cloth. Then, apply a small amount of buffing compound to a soft cloth and gently buff the repaired area. This will help restore the shine and blend it with the surrounding surface.
Apply a Protective Coating
Applying a protective coating will help to seal and protect the repaired area. There are several alternatives when it comes to protective coatings for bathtub chip repair.
One option is to use a clear epoxy coating, which provides a durable and waterproof barrier. Another option is a bathtub refinishing kit, which typically includes a protective topcoat that can be applied after the repair is complete. These kits often come with detailed instructions on how to properly apply the coating.
Professional bathtub chip repair offers several benefits, including the use of high-quality materials and professional expertise. Professionals have access to specialized tools and techniques that can ensure a seamless repair and a long-lasting protective coating. Additionally, professional repairs can often be completed in a shorter amount of time, minimizing inconvenience for homeowners.
Maintain and Care for the Repaired Chip
Now that you’ve successfully repaired the chip in your bathtub, it’s important to maintain it properly to prevent any future damage. Here are four steps to help you maintain your chip repair:
-
Regular Cleaning: Clean your bathtub regularly using a mild non-abrasive cleaner to remove any dirt or grime. Avoid using harsh chemicals or abrasive scrubbers that could damage the repaired area.
-
Avoid Sharp Objects: Be careful not to use any sharp objects or tools that could scratch or chip the repaired area. Use a non-slip mat or towel to protect the repaired chip from any accidental damage.
-
Gentle Use: Be mindful of how you use your bathtub and avoid dropping heavy objects or applying excessive pressure on the repaired chip. Treat it with care to prevent any further damage.
-
Periodic Inspections: Regularly inspect the repaired chip for any signs of wear or damage. If you notice any issues, address them promptly to prevent further deterioration.
Frequently Asked Questions
Can I Use Regular Household Cleaners to Clean the Chip Before Applying the Epoxy Filler?
You can’t use regular household cleaners to clean the chip before applying the epoxy filler. Instead, try using gentle cleaning methods specifically designed for bathtubs. There are also alternative fillers available for repairing chips.
How Long Does the Epoxy Filler Take to Cure Completely?
First, let’s address the epoxy filler curing time. It typically takes around 24 to 48 hours for the epoxy to fully cure. However, there are alternative methods for bathtub chip repair that may have different curing times.
Can I Use Any Type of Protective Coating on the Repaired Chip?
To protect the repaired chip in your bathtub, you have several protective coating alternatives. Before applying any coating, ensure the chip is fully cured. Follow the manufacturer’s instructions to properly apply the protective coating.
Is There a Specific Type of Sandpaper I Should Use to Sand the Filled Chip?
Is there a specific type of sandpaper you should use? Absolutely! To achieve a smooth finish, use a fine-grit sandpaper like 220 or higher. Other alternatives to sanding include using a filler specifically designed for bathtub repairs.
How Often Should I Check and Maintain the Repaired Chip to Ensure It Stays in Good Condition?
To ensure the repaired chip in your bathtub stays in good condition, it is important to regularly check and maintain it. Look out for signs of deterioration, such as cracking or peeling, and promptly address any issues.
Conclusion
Congratulations! You’ve successfully repaired the chip in your bathtub. By following these steps, you’ve restored your bathtub to its former glory.
Now, sit back and admire your handiwork as the protective coating shines like a thousand suns, safeguarding your tub against future damage.
Your bathtub is now so flawless and pristine that it could rival the beauty of a crystal-clear lake on a perfect summer day.
So go ahead, take a relaxing soak in your newly repaired bathtub, and revel in the satisfaction of a job well done!