Hey there!
Ever had a chip in your bathtub that’s been driving you crazy? Well, I’ve got just the solution for you.
In this article, I’ll walk you through the step-by-step process of repairing that pesky chip, so you can have a smooth and flawless bathtub surface once again.
From assessing the damage to applying the chip repair solution, I’ll cover it all.
So, let’s dive in and get your bathtub looking as good as new!
Key Takeaways
- Avoid using harsh chemicals or abrasive materials when cleaning the bathtub.
- Regularly inspect the bathtub for signs of chips or cracks.
- Use a bathtub repair kit specifically designed for chip repairs.
- Apply the chip repair solution evenly and allow it to dry completely before using the bathtub.

KitchenAid Artisan Series 5 Quart Tilt Head Stand Mixer with Pouring Shield KSM150PS, Milkshake
- Durable Metal Construction: Built to last with 59 touchpoints
- 5 Quart Stainless Steel Bowl: Handles small or large batches, dishwasher safe
- Tilt-Head Design: Easy ingredient addition and bowl access
As an affiliate, we earn on qualifying purchases.
Assess the Damage
First, you’ll want to take a close look at the chip in your bathtub to assess the extent of the damage. Bathtub chips can occur due to a variety of reasons, including accidental impact, abrasive cleaning methods, or even the natural wear and tear over time.
To prevent further damage, it is crucial to avoid using harsh chemicals or abrasive materials when cleaning your bathtub. Instead, opt for mild, non-abrasive cleaners and soft sponges or cloths.
Additionally, placing a rubber mat or towel in the bottom of the tub can provide some protection against accidental impacts.
Regularly inspecting your bathtub for any signs of chips or cracks is also important, as addressing them promptly can help prevent them from worsening.
Gather the Necessary Materials
Next, you’ll need to gather the materials you’ll need for the job. Here’s what you’ll need:
-
Choosing the right repair kit:
-
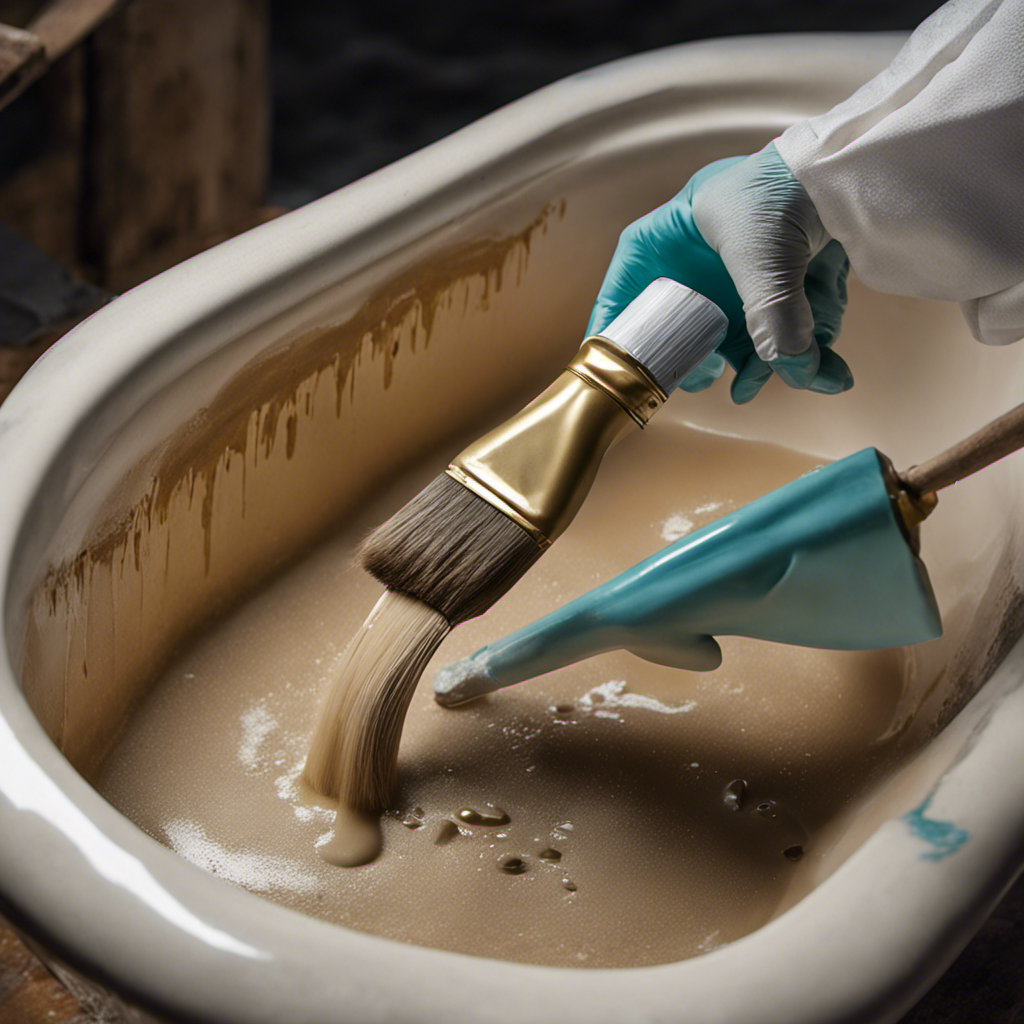
Bathtub repair kit: Look for a kit specifically designed for bathtub chip repairs. These kits usually include epoxy or acrylic-based compounds that can be used to fill and repair the chip.
-
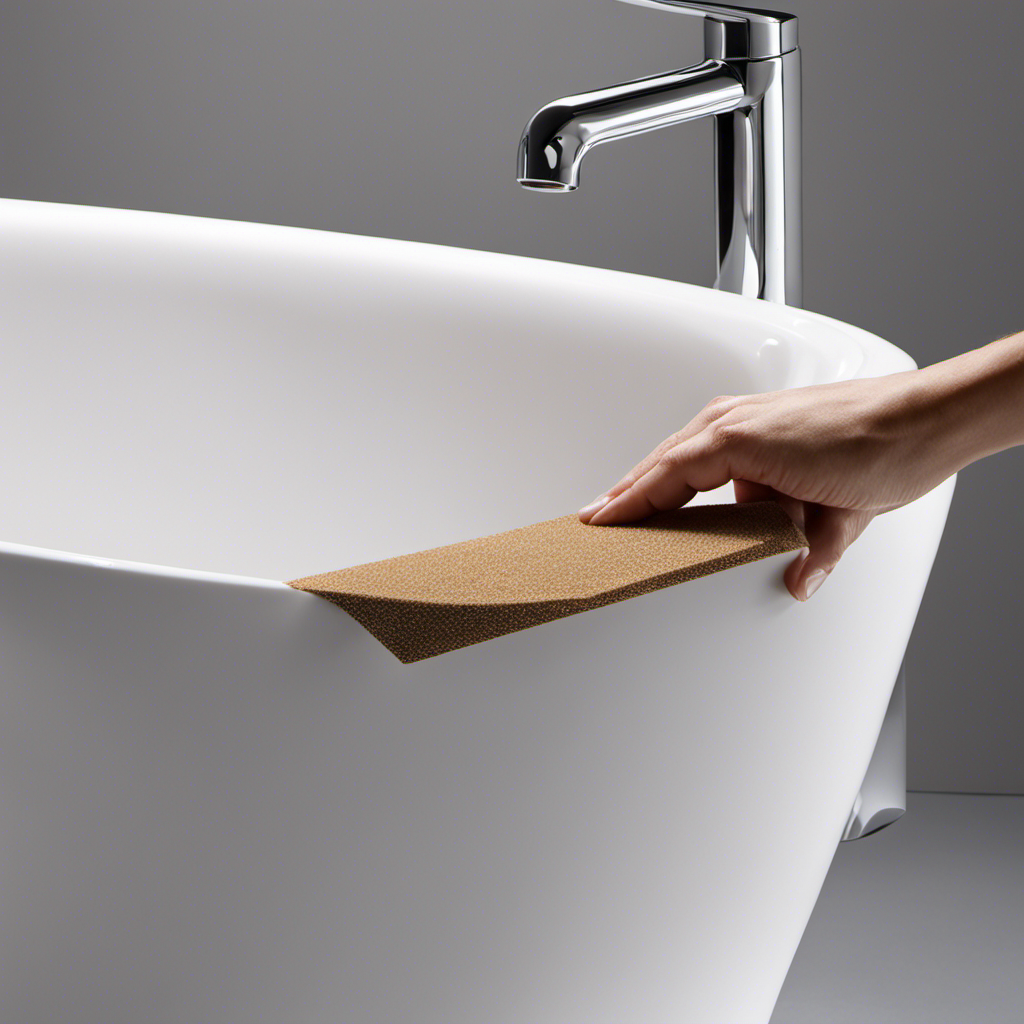
Sandpaper: You’ll need sandpaper to smooth out the repaired area and make it blend seamlessly with the rest of the bathtub surface.
-
Tips for preventing future chips:
-
Use a non-abrasive cleaner: Avoid using harsh cleaners or abrasive scrubbers that can damage the surface of your bathtub and lead to chipping.
-
Use a bathtub mat: Placing a non-slip mat in your bathtub can prevent accidental slips and falls, reducing the chances of chips caused by impact.
-
Be gentle with heavy objects: Try to avoid dropping heavy objects in your bathtub, as they can cause chips or cracks.
Prepare the Bathtub Surface
Before starting, make sure you have all the necessary materials ready for preparing the surface of the bathtub. Choosing the right bathtub repair kit is essential for achieving a successful repair. Look for a kit that includes epoxy or acrylic filler, sandpaper, a mixing tool, and an applicator.
Once you have the kit, begin by cleaning the damaged area thoroughly. Use a mild cleaner and a sponge to remove any dirt, grime, or soap residue. Rinse the area with water and dry it completely.
Next, use sandpaper to roughen the surface around the chip. This will help the filler adhere better. Wipe away any dust with a clean cloth.
Now, you’re ready to apply the filler according to the kit’s instructions. Make sure to spread it evenly over the chip using the applicator. Allow the filler to dry completely before sanding it smooth.
Apply the Chip Repair Solution
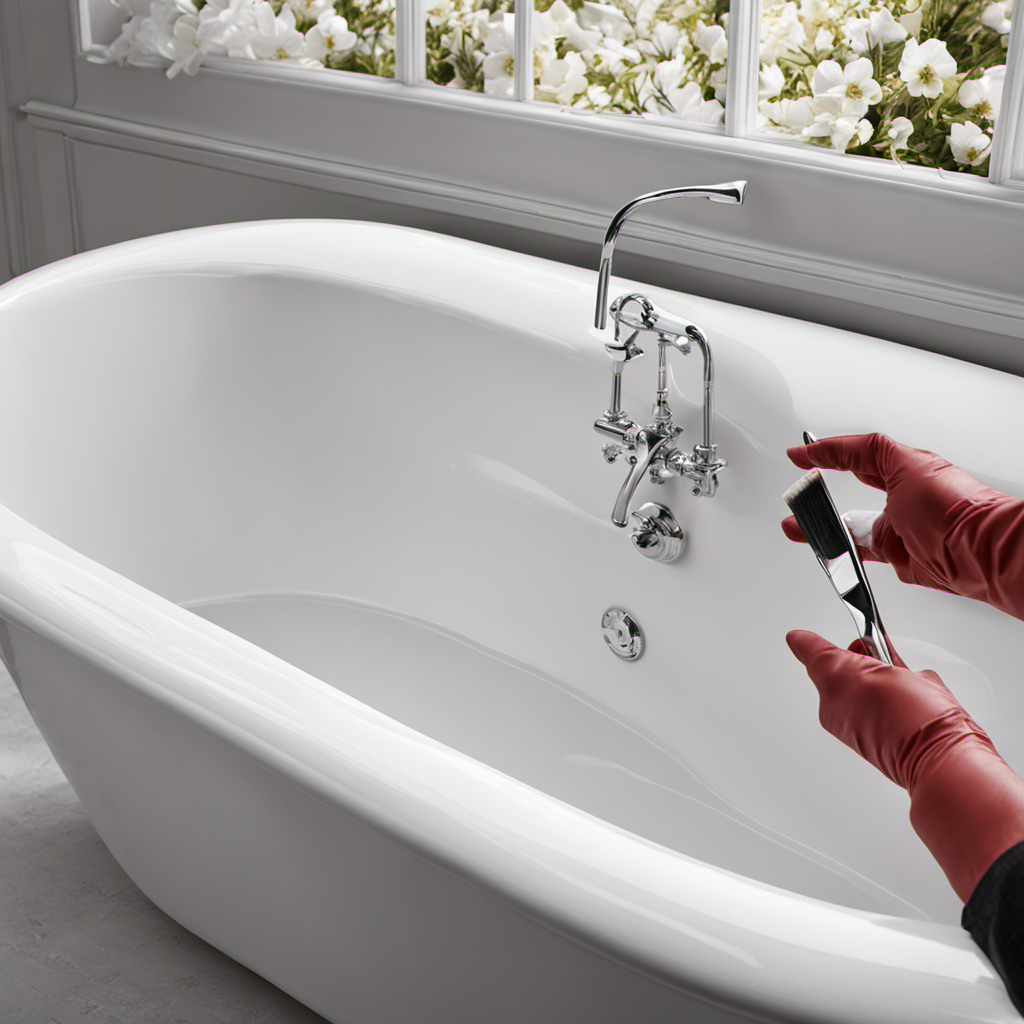
Now you can proceed to applying the solution for fixing the damaged area. Before you begin, it’s crucial to take some safety precautions during chip repair. Make sure to wear protective gloves and safety goggles to prevent any contact with the repair solution. Additionally, ensure that the area is well-ventilated to avoid inhaling any fumes.
To achieve the best results and avoid common mistakes during chip repair, follow these guidelines:
- Clean the damaged area thoroughly before applying the solution. Any dirt or debris left behind can compromise the repair.
- Apply the solution evenly, using a brush or applicator, to cover the entire chip. Be careful not to apply too much or too little.
- Allow the solution to dry completely before using the bathtub. This will ensure a strong and long-lasting repair.
- Avoid using the bathtub for at least 24 hours after the repair to allow the solution to fully cure.
Finish and Seal the Repaired Area
To ensure a seamless finish and long-lasting protection, gently sand the repaired area and then apply a clear sealant.
Polishing techniques can help achieve a smooth bathtub finish after repairing a chip. Start by using fine-grit sandpaper to smooth any rough edges or uneven surfaces in the repaired area. Make sure to sand in a circular motion to blend the repaired area with the surrounding surface.
After sanding, wipe away any dust or debris with a clean cloth.
Next, choose a clear sealant that is specifically designed for bathtub chip repairs. There are different types of sealants available, such as epoxy or acrylic-based sealants. Consider the effectiveness of each type in terms of durability, water resistance, and ease of application.
Apply the sealant evenly over the repaired area, following the manufacturer’s instructions.
Allow sufficient drying and curing time before using the bathtub again.
Conclusion
In conclusion, repairing a chip in a bathtub is a straightforward process that can be easily done at home.
By carefully assessing the damage, gathering the necessary materials, and preparing the bathtub surface, you can effectively apply the chip repair solution.
Remember to finish and seal the repaired area for long-lasting results.
It is important to investigate the truth of any theory to ensure accurate and reliable information.
So go ahead and confidently tackle that bathtub chip repair with these technical, concise, and detailed steps.