
Did you know that a faulty bathtub drain cover can lead to water leakage and potential damage to your bathroom? If you’re experiencing this issue, fear not!
In this step-by-step guide, I’ll show you how to easily replace your bathtub drain cover. With just a few tools and materials, you’ll be able to remove the old cover, clean and prepare the drain, and install a shiny new cover.
Let’s get started and restore your bathtub to its former glory!
Key Takeaways
- Choose a replacement drain cover that fits properly and matches the aesthetic of your bathroom.
- Clean and prepare the drain area before installing the new cover to ensure a proper seal.
- Use plumber’s putty to create a watertight seal around the edges of the drain cover.
- Regularly clean and maintain the drain cover to prevent rust and prolong its lifespan.

Plumb Pak PP826-64 Bathtub Dome Grid Strainer with Screw, 3", Polished Chrome
PERFECT FOR REPAIR: Replace your old bathtub strainer or catcher with this streamlined design
As an affiliate, we earn on qualifying purchases.
As an affiliate, we earn on qualifying purchases.
Tools and Materials Needed
To replace the bathtub drain cover, you’ll need a screwdriver, pliers, and a new drain cover. It’s important to choose the right drain cover design that fits your bathtub and prevents future clogs.
There are different designs available, such as snap-on covers, twist-and-lock covers, and screw-on covers. Snap-on covers are easy to install and remove, while twist-and-lock covers provide a more secure fit. Screw-on covers require screws to hold them in place, offering maximum stability.

Chrome Plated Bathtub Overflow Drain Cover Kit,Snap-On Installation
Compatibility:3.18-inch Diameter Bathtub Overflow Plate, fits most standard-sized bathtubs
As an affiliate, we earn on qualifying purchases.
As an affiliate, we earn on qualifying purchases.
Removing the Old Drain Cover
Start by carefully unscrewing the old cover from the bathtub drain. To remove the drain cover, you can use a screwdriver or a drain key. If the cover is held in place by screws, use the screwdriver to unscrew them counterclockwise. If it is a snap-on cover, insert the drain key into the two small holes on the cover and turn it counterclockwise to release the tabs.
Once the cover is loose, lift it out of the drain.
Now that the old drain cover is removed, it’s time to choose the right replacement. Consider factors such as size, material, and design to ensure a proper fit and aesthetic appeal.
Next, we will move on to cleaning and preparing the drain for the new cover.

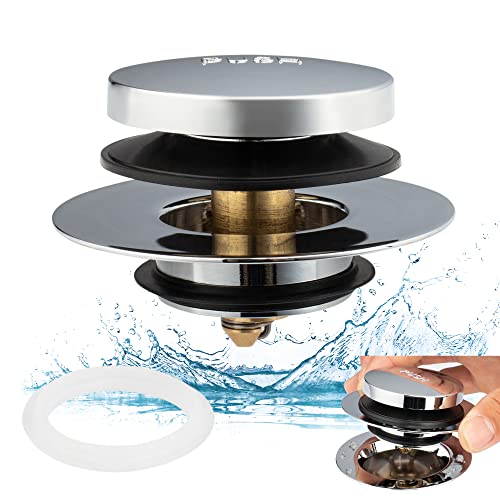
Artiwell Universal Lift and Turn Bath Drain Stopper and Cover, Bathtub Drain Stopper, Replaces Lift and Turn, Tip-Toe and Trip Lever drains for Tub, EZ Installation and Clearing (Brushed Nickel)
UGRADED TUB DRAIN STOPPER AND COVER: New design for Easy Installation and Removing, so that you can clearing…
As an affiliate, we earn on qualifying purchases.
As an affiliate, we earn on qualifying purchases.
Cleaning and Preparing the Drain
Once the old cover’s removed, it’s important to clean and prepare the drain for the new one. Effective cleaning methods and regular maintenance are key to keeping the drain functioning properly. Here’s a step-by-step guide on how to clean and prepare the drain:
-
Start by removing any debris or hair from the drain using a pair of tweezers or a drain snake.
-
Next, pour a mixture of hot water and vinegar down the drain to help break up any buildup or clogs.
-
Use a brush or sponge to scrub the drain cover and surrounding area with a mild detergent or cleaning solution.
-
Rinse the drain thoroughly with hot water to remove any remaining residue.
-
Finally, dry the drain and cover completely before installing the new drain cover.
Artiwell Universal Tip Toe Bath Drain Stopper and Cover, Bathtub Drain Stopper, Replaces Lift and Turn, Tip-Toe and Trip Lever drains for Tub, EZ Installation and Clearing (Chrome Plated)
UGRADED TUB DRAIN STOPPER AND COVER: New design for easy installation and removing, so that you can clearing…
As an affiliate, we earn on qualifying purchases.
As an affiliate, we earn on qualifying purchases.
Installing the New Drain Cover
When installing the new drain cover, make sure it is securely fastened to prevent any leaks or water damage. Here are some proper installation techniques and common mistakes to avoid:
- Use a screwdriver or wrench to remove the old drain cover.
- Clean the drain area thoroughly to remove any debris or residue.
- Apply plumber’s putty around the edges of the drain cover to create a watertight seal.
It is important to ensure that the drain cover is aligned properly with the drain before tightening the screws or bolts. Common mistakes to avoid include over-tightening the screws, which can crack the drain cover, or not tightening them enough, which can lead to leaks.
By following these proper installation techniques and avoiding common mistakes, you can ensure a secure and leak-free drain cover.
Now, let’s move on to the next section about finishing touches and maintenance to complete the installation process.
Finishing Touches and Maintenance
To complete the installation process, don’t forget to apply a waterproof sealant around the edges of the new drain cover. This will help prevent any water from leaking into the subfloor and causing damage. Once the sealant has dried, you can move on to the finishing touches and maintenance of your new drain cover.
One important aspect of maintaining your drain cover is keeping it clean and free from rust. Regular cleaning and polishing can help prolong its lifespan and ensure it looks its best. Here are some polishing techniques you can use:
- Use a mild soap and water solution to clean the drain cover.
- For stubborn stains or rust spots, you can use a mixture of baking soda and water to create a paste.
- Gently scrub the drain cover with a soft brush or sponge.
- Rinse thoroughly and dry with a clean cloth.
Conclusion
In conclusion, replacing a bathtub drain cover is a simple and straightforward task that can be done by anyone with a few basic tools. By following the steps outlined in this article, you can easily remove the old drain cover, clean and prepare the drain, and install the new cover.
With a little bit of effort and maintenance, your bathtub will not only look great, but also function properly. So why wait? Get started today and enjoy a fresh and clean bathtub experience.