Hey there, fellow DIY enthusiasts!
Ever wondered how to tackle that pesky toilet wax ring? Well, I’ve got you covered. In this article, I’ll walk you through the step-by-step process of changing a toilet wax ring, using my years of experience as a professional plumber.
From understanding the purpose of the wax ring to testing for leaks, I’ll provide you with all the technical know-how you need to get the job done right.
So, let’s dive in and make that bathroom renovation a breeze!
Key Takeaways
- The purpose of a toilet wax ring is to prevent water leaks and odors from coming out of the base of the toilet and provide a watertight seal between the toilet bowl and the floor drain.
- When changing a toilet wax ring, it is important to gather the necessary tools and materials such as a wax ring, putty knife, gloves, and towels or rags to absorb any water leaks.
- The old wax ring should be carefully removed using a putty knife, ensuring all old wax residue is scraped away to ensure a proper seal.
- The new wax ring should be installed by positioning it onto the clean toilet flange, gently lowering the toilet onto the wax ring, and applying even pressure to compress the wax ring and create a tight seal. Testing for leaks is crucial to confirm proper installation.
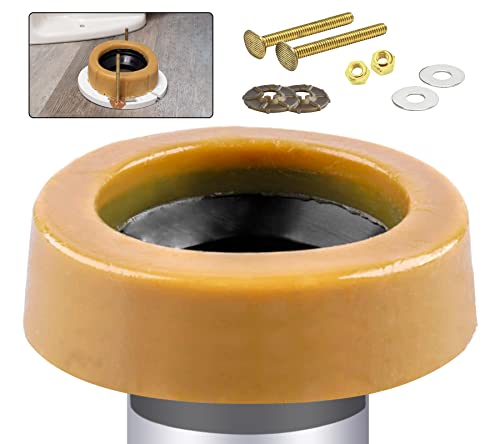
Extra Thick Toilet Wax Ring Kit with Flange and Bolts for Floor Outlet Toilets New Install or Re-seat, Fits 3-inch or 4-inch Waste Lines
Signs of a Bad Toilet Wax Ring?: If you can smell a sewer-like smell coming from your toilet,…
As an affiliate, we earn on qualifying purchases.
As an affiliate, we earn on qualifying purchases.
Understanding the Purpose of a Toilet Wax Ring
To understand why you need a toilet wax ring, it prevents water leaks and odors from coming out of the base of your toilet.
A toilet wax ring is a crucial component of your toilet’s plumbing system, providing a watertight seal between the toilet bowl and the floor drain. Proper installation of the wax ring is essential to ensure a leak-free and odor-free toilet.
The wax ring is made of a pliable material that compresses when the toilet is bolted to the floor, creating a tight seal. It prevents any water or sewage from seeping out and causing damage to your bathroom floor.
Additionally, the wax ring acts as a barrier, preventing unpleasant odors from permeating your bathroom.
Understanding the importance of a properly installed toilet wax ring is essential for maintaining a functional and hygienic bathroom.
Extra Thick Toilet Wax Ring Kit with Flange and Bolts for Floor Outlet Toilets New Install or Re-seat, Fits 3-inch or 4-inch Waste Lines
Signs of a Bad Toilet Wax Ring?: If you can smell a sewer-like smell coming from your toilet,…
As an affiliate, we earn on qualifying purchases.
As an affiliate, we earn on qualifying purchases.
Gathering the Necessary Tools and Materials
You’ll need a few tools and materials to get started on this project. Here’s what you’ll need:
-
Wax ring: Choosing the right wax ring is crucial for a successful toilet wax ring replacement. Look for a wax ring that is specifically designed for your toilet model to ensure a proper fit and seal.
-
Putty knife: This tool will come in handy for removing the old wax ring and any residue left behind. Make sure it has a sharp edge to facilitate easy scraping.
-
Gloves: It’s important to protect your hands from any germs or bacteria that may be present. Wear disposable gloves to keep your hands clean and safe.
-
Towels or rags: Have some towels or rags on hand to absorb any water that may leak during the process. This will help keep your bathroom clean and dry.
Common mistakes to avoid:
-
Not properly aligning the toilet: Make sure the toilet is properly aligned with the floor flange before tightening the bolts. Failure to do so can result in leaks or an uneven toilet.
-
Over-tightening the bolts: Be careful not to over-tighten the bolts when securing the toilet to the floor. This can crack the toilet or damage the flange.
-
Using too much wax: Applying too much wax can cause the toilet to rock or sit unevenly. Use just enough to create a proper seal.
-
Not checking for leaks: After installing the new wax ring, be sure to check for leaks by flushing the toilet multiple times and inspecting for any water seepage.

Fluidmaster K-400H-021-P8 PerforMAX 2-Inch Everything Toilet Repair Kit, Multicolor
The Everything Kit includes everything you need to fix your toilet in one trip and one purchase
As an affiliate, we earn on qualifying purchases.
As an affiliate, we earn on qualifying purchases.
Removing the Old Wax Ring
Using a putty knife, carefully scrape away the old wax residue from the toilet flange. This step is crucial in preparing the toilet for a new wax ring. The old wax ring must be completely removed to ensure a proper seal and prevent leaks.
Start by inserting the putty knife between the flange and the wax ring, gently prying it up and scraping off any remaining wax. Be thorough and meticulous in this process, as any residue left behind can compromise the effectiveness of the new wax ring.
Once all the old wax has been removed, dispose of it properly. Avoid flushing it down the toilet as it can cause clogs. Instead, wrap it in a plastic bag and throw it in the trash.
With the old wax ring gone, we can now move on to installing the new wax ring.

One N Done Toilet Flange Repair Kit – Toilet Kit For Low or Broken Flange. Toilet Wax Ring Replacement Kit W/Toilet Flange Extender Kit, Easy Toilet Bolts, & Toilet Caps For Bottom of Toilet. (1 Ea.)
Save Time & Money | No wax ring for toilet required. The One N Done toilet flange repair…
As an affiliate, we earn on qualifying purchases.
As an affiliate, we earn on qualifying purchases.
Installing the New Wax Ring
Now that the old wax residue has been completely removed, it’s time to move on to the next step: installing the new wax ring. This crucial step ensures a proper seal between the toilet and the drain pipe, preventing leaks and odors.
Here are some important tips to follow during the installation process:
- Ensure the toilet flange is clean and free of debris.
- Position the new wax ring onto the flange, making sure it is centered.
- Gently lower the toilet onto the wax ring, aligning the bolts with the holes on the flange.
- Apply even pressure to the toilet, pressing it down firmly to compress the wax ring and create a tight seal.
Troubleshooting common issues during installation:
- If the toilet wobbles, check if the flange is securely fastened to the floor.
- If the toilet doesn’t sit flush on the floor, use shims to level it.
Tips for ensuring a proper seal with the new wax ring:
- Avoid over-tightening the bolts, as it can crack the toilet or damage the flange.
- Use a level to ensure the toilet is evenly seated on the floor.
Testing and Checking for Leaks
To test for leaks, simply flush the toilet and observe if any water seeps out from the base.
Proper toilet maintenance is crucial to prevent water damage and maintain a healthy bathroom environment.
One common sign of a faulty wax ring is water leaking from the base of the toilet. This indicates that the seal between the toilet and the floor has been compromised.
In order to fix this issue, it is necessary to replace the wax ring. Start by shutting off the water supply to the toilet and draining the tank.
Next, remove the toilet by disconnecting the water supply line and unscrewing the bolts securing it to the floor. Carefully lift the toilet and inspect the old wax ring for any damage or wear.
If necessary, clean the area around the flange to ensure a proper seal. Finally, install the new wax ring and reassemble the toilet, making sure to tighten the bolts evenly.
Testing for leaks by flushing the toilet will confirm if the new wax ring has been installed correctly.
Conclusion
Changing a toilet wax ring is a crucial step in maintaining a leak-free and properly functioning toilet. By carefully following the steps outlined in this article, you can confidently replace the wax ring and prevent any potential water damage or unpleasant odors.
Remember, attention to detail and precision are key when working with plumbing components. So don’t hesitate to ask for professional assistance if you’re unsure.
With the right knowledge and tools, you’ll be able to conquer any toilet wax ring replacement with ease.